Dried Flower Garland Making: A Complete DIY Guide
Welcome to Dried Flower Garland Making Foundations: Tools, Materials, and Planning. This primer lays out the toolkit, the best materials, and the planning steps that help you create a durable, beautiful dried flower garland. From choosing stems to arranging color palettes, a solid foundation saves time and reduces waste. In 2026, BloomHaven emphasizes eco-friendly practices, sustainable sourcing, and long-lasting color. Read on to map your project, select reliable tools, and set up a workflow that makes every garland feel effortless and professional. The term dried flower garland recurs throughout this guide to keep focus on the project you want to master.
Understanding the foundations of a dried flower garland begins with the simple truth that good results start with preparation. Preparing stems, choosing a palette, and planning the workflow crucially affect both appearance and durability. In this section, we outline the decisions that influence your final garland—from length estimations to drying methods and storage. With the right approach, you can combine wildflower charm with structured technique, producing a garland that lasts, travels well, and photographs beautifully for Pinterest and Instagram.
Therefore, the approach here is practical, scalable, and suited to a range of spaces, from cozy mantels to outdoor arches. In addition, we address climate considerations, timing, and how to stage a project so you can work efficiently without sacrificing artistry. Crucially, this foundation sets up the hands-on steps that follow in Part 2, where we move from planning to actual assembly and finishing touches for a polished dried flower garland.
Dried Flower Garland Tools
The right tools make a big difference for a dried flower garland. With fragile blooms, precision matters. Therefore, assemble a compact toolkit that covers cutting, binding, and hanging. Your goal is accuracy, not excess bulk. The following essentials keep you prepared for most bouquets and palette choices, while maintaining a light touch that preserves stem integrity and color fidelity.
- Sharp floral scissors or snips for clean cuts
- Wire cutters and needle-nose pliers to manage stems and bind with confidence
- Green floral tape and 22–28 gauge floral wire for flexible, discreet binding
- Low-temp glue gun and acid-free glue sticks to secure delicate blooms without scorching petals
- Binders and twist ties for quick structural tweaks during layout
- Ribbons, jute, or twine for hanging and soft reveals
- Drying racks or clip boards to air-dry and pre-shape flowers before assembly
- Gloves and a soft work surface to protect delicate textures
Crucially, tools should be lightweight and comfortable, because a good tool fits your hand and your workflow. A well-chosen set reduces breakage and speeds up the process, which matters when you’re building multiple garlands for a series or event.
For a practical, up-to-date reference on drying flowers and optimizing stems before garland assembly, you can consult this non-competitive resource: Almanac’s guide to drying flowers.
Care and Maintenance of Dried Flower Garland Tools
Tools deserve regular care. Therefore, wipe blades after use to remove resin and sap. In addition, store tools in a dry, cool place to prevent corrosion. Keep wires and tapes organized to avoid tangling during a busy weekend project. By maintaining your tools, you ensure consistent results and protect your investment in materials and blooms.
Respect the limitations of each tool. A sharp scissors blade makes clean cuts, while over-twisting a fragile stem can cause snapping. In practice, build a habit of testing a small cut on a spare bloom before committing to a larger stem. This proactive check keeps your dried flower garland looking cohesive and professional.
Dried Flower Garland Materials
Materials set the character of a dried flower garland. The aim is to balance durability with beauty, ensuring color stays vibrant even as blooms dry. Start with stems and blooms that tolerate air-drying or controlled-drying methods, then layer foliage and filler to add texture and depth. A thoughtful material plan helps you achieve a harmonious, garden-inspired garland that photographs well for social media and real-life displays alike.
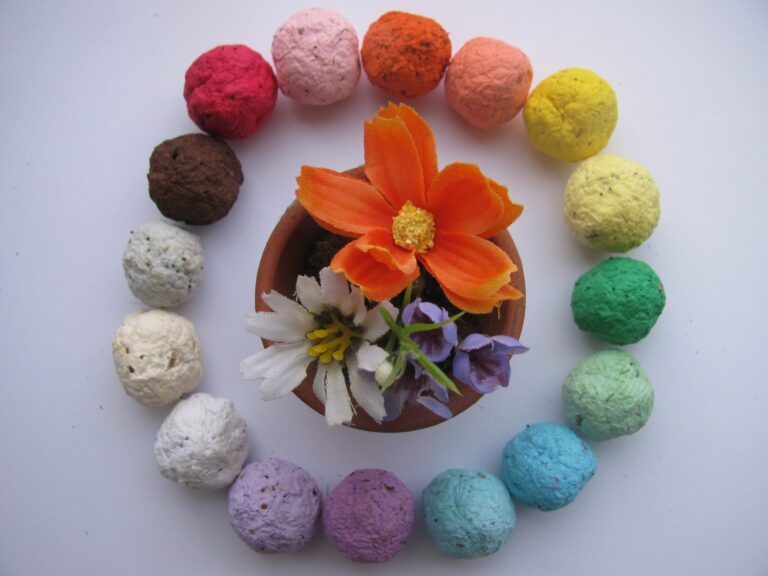
Stems and blooms drive the overall form. Favor blooms with sturdy stems or pliable branches that won’t crumble under gentle bending. Excellent options include statice, dried hydrangea accents, strawflower, lavender, and preserved roses. For filler and texture, consider delicate sprays of baby’s breath, preserved eucalyptus, and seed heads. The key is variety in form and texture while keeping a cohesive color story. If you’re aiming for a boho or wildflower vibe, mix wispy elements with compact blooms to create movement along the garland’s length.
Foliage adds depth and contour. Dried eucalyptus leaves, dusty miller, and preserved ferns can provide architectural lines. Use foliage to outline the edge of the garland, then tuck blooms into the interior for focal points. Color is essential. Plan a palette that reflects your space and season—neutrals with warm undertones, or a jewel-toned accent to punch up a simple motif. A tested approach is to select three base tones, then introduce small bursts of contrasting color to guide the eye without overwhelming the piece.
Preservation and conditioning influence longevity and color. Air-dried blooms retain a soft, natural texture, while silica gel-assisted drying can preserve more fragile petals. After drying, condition blooms by storing them in a breathable container with a little weight to prevent curling. This stage reduces crumbling and helps blooms settle into the garland’s structure as you assemble. For especially delicate arrangements, keep a few backup stems in reserve in case you need to replace a bud mid-assembly.
Adhesives and binding options support longevity without sacrificing flexibility. Use floral wire and green tape for structure, thread or fine twine for weaving, and a light dab of glue for securing small clusters. The aim is to keep connections discreet while maintaining resilience against movement and humidity. Finally, consider finishing materials such as a protective sealant spray designed for dried botanicals if your garland will be displayed outdoors or in a high-humidity space, but test on a single bloom first to avoid unexpected discoloration.
Planning your palette around the flowers you dried helps you avoid waste and ensures consistent color distribution across the garland. If you’re new to selecting stems, start with a small batch to test color and texture before committing to a long strand. Over time, you’ll learn which combinations hold up best in your climate and which colors weather best with age, guiding future projects and seasonal updates to your blooms library.
Choosing Stems and Preserving Color for Dried Flower Garland
Choosing the right stems matters as much as the assembly technique. Therefore, select blooms with sturdy centers and tenacious petals. In addition, prune stems to uniform lengths to simplify the layout and ensure even tension along the garland. For color retention, air-drying in a shaded, low-humidity space helps preserve tones more faithfully than direct sun. If you plan to use a wide color spectrum, test each bloom’s hue after drying to confirm compatibility. A well-chosen mix yields a cohesive yet lively piece that remains striking over time.
Keep a color map as you work. Use sketch paper or a digital board to arrange blooms before tying. This practice reduces guesswork during assembly and allows you to refine the palette, spacing, and focal points. In practice, place stronger colors at the ends or in alternating clusters to frame the garland’s silhouette and guide the viewer’s gaze along the length. By planning color distribution, you avoid overpowering the piece with any single bloom and create a balanced, museum-quality finish that travels well in photos and on-site displays.
Planning Your Dried Flower Garland Project
Planning is the backbone of a successful dried flower garland. Therefore, begin with a clear length and an accurate material tally. In addition, consider where you will hang the garland, the lighting it will encounter, and how long you want it to maintain visual impact. A precise plan improves efficiency, reduces waste, and keeps your project within budget. The following framework helps you map your work from concept to completion.
- Define the garland’s length and thickness. Measure the space and consider the viewing distance to determine how many stems you’ll need and how densely you should arrange them.
- Outline a layout. Draft a rough pattern on paper or a pegboard, noting where focal blooms will appear. This guide helps you maintain balance as you assemble.
- Schedule drying and conditioning. If you must complete the garland within a deadline, space out drying and conditioning steps to align with your assembly window. Consistency in timing preserves color and texture across blooms.
- Plan binding and finishing methods. Decide whether you’ll thread, wire, or twist ties for structure, and choose a finishing approach that suits the display environment.
- Capture a test run. Build a short prototype garland to verify proportions, color, and tension. Adjust your plan for the final piece accordingly.
For more on the drying process and choosing stems, see this practical guide: Almanac’s guide to drying flowers.
In addition, create a simple task timeline. Therefore, allocate time for sourcing, trimming, drying, layout testing, binding, and final hanging. A realistic schedule minimizes last-minute stress and elevates the quality of your dried flower garland. Crucially, document your process and note which stems and colors performed best in your climate, so your future garlands improve with experience.
As you wrap up this foundational planning, reflect on the intended use of the garland. Will it be a seasonal centerpiece, a decorative arch, or a long-form wall piece? Answering this question guides your length, weight, and connection strategy, ensuring the finished garland is not only beautiful but also durable in its chosen setting.
Next, in Part 2: Dried Flower Garland Assembly and Finishing Techniques, we will explore assembly methods, tying patterns, and finishing touches for a polished dried flower garland.
Dried Flower Garland Making Step-by-Step: From Bloom Selection to Finishing Touches
In this section, we move beyond ideas and into hands-on technique, guiding you through bloom selection, drying methods, and the careful assembly that yields a lasting, beautifully balanced dried flower garland. Specifically, the process centers on maintaining color, texture, and structure so your dried flower garland remains striking for months. Moreover, you will learn how to design with intention, so the final piece harmonizes with your space while resisting common fragility issues inherent to dried florals.
First, consider the role of each bloom in your composition. The strongest dried flower garland blends texture and hue, with bold focal blooms anchoring the design and lighter fillers creating air and movement. In practical terms, you want variety in form—round blossoms, feathery accents, and linear sprigs—to prevent a flat look once the stems are removed and the arrangement is suspended. When you choose blooms, think about how the colors will age. For instance, blues and purples tend to fade gracefully, while yellows can brighten over time in some light conditions. In 2026, color palettes favor earthy neutrals with soft botanical accents, but you can keep a pop of saturated color if you prefer a contemporary edge. Specifically, aim for a cohesive range rather than a random mix; cohesion makes the dried flower garland feel intentional and magazine-ready.
When selecting materials for the garland itself, pick a sturdy base that can endure some handling. Cotton, linen twine, or jute offers a natural, unobtrusive background that won’t compete with the reverberating tones of the dried flowers. If you plan to hang the garland in a high-traffic area or near a doorway, consider a subtle wire core wrapped with floral tape for extra resilience. Even with a robust base, avoid overloading each segment; weight balance is essential for a garland that drapes gracefully instead of sagging unevenly. In this context, the phrase dried flower garland takes on two meanings: the decorative composition you craft and the practical, physical garland that carries the weight of every stem. In short, thoughtful selection of both blooms and base materials sets the stage for a durable, aesthetically pleasing project.
Bloom Selection for Your Dried Flower Garland
Begin by listing a core set of focal blooms that will anchor the design. Choose buds and blooms with sturdy stems, as flimsy stems tend to snap when dried or when applied to the garland framework. Specifically, roses, tulips, or peonies when dried can serve as dramatic anchors, while spray dahlias and grasses add texture and movement. To keep the arrangement balanced, plan for a mix of large, medium, and small elements. For a cohesive dried flower garland, limit the color family to two or three tones and use a handful of complementary neutrals for rest. If you are inspired by a particular season, carry through with seasonal accents—evergreen pods for winter, dried poppies for summer, or airy white Queen Anne’s lace for a versatile backdrop. The aim is to craft rhythm: a pattern where heavier blooms anchor alternating with lighter filler stems so the garland reads consistently from any viewing angle.
Texture matters as much as color. A successful design blends velvety petals with papery grasses and slender stems. In practice, you might pair a large, velvety bloom with wispy filler and a few bold, flat elements to catch the eye. If you want a more organic, wildflower look, you can mix garden-inspired stems with native grasses to reflect local flora in a dried state. Remember that the color of dried blooms will shift as they cure, so choose stems with a shade range that still reads well once all are preserved. Finally, reserve a handful of accent pieces for the ends of the garland, where negative space can create an elegant taper rather than a blunt finish. This approach ensures your dried flower garland feels thoughtfully composed rather than assembled.
As you select varieties, document a rough micro-layout in your mind or on paper. In the absence of a formal plan, you will be guided by a sense of balance rather than symmetry. For instance, alternate a bold bloom with a cluster of smaller ones, then follow with a textural element to mimic a natural growth pattern. Specifically, the equilibrium you pursue will translate into how the garland drapes, hangs from a mantle, or arches over an entryway. If your space favors minimalism, pick a few strong blooms and a generous amount of negative space; if you love maximal texture, allow a denser cluster of elements along the centerpiece with lighter notes at the edges. Ultimately, your bloom selection should be rooted in how the colors and textures interact under your lighting, so test a small sample at home before committing to the entire garland.
When you source your florals, look for stems that have already begun to dry to a comfortable pliability. For many gardeners, the best results come from letting fresh stems dry slowly in a cool, dark place for a few days before proceeding. In contrast to quick-dry methods, this step helps preserve petal shape and reduces the risk of cracking. Specifically, a slow, natural drying phase gives you a more forgiving canvas for assembly. If you choose to rush the process with a silica gel or heat-based method, monitor the blooms carefully to prevent over-drying, which can lead to brittleness that jeopardizes the garland’s longevity. A single well-planned stem can define the tone of the piece, so select it with care and set it aside as your reference bloom. Finally, store unassembled stems in breathable containers until you are ready to begin the assembly, ensuring they stay pliable and true to color.
For practical guidance on drying techniques, you can consult trusted resources that walk through color retention and texture preservation. For example, emergency conservation advice and step-by-step drying methods are detailed in popular at-home guides, which provide complementary techniques to our approach. This guide offers additional context on preserving petals and stems so your dried flower garland remains vibrant. In general, you want to narrow your choices to blooms that respond well to drying and that maintain some structural integrity after curing. Your selection process should emphasize both aesthetics and practicality, because the best garlands combine beauty with lasting quality. Finally, ensure your blooms are clean and free from pests, and handle them with care to avoid bruising delicate petals during assembly.
Drying Techniques to Preserve Color and Texture
Drying is the heartbeat of any dried flower garland project. Each method carries its own advantages and is best chosen by bloom type, scale, and your environmental conditions. Specifically, air-drying is the most forgiving approach for a wide range of flowers, while silica gel drying excels when you want to stabilize color and shape more aggressively. Pressing, when used thoughtfully, can yield interesting flat textures that work beautifully for a garland that lies against a wall or window. The key is to keep blooms fully supported during the drying process to prevent warping or flattening that would hinder later assembly. In practice, plan for a multi-method approach if your mix includes both robust stems and delicate petals. For instance, you might air-dry the bulk of the stems while reserving a few color-rich, papery blooms for silica gel drying to preserve their vivid hues. And remember, the weather plays a role; if you live in a dry, warm climate, you can speed up air-drying, but you must stay vigilant for rapid color loss. Conversely, in humid environments, silica gel or press-drying will yield more predictable results. Throughout, you’ll want to label each batch so you can mix and match with intent when you begin assembly, ensuring the dried flower garland achieves a harmonious rhythm rather than a random collection of petals.
Air-drying offers simplicity and a natural look. Place stems with ample space between them in a dark, well-ventilated corner. Over several days, stems shrink and colors fade to a softer palate. However, the result often includes a more delicate structure; that’s perfectly acceptable for lighter sections of the garland, where weight distribution matters less. Specifically, you can speed things up by hanging clusters in a single layer so air circulates around each bud, reducing mold risk. For larger blooms, twist ties or looped string sections can help maintain form as stems lose moisture. When using air-drying, expect variation in shade as the natural pigments settle, which can contribute to a vintage look that many designers love for a bohemian or cottage-style space.
Silica gel drying is a more controlled method that preserves shape and color with precision. Submerge the blooms in silica gel and monitor color retention; this can be especially effective for petals that tend to curl or wilt. Specifically, the crystals wick away moisture without distorting the bloom’s natural silhouette. Because silica gel is reusable with proper care, you can experiment with several small samples to learn how each bloom reacts before committing larger stems to the process. Pressing and stacking is a third option that yields a different aesthetic—flat, papery textures that read beautifully along the edge of a garland. This approach works well for daisies, Queen Anne’s lace, and other airy forms. Specifically, pressed blooms lend themselves to linear arrangements that echo natural stems and create an intriguing, modern line in the garland. Each drying method influences how the finished piece catches light, so consider the placement of your garland when selecting methods for different blooms.
Regardless of method, always handle blooms gently once dried. A light mist of clear, workable sealant can help stabilize fragility and reduce shedding over time, though you should test on a small area first to ensure the finish does not alter color excessively. As you prepare to assemble, maintain a consistent look by grouping blooms with similar dryness levels. Specifically, aim for a uniform hardness so the garland holds its shape when you hang it. Finally, don’t rush; the beauty of a dried flower garland rests on the careful balance between color, texture, and form. The small patience you invest in drying pays off when you see the final piece drape with graceful confidence.
Design Principles for Balance and Flow
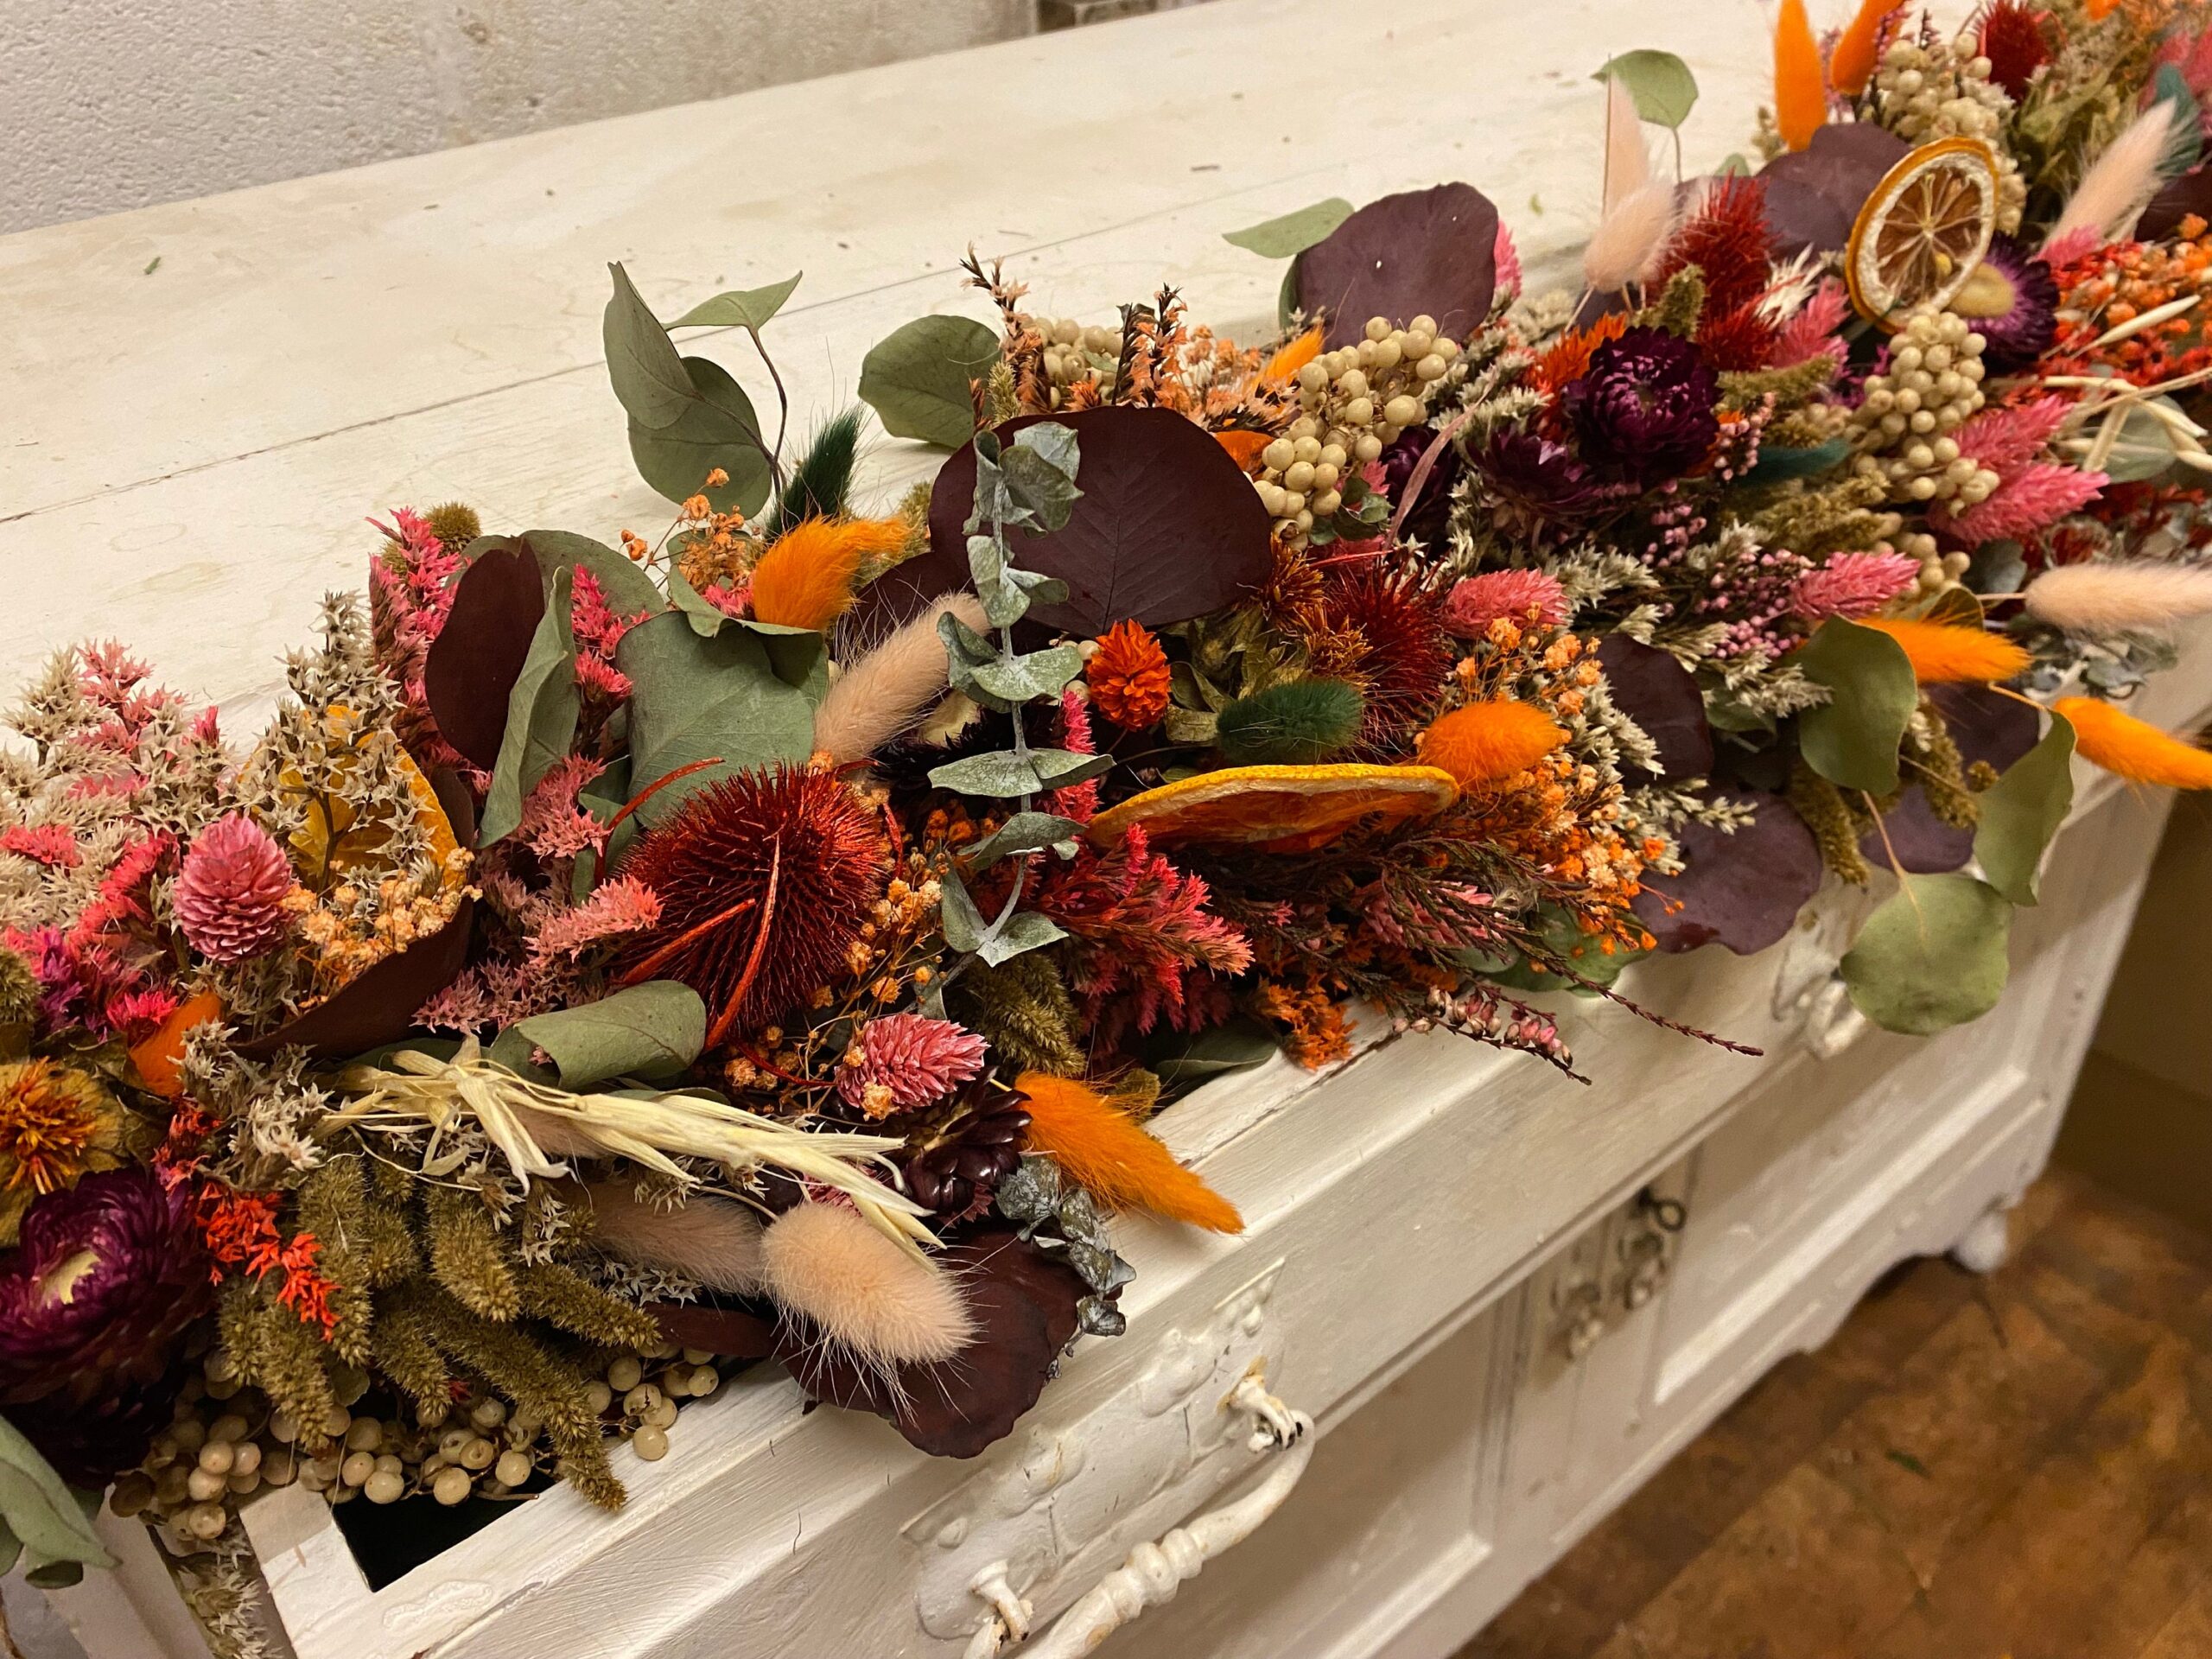
A successful dried flower garland reads with rhythm. Specifically, you want a gentle arc that begins subtly, peaks with a few larger blooms, and finishes with a taper that invites the eye to travel along the length of the piece. Balance is not about symmetry; it’s about creating a natural cadence that guides attention from one focal area to the next. Consider how the garland will be viewed in situ. If it will frame a doorway, you may want a slightly heavier center and lighter edges to prevent the ends from looking underscaled when viewed straight on. In contrast, a garland hung above a mantel benefits from a balanced composition with repeated motifs that echo on both sides, so the eye travels without interruption. Color rhythm matters too. Start with a main color, insert a supporting accent every few blooms, then repeat at regular intervals to reinforce continuity. This approach helps to prevent a single cluster from dominating the piece or draining color too quickly as the blooms settle into their dried state.
Texture creates depth. For example, pair velvety petals with linear grasses or seed heads to suggest movement and life. Specifically, contrast flat, papery petals with curly, wiry stems so light interacts differently across each element. The eye perceives these transitions as depth, which makes the garland feel more dimensional even when pressed flat against a wall. The gender-neutral, earthy palette that’s popular in 2026 works well with various spaces; you can soften a bold palette by adding a few pale neutrals or creamy whites that catch ambient light and render a gentle glow. When planning proportions, imagine thirds: place anchor blooms roughly at one-third intervals along the garland, then fill between with secondary blooms and filler greens to maintain a consistent density. In practice, this planning reduces the risk of gaps that interrupt the visual flow and helps the finished piece appear deliberate and polished.
Greens and fillers deserve deliberate consideration. Include foliage with a sturdy backbone to provide support and frame the blooms gracefully. Sparse, slender greens can create airiness, whereas dense, textured foliages add weight and durability. If you choose to incorporate dried seed pods or grasses, place them toward the outer edges or the ends where they can naturally frame the piece as it hangs. Specifically, greens act as negative space in a dry arrangement, allowing blooms to “breathe” and preventing the garland from looking too crowded. Finally, consider the length and final display environment. A garland designed to drape across a doorway benefits from a slightly longer tail and a balanced, even weight distribution. An arch installation may require additional anchor points and a more compact center so the curvature remains stable and elegant over time.
Assembly Techniques: Wiring, Stringing, and Securing
Now comes the practical art of putting blooms onto the garland framework. The goal is to achieve a stable, flexible weave that can bend with the wall or doorway but won’t shed petals after a few days. Specifically, you want a discreet wire or twine path that anchors blooms without creating unsightly gaps. Begin by laying out the major elements along a stiff line that will serve as the backbone of the garland. Then, attach each bloom with care, using a gentle twist or loop that can be tightened without breaking the stem. When you wire, use floral tape to conceal the connection and secure with a kink-free wrap that sits flush against the stem. The better you hide the attachment points, the more seamless your garland will look. In addition, it’s wise to alternate attachment techniques: fix larger blooms with a shared loop and secure filler elements with smaller, delicate ties. This variation distributes tension evenly and minimizes the risk of drooping in the center. If you are working with a longer garland, consider placing anchor blooms at the center to create a natural focal point and reduce sag at the midpoint.
Connectivity matters as much as aesthetics. Use a base string that is a touch more robust than you think you need; a slightly thicker twine reduces stretch and keeps the garland taut in display. Specifically, a cotton or linen cord offers both resilience and a tactile beauty that complements the natural look of dried stems. On a practical note, attach the garland to a fixed anchor point using a gentle knot that can be easily adjusted if needed. If you need to reposition, avoid over-tightening, which can crack petals or bend fragile stems. Moreover, you may incorporate a lightweight spacer between blooms to maintain spacing as the garland ages. In everyday use, the most important rule is to be patient during assembly: rushing often leads to misalignment or drooping in the finished piece. Take breaks to step back and evaluate balance from several angles, adjusting as necessary to preserve the intended arc and rhythm.
Protective handling is part of the process too. After you have assembled the garland, gently bend and lay it flat for a few days to set the shape. In environments with high humidity, consider a light sealant that is compatible with dried botanicals to reduce shedding and strengthen petal edges. Always test any finish on a small portion first to ensure color integrity. Finally, if the garland will be stored for an extended period, wrap it in tissue paper and store it in a cool, dry place to slow any further color changes. This approach preserves the piece until you are ready to display it anew, maintaining its character and charm for seasons to come.
Finishing Touches: Preserving and Wrapping
With the structure in place, finishing touches bring the piece from a crafted item to a polished home accessory. A delicate, clear sealant can help protect the blooms from color fade and shedding, but you should verify compatibility with each bloom type. Specifically, test on a single petal to observe any changes in hue. If you prefer a more tactile finish, a light wax or resin coating can add a subtle sheen and extra rigidity, which some designers find desirable for long-term installations. In contrast, a matte finish maintains a natural look that suits rustic and bohemian interiors. The choice of finish should align with the space and the mood you want to convey. When planning finishes, consider whether you want the garland to age gracefully or retain near-constant color intensity. Both goals are achievable, but they require different finishing strategies and maintenance routines. For example, you may re-treat the piece seasonally to keep colors vibrant, especially if the garland is exposed to direct sunlight or fluctuating humidity. When a finish is applied, allow adequate drying time before handling again to prevent smudging or misalignment of blooms. Finally, store a sealed garland away from pests and moisture to maximize its longevity while preserving its delicate beauty.
Another finishing consideration is the presentation of the garland. If you plan to display it on a wall, ensure you have a smooth, clean surface that won’t snag petals. For doorway arches or window frames, secure anchor points with corrosion-resistant hooks or nails that won’t shift as seasons pass. Specifically, avoid metal components that can rust or transfer pigments to fabrics or paint. When possible, use removable adhesives that won’t damage walls, especially if you are renting or moving soon. If your display includes textiles or painted surfaces, test proximity to the blooms to prevent color transfer. The end result should feel effortless and intentional, like a natural extension of your decor rather than a contrived craft project. Finally, always perform a gentle check after installation to confirm there are no loose blooms that could fall and create a fragile moment in a high-traffic area.
Display Ideas and Long-Term Care
Once your dried flower garland is complete, consider how it will live in your space. A horizontal or slightly curved display across a fireplace mantle is a classic choice that emphasizes a curated, timeless look. Specifically, draping the garland over a mantle gives you a natural focal line, while a vertical installation above a doorway creates a welcoming, architectural statement. If you prefer flexibility, hang the garland from a light fixture by folding the ends behind a curtain rod or a decorative hook, allowing it to cascade with a gentle, organic sway. For ceiling installations, a delicate, airy garland can illuminate an entryway as guests enter, creating an inviting mood. Over time, you may notice color fading or slight shedding; that is part of the natural aging process and can be embraced as character. For ongoing care, dust the garland with a soft brush or a can of compressed air on a low setting to remove surface dust, being careful not to disturb delicate blooms. If shedding becomes noticeable, you can re-secure faint petals with small, unobtrusive ties so the overall silhouette remains intact. Finally, consider rotating or repositioning the garland seasonally to refresh the look without purchasing new blooms. The result is a centerpiece of natural beauty that continues to reward you each time you enter the room.
Maintenance is not merely about keeping a physical piece intact; it’s about protecting color and texture for longevity. In practice, place the garland away from direct sunlight to slow color changes, and monitor humidity to prevent mold or limp stems. If you live in a particularly damp climate, consider a light anti-microbial spray that is compatible with dried florals and test first on a hidden area. In addition, store the garland during extended off-seasons in a breathable bag or wrap to prevent crush damage. This approach ensures that when you bring the piece back into daily life, it retains its original charm and continues to elevate your space. Finally, remember that the impact of a dried flower garland comes from its layers and textures as much as its colors, so never rush the display or care routines. Take time to enjoy how it changes with the light and seasons, and your investment will feel well spent for years to come.
Common Mistakes and Quick Fixes
Even seasoned crafters encounter pitfalls. A common mistake is choosing too-heavy blossoms for a long garland, which can lead to sagging over time. Specifically, if the center droops, re-balance by repositioning one or two heavier stems toward the ends or by adding a lighter filler to the middle. In addition, inconsistent drying can cause color mismatches; the fix is to pre-sort blooms so similar hues and textures are grouped together before assembly. If you encounter petal shedding, a light touch of sealant on the exterior surface can help, but test first. For those who overlook base stability, consider reinforcing with a thin internal wire frame that is wrapped in tape to reduce visible connections. Finally, remember that helming a harmony-based design is more important than chasing a trend. A timeless dried flower garland is adaptable and retains its charm across spaces and seasons.
To avoid typical errors, plan ahead. Sketch a rough layout or use a simple mock-up using spare stems laid on a flat surface to visualize balance before you begin wiring. Specifically, visualizing ahead of time helps you spot potential weak points in the design and allows you to adjust before committing to the final assembly. If you make a mistake, don’t despair; detaching a few blooms and reattaching them in the correct position is often quicker than you think and yields a more polished result. Remember that patience, balance, and texture are the three pillars of success when crafting a dried flower garland that stands the test of time.
Variations by Theme and Season
The same foundational techniques apply across styles, but you can tailor your dried flower garland to specific aesthetics. For a cabbage-crush-inspired look, think bold, textural shapes and large blooms spaced with lush greenery to evoke a garden-fresh feel. Specifically, this trend emphasizes volume and visual punch, so balance the heavy accents with wispy fillers to prevent overwhelming the space. For wildflower-inspired garlands, favor a palette of soft yellows, pinks, lavenders, and whites with a generous mix of tiny fillers and seed heads to mimic a meadow at harvest. In addition, native grasses can provide movement and a sense of place, which often resonates in rustic or farmhouse interiors. A peony-forward garland can be lush and romantic when dried, but you may want to pair it with subtle greens and light filler to preserve the bloom’s exquisite silhouette. Finally, don’t forget pollinator-friendly accents; dried blooms that reflect textures and colors found in local floras can bring a sense of biodiversity into your home, making your decor not only beautiful but meaningful. As trends evolve, a well-crafted dried flower garland remains a flexible, timeless piece that can be updated with a few key additions or swaps each season.
To sum up, the art of building a dried flower garland lies in purposeful bloom selection, mindful drying, balanced design, and thoughtful finishing. Each choice you make—from bloom scale to finish—affects the final impact. In 2026, the ongoing popularity of natural textures and sustainable decoration reinforces the value of a well-made garland that can be enjoyed for years. If you want to dive deeper into the next phase of this guide, stay with us for Part 3, where we explore finishing touches, display ideas, and care routines to keep your dried flower garland at its best.
Next up, in Part 3, Finishing Touches, Display Ideas, and Care for Your Dried Flower Garland, we will translate this step-by-step into practical, repeatable practices for home use.
Advanced Dried Flower Garland Making: Variations, Troubleshooting, and Sustainability
In this final section, we deepen your mastery of dried flower garland projects. You will discover design variations, practical troubleshooting steps, and sustainable choices that align with BloomHaven’s values. Use these techniques to tailor garlands for weddings, seasonal home decor, or garden-inspired displays.
Variations in Dried Flower Garland Styles
Garland styles adapt to space, light, and the mood you want to set. By combining textures, forms, and colors, you can craft a dried flower garland that feels classic or boldly contemporary. The following variations help you customize projects without losing the signature charm of dried blooms.
Color Palettes for a Dried Flower Garland
Choose a palette before you cut. A cohesive color story guides balance and rhythm. Soft pastels work well for romantic or cottage-core spaces. Deep, earthy neutrals pair with wood tones for a grounded look. Bright, saturated hues make a festive statement in entryways or celebrations. To keep color from fading, mix flowers with silvery greens and warm browns. A restrained palette often reads more timeless than a rainbow of tones.
Texture and Form Variations
Flowers aren’t the only textures you can use. Include seed pods, grasses, branches, and delicate ferns. Berry sprigs add color without bulk. Dried eucalyptus or ruscus provide leafy backdrop that makes blossoms pop. Use mixed textures to create visual interest from a distance and close-up appeal when viewed up close.
Size, Length, and Shape Variations
Length adapts to your space. A long garland can drape along a mantel or staircase. Shorter strands create focal accents on walls or windows. Consider shapes like curving swoops, evergreen-inspired garlands, or irregular, organic lines. When planning shape, think about hanging points and gravity. Lighter blooms require careful anchoring to prevent sagging.
Theme-Focused Garland Ideas
Design garlands around events or seasons. A garden party palette can feature miniature blooms and bright greens. A winter wedding might use ivory, pale gray, and soft blush with cotton and pine accents. For a woodland look, mix delicate white daisies with evergreen sprigs and seed pods. Thematic garlands become memorable backdrops for photography and ambiance.
Materials and Wiring Options for Durability
Garlands hinge on how you assemble them. Natural twine offers rustic charm, while floral wire provides strength for heavier blooms. For delicate stems, use floral tape to secure joints before wrapping. Glue methods work for non-porous elements, but test compatibility with dried petals. When in doubt, build a small model first to test stability.
Troubleshooting Common Dried Flower Garland Issues
Even with care, issues can arise. The key is early recognition and simple fixes. Below are common problems and practical remedies that keep your dried flower garland looking its best.
Fragile Petals and Shedding
Dried petals shed when handled roughly or when they’re over-dried. Handle gently, and support blooms at their stems. Use a light sealant spray designed for dried flowers to reduce shedding. Store garlands flat or loosely coiled to minimize pressure on stems. If petals shed during display, you can re-anchor with a thin thread or a dab of clear-drying adhesive at the base.
Curling, Warping, or Sagging
Curling happens when stems dry unevenly. To prevent it, dry blooms on a flat surface with even air flow. For sagging, reinforce with a discreet internal core: insert a thin wire or monofilament along the length, then re-secure with gentle wrapping. Keep garlands away from direct sunlight to prevent rapid drying that accelerates curling.
Color Fading and Brightness Loss
Color fades with prolonged sun exposure and heat. Use dried flower garlands in shaded or indirect-light areas when possible. If color loss occurs after display, consider reviving with subtle touches of color through safe dyes or by replenishing with newly dried blooms that match the palette. Store in a cool, dry place to preserve hues between uses.
Humidity, Mold, and Mildew Risks
Humidity invites mold growth on organic materials. Ensure good ventilation where garlands hang. If you notice a musty smell or visible haze, remove the garland, air it in a dry room, and inspect each bloom. For reusable garlands, consider sealing with a light, breathable fixative that does not trap moisture.
Adhesive and Wiring Troubles
Some adhesives degrade natural fibers over time. Test any glue on a small section first. Choose adhesives labeled for dried botanicals and apply sparingly. Wiring should be insulated and unobtrusive. Double-check joints after a few days, because shifts can loosen attachments. When in doubt, replace with a sturdier anchor.
Maintenance and Cleaning Techniques
Dust is the enemy of longevity. Use a soft brush or a gentle blast of air to remove dust. Do not wash dried blooms; moisture can cause color bleeding or stiffness. If you must refresh color, replace worn elements rather than scrubbing existing pieces. Regular checks help you catch issues before they become visible defects.
Sustainability in Dried Flower Garland Craft
Sustainability should underpin every step of your garland project. From sourcing to end-of-life, thoughtful choices extend the life of your craft and reduce waste. These guidelines help you create beautiful garlands that align with eco-friendly principles.
Ethical Sourcing for a Dried Flower Garland
Where possible, select locally grown or home-dried blooms. Buy from small growers who practice responsible farming and fair labor. If you harvest flowers yourself, choose species that recover quickly and avoid rare, protected plants. Document your sourcing to share with clients or guests who value transparency.
Eco-Friendly Drying Methods and Materials
Air-drying and press-drying are low-energy options that preserve color and texture. Use natural, non-toxic preservatives or none at all to keep your garlands safe for homes with kids and pets. When you need to preserve color, test natural alternatives like glycerin or silica gel in small batches. Choose reusable, recyclable containers for storage and packaging.
End-of-Life, Reuse, and Upcycling
Plan garlands with modular sections that can be replaced or repurposed. If a garland ends its life, reuse elements in other crafts or donate to schools and community centers. Compost plant materials where appropriate, ensuring any synthetic components are removed first. This approach reduces waste and extends the value of your work.
For readers seeking additional guidance on sustainable floristry, you can explore resources such as the University Extension guide on drying flowers: University Extension: Drying Flowers.
Conclusion: Mastering Advanced Dried Flower Garland Techniques
Across variations, troubleshooting, and sustainability, you now have a robust framework for crafting exceptional dried flower garlands. Variations let you tailor garlands to space, season, and occasion. Troubleshooting equips you to handle common challenges with confidence and care. Sustainability elevates every step, from ethical sourcing to end-of-life decisions. The result is a beautiful, durable garland that honors both craft and the environment.
In summary, a well-made dried flower garland blends artistry with practical know-how. It is a versatile decor element that celebrates blooms long after their fresh-life has faded. By embracing variations, applying thoughtful fixes, and prioritizing sustainability, you craft pieces that resonate with memory and meaning. Ready to start your next project? Explore more tutorials, shop smartly for supplies, and subscribe for ongoing ideas and techniques on dried flower garland creations.
Call to Action: If you found this advanced guide helpful, subscribe to BloomHaven for fresh tips, seasonal palettes, and hands-on projects focused on dried flower garland artistry. Share your own variations and troubleshooting wins in the comments to inspire fellow growers and makers.