Wildflower Seed Bombs: DIY Recipes & Tips
Welcome to BloomHaven’s Foundational Guide to Wildflower Seed Bombs for Eco-Friendly Gardens. In 2026, gardeners are embracing simple, sustainable tricks to grow beauty with less effort and fewer resources. Wildflower seed bombs offer a compact, resilient way to transform dull patches into buzzing, color-filled corners. They combine clay, compost, and seeds into little orbs that protect seeds from sun and wind, then break apart when they land in rich soil. Therefore, you can seed long stretches of your yard, balcony, or urban lot without heavy digging, chemical fertilizers, or continuous watering. This guide explores what wildflower seed bombs are, why they work, and how to deploy them with intention, keeping pollinators in mind and the landscape healthy for years to come.
Here, you will learn the foundational science behind seed bombs, practical how-tos, and design ideas that fit contemporary eco-conscious gardens. We’ll cover seed selection, soil considerations, and seasonal timing so you can tailor your approach to your climate. You’ll discover best practices for storage, durability, and ongoing maintenance, ensuring your wildflower seed bombs thrive from spring through late summer and into early fall. By the end of this section, you’ll be ready to create resilient pollinator havens with confidence and clarity.
Foundational Guide to Wildflower Seed Bombs for Eco-Friendly Gardens
What Are Wildflower Seed Bombs?
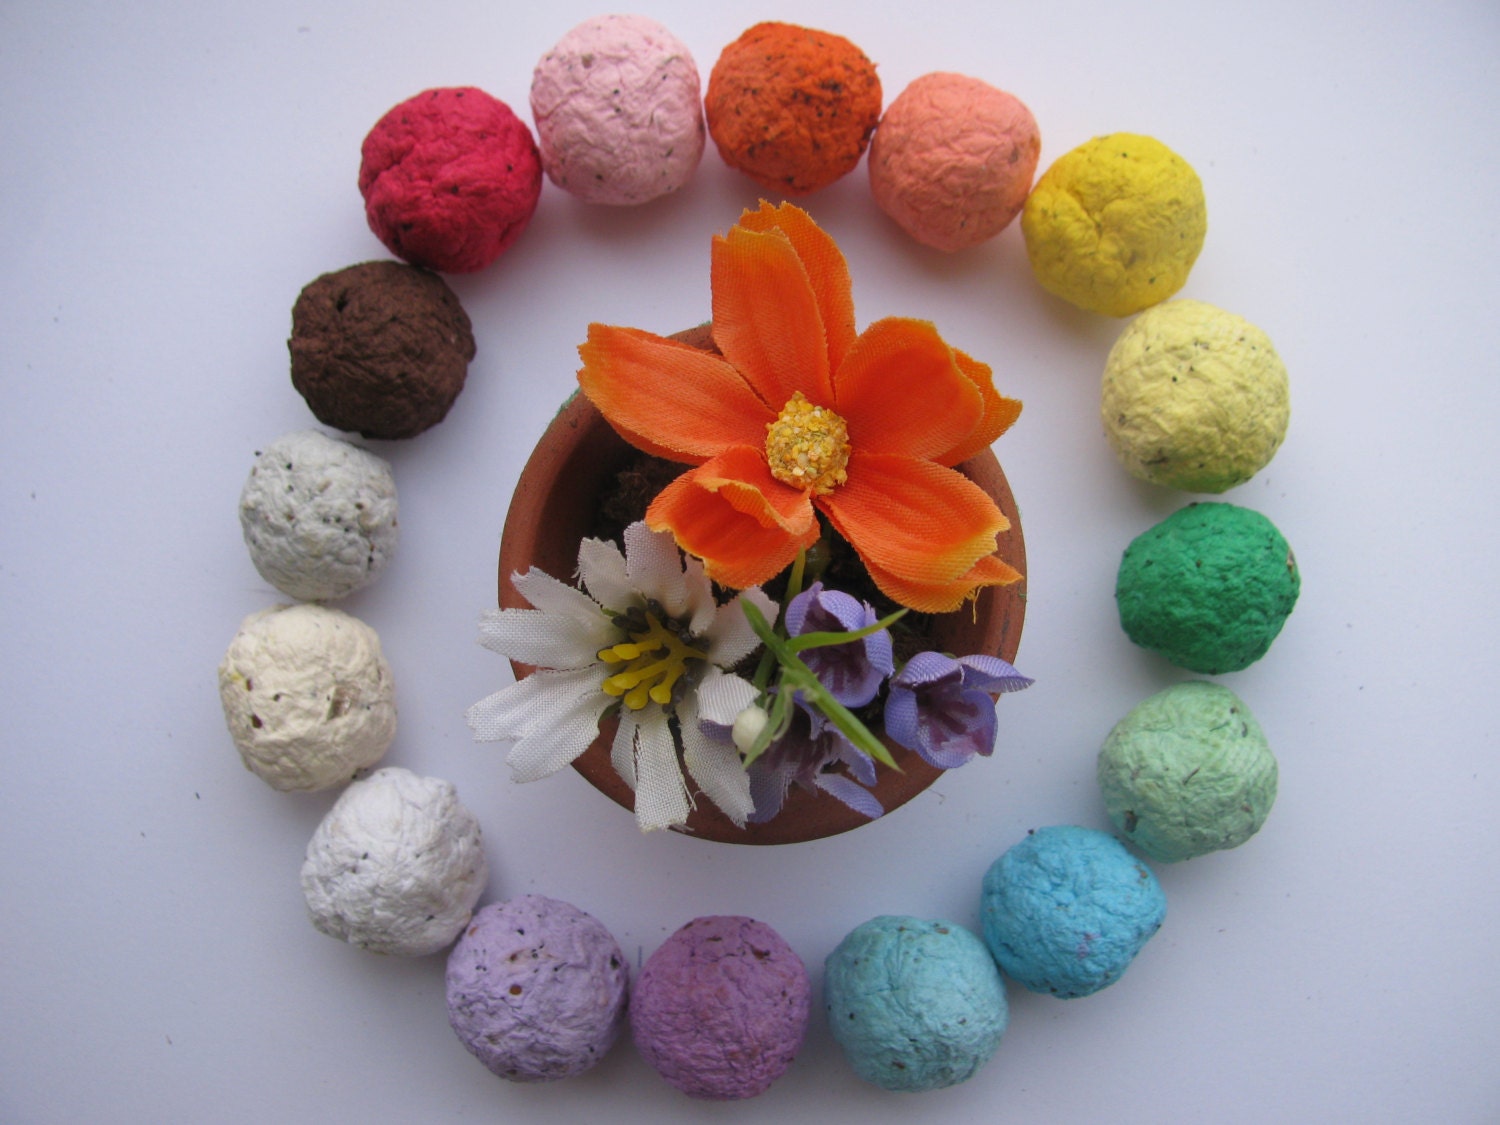
Wildflower seed bombs are tiny balls of clay, compost, and seeds that can be tossed onto soil. They protect seeds from desiccation and help germination by staying moist until rain arrives. In practice, they pop up with diverse native and ornamental wildflowers, feeding pollinators and adding texture to the garden. They are a small-scale, portable gardening technique that fits balconies and community plots alike. Crucially, they let you seed hard-to-reach spots without heavy machinery.
- A simple homemade mix is typically clay, compost, and a selection of seeds.
- They work well in urban spaces and neglected corners where soil is thin or compact.
- Seed viability and success increase when you choose regionally appropriate, pollinator-friendly species.
Why Wildflower Seed Bombs Matter for Eco-Friendly Gardens
Eco-friendly gardens prioritize biodiversity, soil health, and water efficiency. Wildflower seed bombs contribute by providing nectar sources across seasons, supporting pollinators when food is scarce. They also minimize soil disturbance and reduce weed competition with carefully selected blends. In addition, seed bombs can be used to repair damaged ground, revitalize dull corners, and connect fragmented habitats.
- They offer a low-disturbance method to establish new plantings in poor or compacted soils.
- They enhance biodiversity by introducing multiple native or well-adapted species at once.
- They support pollinators and beneficial insects, contributing to a healthier garden ecosystem.
How to Make Wildflower Seed Bombs: Step-by-Step
Working with dry hands, mix seed, compost, and clay until you form a dough. Roll into small balls the size of a walnut. Allow them to dry in shade on a breathable surface for 24 to 48 hours. Then store in a cool, dry place until you’re ready to deploy. Always test the temperature and humidity in your area. This method yields reliable germination when conditions are right.
- Gather your materials: clay powder or air-dry clay, compost, seeds, and clean water.
- Combine in a large bowl until a pliable dough forms.
- Add seeds and knead gently to distribute them evenly.
- Roll into balls and place on a drying rack away from direct sun.
Materials and Ratios for Successful Bombs
Keep the ratio roughly: 1 part clay, 1 part compost, and 1 part seeds by volume. Use fine clay for lightweight bombs and add sand if your soil is very compact. For better moisture retention, consider a tiny amount of shredded coconut coir or peat-free mulch. You can also add a dash of fine fertilizer in some blends, but keep fertilization moderate to avoid overpowering seedlings.
- Standard batch yields about 20–30 bombs depending on size.
- Adjust clay-to-compost ratio if your climate is very dry or very humid.
- Choose seeds with a preference for local rainfall patterns and sun exposure.
Seed Blends for Wildflower Seed Bombs Across the Seasons
Choose blends that match your climate and pollinator needs. A typical spring blend includes poppies, calendula, and bachelor’s buttons; a summer mix might add daisies and cornflowers; a late-season selection can feature native perennials and coreopsis. To maximize biodiversity, include native species suited to your region. This approach supports a longer flowering window and healthy pollinator activity throughout 2026 and beyond.
- Spring: poppies, calendula, cornflowers, and forget-me-nots.
- Summer: daisies, cornflowers, bachelor’s buttons, and rudbeckia.
- Fall: echinacea, aster varieties, and native goldenrods.
Deployment Strategies: Where and When to Scatter
Scatter seed bombs on bare soil, along fence lines, and in sunny patches. The best time for deployment is after a light rain or when you can water gently for a week. Avoid dense shade or overly sandy soil unless you improve the bed with compost. In urban settings, seed bombs can be dropped in planters, deserted lots, and along sidewalks where soil is exposed and compact.
- Plan a staggered deployment for prolonged bloom windows.
- Focus on edges and sunny spots where weed pressure is low.
- Coordinate with local rain events to maximize germination without extra watering.
Maintenance, Storage, and Longevity of Seed Bombs
Store seed bombs in a cool, dry place inside a sealed container. They remain viable for at least one growing season if kept dry, though some blends may last longer. When planting, water well and monitor germination. If some bombs fail, you can reapply new batches in early spring or late summer, depending on climate. Regularly inspect planters and beds to ensure seeds aren’t being washed away by heavy rain.
- Label blends to track flowering times and pollinator benefits.
- Keep bombs dry until use to maintain seed viability.
- Reapply after flash droughts or extreme heat events.
Quality, Sourcing, and Seed Ethics
Choose seeds from reputable suppliers who provide non-GMO varieties and open-pollinated options. Consider regional natives to increase success and local biodiversity. We encourage buying from seed companies that use sustainable packaging and transparent sourcing. If possible, prefer seeds collected locally to maintain ecological balance.
- Ask suppliers about seed lot quality and germination rate information.
- Prefer open-pollinated and locally adapted varieties.
- Support packaging that minimizes plastic waste and uses recycled materials.
Deployment and Design Considerations for Climate and Space
Adjust seed choices to your USDA hardiness zone, rainfall patterns, and sun exposure. In dry regions, select drought-tolerant wildflowers; in wet regions, include moisture-loving species. Space is abundant in gardens with a spacious bed, but balcony gardens benefit from small, targeted seed bombs placed in sunlit corners. Consider companion planting to extend color and nectar availability.
- Match bloom times with garden design goals (color, texture, pollination).
- Use containers and raised beds to control soil quality and irrigation.
- In hot climates, choose water-wise natives to reduce irrigation needs.
Common Pitfalls and How to Fix Them
Overly heavy bombs can crack or fail to sprout. If you notice seed bombs drying too quickly, blend more compost and reduce clay. If germination is slow, adjust seed ratio or water more consistently. Avoid using treated or coated seeds that may impede germination. Finally, keep seeds away from pets who might nibble on them.
- If bombs crumble during handling, add more binder (clay) and reduce seed load slightly.
- If germination is sparse, check seed quality and consider a broader seed mix.
- Avoid contaminated or coated seeds that may hinder germination.
Resources and Further Learning
For additional guidance on pollinators and garden-friendly practices, explore expert tips from sustainable gardening resources like the National Wildlife Federation. Pollinator-friendly gardening offers seasonal ideas and plant lists that pair well with wildflower seed bombs.
Conclusion and Next Steps
By now you have a solid foundation for creating and deploying wildflower seed bombs. In Part 2 — Practical Deployment and Garden Design with Wildflower Seed Bombs, we will translate this knowledge into ready-to-use layouts and seasonal calendars.
Executing Wildflower Seed Bomb Recipes: Step-By-Step
Welcome to the hands-on portion of our guide. This section walks you through a complete, field-ready method for crafting wildflower seed bombs that are easy to deploy, store, and plant. Each step emphasizes practicality and sustainability, with a focus on attracting pollinators and supporting local ecosystems. By following these steps, you’ll be able to produce consistent, nutritious bombs that germinate reliably in a variety of environments, from urban cracks to roadside banks. The goal is to empower you to transform seed into soil-ready potential with clarity and confidence, so your blooms arrive on schedule in 2026 and beyond.
Step 1: Gather Materials for Wildflower Seed Bombs
Preparation begins with a clean, dry workspace. Gather all components before you mix, so you maintain a steady rhythm. You will need seeds suitable for wildflower seed bombs, a safe binder, a moisture source, and drying space. A basic, effective mix uses a simple, inert binder that helps seeds cling to soil without choking air or water flow. Choose a binder that aligns with your environmental goals and local guidelines. In most urban and suburban settings, clay-based binders or compost-rich blends work well. Have gloves on hand to keep the process tidy and protect your skin as you handle powders and clays. Lay down parchment or a clean tray to prevent sticking and make rolling easy. Finally, prepare a shallow pan or tray for drying, and a labeled jar or bag for storage after the bombs are cured. The emphasis of this step is organization, because a smooth start reduces the chance of inconsistent bombs later on. A well-prepared toolkit supports steady execution and better outcomes for wildflower seed bombs across your BloomHaven garden or neighborhood planting project.
Step 2: Select Your Wildflower Seed Bomb Mix
Seed selection is the heart of any wildflower seed bomb. The right blend will determine bloom times, colors, and pollinator visits. For Step 2, consider local ecology, climate, soil types, and the season in which you plan to deploy. A robust mix targets a range of bloom windows so there is continuous nectar across spring, summer, and into early autumn. Specificity matters: choose native or well-adapted wildflowers that thrive in your region and complement existing plantings. This is not a one-size-fits-all recipe; it is a modular approach that respects local variation while delivering reliable germination. When you select seeds, imagine the eventual garden you want to create. Do you seek a early-spring splash of color to greet pollinators, or a late-summer meadow vibe to extend bloom periods? Your seed bomb batch should reflect that vision. For BloomHaven readers, incorporating species that support native pollinators builds a resilient pollinator corridor, especially in urban and suburban landscapes. If you want to see a practical reference for choosing pollinator-friendly seeds, consider checking expert guidance from respected horticulture resources, such as the Royal Horticultural Society, which offers tips on plant selection for pollinator-friendly landscapes. Learn more about pollinator-friendly flowers.
In practice, your seed mix should balance variety with practicality. Include a core set that germinates reliably in your climate, with supplementary species to fill gaps in bloom time or to provide nectar across different times of day. As you compile your blend, think about color variety, plant height, and habitat structure. Low-growing natives can form a ground cover that protects soil and reduces erosion, while taller asters or coneflowers add vertical interest and welcome long-season pollinators. By emphasizing both diversity and reliability, you create seed bombs that perform well in the real world, even when conditions aren’t perfect. The result is a seed bomb that germinates consistently and contributes to a thriving, pollinator-friendly landscape surrounding your BloomHaven projects.
Seed Blends and Variations: Local Ecology Should Drive Your Recipe
To tailor Step 2 to your environment, break your blend into a few functional groups. You might include a core set of hardy natives, a secondary group to extend nectar windows, and a trailing or filler component to help with soil stabilization and microhabitat creation. This approach ensures every seed bomb has multiple benefits: germination reliability, extended bloom times, and improved habitat structure. When you design variations, consider how each component contributes to pollinator visits. A well-planned mix can attract bees, butterflies, and other important pollinators throughout the growing season, creating a more vibrant and resilient local ecosystem around your blooms. The thoughtful selection of seeds also improves success rates for wildflower seed bombs deployed in challenging sites, such as urban walls, vacant lots, and roadside medians. The key is to align seed choices with your climate realities and the needs of local pollinators, so each bomb has the best chance to perform as intended.
Step 3: The Binder Basics — Clay, Compost, or a Peat-Free Alternative
The binder acts as the holding matrix that keeps seeds together while they dry and until germination begins. In Step 3, you will choose between clay-based binders, compost-rich blends, or peat-free alternatives. Clay binders are traditional and effective; they create a sturdy shell around seeds while allowing moisture to pass through. Compost-rich blends introduce organic matter that can improve soil health once the bomb begins to break down. Peat-free options prioritize sustainability and minimize environmental impact, aligning with BloomHaven’s eco-conscious ethos. Whichever binder you select, aim for a product that is inert and non-toxic, ensuring safety for soils, water sources, and local wildlife. If you are concerned about climate impact, a compost-based binder can be appealing, but ensure it is well-rotted to avoid heat or chemical imbalances during germination. The binder choice shapes drying times, final texture, and the stability of your seed bombs, so choose thoughtfully and align with your long-term garden goals.
Binder Ratios: Finding the Sweet Spot for Consistency
Achieving a consistent, workable dough is the objective of Step 3. Begin with a modest binder ratio and adjust gradually. You want a mix that is cohesive enough to roll into bombs without crumbling, yet not so wet that it becomes a sticky mess. The dough should hold its shape when squeezed, but still be forgiving enough to crumble slightly under pressure if you need to adjust a bomb’s size. If your blend feels dry, add a small amount of water or a little more binder. If it feels too wet, sprinkle a touch more dry mix or binder to rebalance. In this careful balancing act, you shape bombs that are easy to form, transport, and deploy in diverse settings. Your goal is a surface-drying finish that forms a protective crust while preserving seed viability inside. This balance is essential for predictable germination and a smooth planting experience for you and your pollinator partners.
Step 4: Mixing Technique for Uniform Wildflower Seed Bombs
Step 4 is where you transform dry ingredients into a uniform, rollable dough. Begin by combining your dry seeds with the chosen binder, then gradually incorporate moisture until you achieve a pliable consistency. Use a gentle folding motion rather than aggressive stirring to avoid crushing delicate seeds. The dough should come together without sticking to your hands, forming a ball that holds its shape. If you notice uneven distribution of seeds, break the ball apart and rework it, ensuring each portion contains a representative mix. Throughout the process, maintain a calm rhythm and deliberate pace. The goal is uniform seed distribution within each bomb, so every unit offers the same germination potential and bloom trajectory. As you work, keep the atmosphere clean and free of dust that could affect seed viability or seedling vigor. You are creating tiny, soil-ready capsules that will soon awaken into a field of color and life.
Ensuring Even Distribution and Ball Uniformity
Uniformity matters because it reduces variability in germination and growth. A well-mixed bomb delivers a consistent dose of seeds in every unit, which translates into a more predictable display of blooms after planting. If you are crafting a batch for a large area, consider weighing portions to achieve consistent sizes, but keep the process practical and repetitive rather than mechanized. The human touch matters here, and deliberate, mindful mixing yields reliable results that perform well in real-world deployments. Through this approach, you ensure each wildflower seed bomb carries a balanced assortment of species and seeds, enabling a resilient, multi-species bloom from the same order of bombs. The result is a robust, pollinator-friendly seed bomb batch that performs reliably in diverse environments.
Step 5: Drying, Curing, and Storage for Long-Term Performance
After forming your bombs, you must let them dry properly. Step 5 focuses on surface drying, cure time, and proper storage. Place the bombs in a single layer on parchment or a drying rack in a shaded, well-ventilated area. Avoid direct sun, which can crack the crust or degrade seed viability. Depending on climate, drying may take 24 to 72 hours. The surface should feel firm to the touch, and the bombs should no longer feel tacky. Once dry, store them in breathable containers such as paper bags or cloth pouches. Keep them away from moisture and heat, which can trigger premature germination or mold growth. Label each batch with the seed types and date, so you can monitor shelf life and ensure you deploy fresh bombs when volume is needed. A well-cured, properly stored seed bomb remains viable for months, sometimes beyond a year, depending on species and storage conditions. The key is to maintain a dry, cool environment that preserves seed coats and moisture tolerance while preventing clumping and spoilage. Your storage choices can impact the timing and success of germination, so treat this step with care.
Drying Environment and Timing Tips
To optimize drying, ensure you have good air circulation and moderate humidity. A fan can help, but avoid direct blasts that may blow away lightweight bombs. A climate-controlled space is ideal when available. If you are in a humid area, consider elevating the drying surface and using a dehumidifier to speed the process without compromising seed viability. If you notice crust cracking or warping, adjust the thickness of each bomb by rolling slightly larger or smaller, then re-dry. Consistency in thickness leads to uniform drying times and higher reliability when you deploy the bombs later in the season. When storage time approaches, periodically check for signs of moisture, mold, or odor. Quick action—airing out spores or replacing damp packs—helps preserve germination potential for many months ahead.
Step 6: Deploying Wildflower Seed Bombs for Best Results
With bombs properly formed, dried, and stored, Step 6 focuses on deployment. The goal is to maximize seed-soil contact and protect seeds from predation or desiccation while they establish. Choose planting sites that offer exposure to sunlight and adequate drainage, such as sunny cracks in sidewalks, disturbed soil along paths, or gaps in garden borders. Lightly tamp the bombs into soil or press them into soil crevices so they are not easily dislodged by wind or rainfall. You can place bombs on quiet days after rainfall to ensure moisture improves germination odds. Avoid overly compacted soil or pervasive shade, which can hinder root development and early shoot growth. If you are working with containers or planters, press the bombs into thin layers of soil to maximize contact without burying seeds too deeply. The aim is to create an inviting microhabitat where seeds can awaken as moisture becomes available and air pockets remain accessible to the developing roots. By deploying thoughtfully, you extend the blooming season across multiple weeks and increase the likelihood of pollinator visits that benefit your entire BloomHaven ecosystem.
Strategies for Different Deployment Environments
Urban walls, vertical spaces, and ground-level patches each require a tailored approach. On walls or vertical features, place bombs into crevices where soil gathers and moisture lingers. In ground-level patches, scatter bombs across bare soil to encourage rapid germination and minimal competition from established plants. In containers, layer bombs into topsoil with a light press and adequate drainage. Across environments, consider pairing seed bombs with shallow watering after deployment. While many wildflowers are drought-tolerant once established, initial moisture helps seeds break dormancy and start seedlings more quickly. The key is to adapt your technique to the site while maintaining the same core principle: seed bombs that encounter the right microenvironment germinate efficiently and bloom robustly. The deployment step is where science meets art, and your attention to site specifics translates directly into a more colorful, pollinator-rich landscape.
For readers who want a practical reference on pollinator-friendly habitat creation in established landscapes, the Royal Horticultural Society offers guidance on planning and planting for pollinators, which complements the seed bomb approach with broader habitat considerations. Learn more about pollinator-friendly flowers.
Step 7: Troubleshooting Common Issues and Safety Considerations
No guide is complete without a troubleshooting section. If your bombs crumble, assess whether the binder ratio was too low or the mixing was not thorough enough. If germination is slow, investigate seed viability and storage history. Temperature, moisture, and soil conditions all affect performance. In some cases, a portion of your seed mix may have low germination rates due to seed age or storage exposure. Adjust future batches by rotating seed lots and using the freshest seeds available. Safety matters too. Keep bombs away from pets and children until you know they have fully matured in the ground. Wear gloves during handling, especially if you are mixing in large quantities, and store materials away from heat sources or direct sunlight to preserve seed viability. This step emphasizes patient assessment and careful adjustment, ensuring your wildflower seed bombs perform reliably with minimal waste and maximum impact for local pollinators and neighbors alike.
Step 8: Quick Recipe Variations for Different Climates
Step 8 offers flexibility for varied climates and seasonality. In milder climates with longer growing seasons, you can lean into a more diverse seed mix that includes both cool-season and warm-season species. In hotter, drier climates, prioritize drought-tolerant natives and incorporate a slightly higher proportion of hardy perennials that will establish quickly and contribute to soil stabilization. If you are working in coastal areas with salt exposure, select species proven to tolerate salinity and wind. Each variation requires small adjustments to the binder content, moisture level, and drying conditions to maintain bomb integrity and germination potential. A thoughtful approach to climate-aware variations ensures you can implement seed bombs in a wide range of environments with consistent results, and that you continue to deliver the bloom-forward payoff your readers expect from BloomHaven in 2026 and beyond.
Step 9: Post-Planting Care and Monitoring
After deployment, little care is typically needed, but a little attention goes a long way. In Step 9, monitor for germination and early seedling survival during the crucial first weeks. Water during dry spells if rainfall is insufficient, but avoid overwatering, which can wash away delicate shoots. Mulching lightly around patches can reduce weed competition and retain moisture, especially in hot or windy locales. If blossoms arrive unevenly, you can plan a follow-up wave of seed bombs to fill in gaps and maintain a continuous display of color and nectar. By staying engaged with the patch, you help seed bombs transition from dormant seeds to thriving plant communities that sustain pollinators throughout the growing season. This ongoing maintenance reinforces the yield of your seed bomb program and helps you cultivate a reliable, aesthetically pleasing landscape around your BloomHaven projects.
Step 10: Record-Keeping and Long-Term Improvement
Finally, Step 10 emphasizes learning from each batch. Keep a simple record of seed types, binder used, drying times, deployment dates, and observed results. This data becomes invaluable for refining future batches, improving germination rates, and tailoring seed bombs to the specific microclimates within your garden or community project. With a careful log, you can track what works best in your area, adjust plant selection for diverse bloom windows, and communicate more effectively with readers and gardeners who want reliable, pollinator-friendly results. The ideal outcome is a scalable seed bomb program that evolves with the BloomHaven ethos, delivering consistent color and ecological benefits across multiple sites and seasons.
As you near the end of this step-by-step guide, you should feel ready to embark on your own seed bomb projects with confidence. The process is designed to be repeatable, transparent, and aligned with principles of sustainability and biodiversity. Your wildflower seed bombs are more than a hobby; they are a bridge between hands-on gardening and thriving pollinator habitats in 2026 and beyond.
In Part 3, we move from bombs to blooms with planting strategies and care practices that help you maximize germination success and cultivate vibrant wildflower displays across your landscape. Part 3 will be titled: Planting Wildflower Seed Bombs: From Bombs to Blooms.
Advanced Strategies for Wildflower Seed Bombs and Garden Impact
With the basics behind you, this final section explores advanced strategies that translate seed bombing from a playful project into lasting garden impact. The focus is on tailoring blends to microclimates, refining coatings for germination, aligning deployments with pollinator life cycles, and measuring biodiversity. When executed with intention, wildflower seed bombs become catalysts for resilient landscapes, pollinator networks, and community learning. Below are actionable tactics that you can apply in 2026 and beyond.
Designing Purposeful Seed Bomb Blends for Microclimates
Every site has microclimates that influence soil moisture, sun exposure, and temperature swings. By recognizing those microclimates, you can craft seed bombs that flourish year-round rather than flail after a heatwave. Start with a site map that notes sun hours, drainage, and typical wind exposure. Partition your garden into zones—sun-loving hot spots, part-shade pockets, and cooler, damp corners. For each zone, choose species that align with bloom times and moisture needs. Wildflower seed bombs that target a single microclimate will germinate more consistently and produce blooms at predictable intervals. This approach reduces waste and increases pollinator value.
In practice, you might combine drought-tolerant species for exposed slopes with moisture-loving natives for low-lying depressions. Incorporate natives that offer staggered bloom windows, such as early spring poppies, mid-season coneflowers, and late-blooming asters. Diversifying bloom timing not only sustains pollinators but also elongates the visual impact of your garden. When you design by microclimate, you’re optimizing seed viability and ecological return on investment.
Assessing Your Site’s Microclimates
Map sun paths from dawn to dusk and note where water pools after rain. Record how wind shifts scent and pollen movement across beds. Use this data to assign seed bomb blends that match each microclimate. For example, hot, windy edges may benefit from sturdy annuals with deep roots, while shaded corners can host cool-season perennials. Keep notes and adjust year to year. Tweaks are normal and part of the learning curve.
Choosing Species for Bloom Windows
Choose a core set of species with complementary bloom times and long-lasting nectar sources. Favor natives that support local pollinators and resist local pests. When possible, include at least one evergreen foliage element to anchor color during off-bloom months. Document the bloom window for each species so you can predict garden impact across seasons. A well-timed array of species ensures that wildflower seed bombs deliver continuous food for bees, butterflies, and other beneficial insects.
Mix Proportions for Longevity
Seed mixes should balance annuals and perennials, as well as nectar vs. pollen providers. A conservative starting ratio is 40% early-season, 40% mid-season, and 20% late-season bloomers. Include 10–20% sturdy evergreens for seed bank longevity and visual interest into late autumn. Test small batches to confirm germination rates in your soil. If germination lags, adjust moisture-holding materials or seed ratios. The goal is predictable, repeated blooms rather than a single spectacular flush.
Seed Coating Technologies and Germination Boosters
Coatings can dramatically affect germination timing and seedling vigor. The simplest route uses a clay-water dough that adheres seeds into ball shapes and protects them from birds. More advanced coatings can incorporate natural binders, wetting agents, and minor nutrient boosts. The right combination helps seeds stay moist, germinate quickly after rainfall, and emerge in the right season. However, coatings should be food-safe and non-toxic for wildlife. The best coatings support soil biology while keeping seed viability high.
Clay vs. Compost Coatings
Clay coatings create a gentle outer shell that holds moisture, slows desiccation, and helps seed bombs hold their shape. Compost-based coatings add microbial life and nutrients that can kick-start early growth. If you’re in a dry climate, clay-based coatings may deliver steadier germination. In moist regions, compost-based options can grant a helpful boost to seedlings. Test both on small batches to see which yields better emergence in your soil.
Incorporating Natural Germination Buffers
To improve germination timing, include tiny amounts of biochar or coconut coir to improve moisture retention. Lightly mulch seed bombs after planting to reduce evaporation. Some gardeners add powdered kelp or alga-based products for trace minerals that support root development. Keep the amounts small; you want to aid germination without overpowering the seed’s biology. Record outcomes so you can tailor future batches by climate and season.
Safety and Non-Target Considerations
Choose mixes that minimize the risk of invasive or non-native species escaping. Favor natives that are well-adapted to your local conditions and that pose low risk to surrounding ecosystems. Include seed fallbacks and avoid species with aggressive spread traits in confined landscapes. Always label seed bombs with the bloom window and site notes so you can avoid releasing species into sensitive habitats. Safety matters; responsible seed bombing protects pollinators and landscapes alike.
Garden-Level Deployment: Placement, Timing, and Maintenance
Deployment strategy is as important as seed selection. The simplest rule is to place seed bombs where they will have easy access to rainfall and natural irrigation, yet are protected from foot traffic that could crush emerging seedlings. Timing matters—align sowing with the end of dry spells and the onset of favorable temps for germination. In many temperate regions, autumn and early spring slots provide reliable moisture. In hot climates, late winter or early autumn can be ideal.
- Place seed bombs on slightly raised ground that drains well to prevent root rot.
- Space bombs in clusters to create microhabitats that attract diverse pollinators.
- Water newly planted bombs lightly during dry spells; avoid heavy irrigation that may wash away the seed coats.
- Mulch around emerging seedlings to suppress weeds and maintain soil moisture.
Maintenance is about observation, not labor. Check for signs of sprouting after rain events and adjust watering accordingly. Remove any aggressive weeds that outcompete young wildflowers, but avoid harsh weeding that can disturb shallow root systems. If deer or other herbivores are an issue, install simple protection like garden netting or barriers. The goal is to create a thriving, low-maintenance bloom mosaic that supports pollinators while remaining accessible to gardeners of all experience levels.
Biodiversity Metrics and Observing Impact
Measuring impact helps you refine techniques, defend budgets, and celebrate successes. Start with simple, repeatable observations you can track season to season. Record bloom dates, flower counts, pollinator visits, and signs of seedbomb success. These metrics translate qualitative observations into actionable insights. An ongoing log helps you optimize species mixes, coating methods, and deployment timing over time.
To make data collection manageable, create a lightweight template: bloom window, first bloom date, average blooms per plant, pollinator counts, and any pest observations. Compare year over year and note environmental conditions such as rainfall and temperature. If you want to deepen the data, consider enrollments in citizen science projects or consult local extension services for standardized pollinator metrics. For those who want a broader perspective on pollinator support, visit Xerces Society for research-backed practices and species lists.
Community and Education: Scaling Up Projects
Wildflower seed bombs shine when they become community-driven. They are powerful tools for classrooms, neighborhood associations, and conservation groups. Start with a simple plan: recruit volunteers, define roles, and map a set of target sites that maximize range and impact. Provide hands-on workshops that teach seed collection, mix design, coating, and deployment. When participants see tangible results, engagement grows and so does the likelihood of long-term stewardship.
Consider partnerships with local parks, schools, and community gardens. A shared seed bomb project can pool resources, compare outcomes across microclimates, and publish a regional bloom calendar that benefits many gardeners. Document best practices and share them publicly to boost BloomHaven’s authority and to create replicable models that others can imitate. The more people involved, the broader the ecological footprint of wildflower seed bombs becomes.
- Host seasonal seed bomb-making days to build community capital.
- Provide open-access templates for planning, materials, and maintenance schedules.
- Offer micro-grant guidance to fund local seed production and site preparation.
Public-facing documentation, like a bloom calendar and how-to guides, helps residents compare outcomes and plan future projects. The ripple effects extend beyond the garden: schools learn science and ecology, while neighborhoods experience greater beauty and pollinator activity. This is how wildflower seed bombs scale from personal hobbies to city-wide green infrastructure.
Troubleshooting and Risk Management
Even the best-laid plans encounter challenges. The following quick checks can save you time and preserve confidence in your project.
- Germination not obvious after a rain: verify coating integrity and soil moisture; adjust the mixture or season of deployment.
- Seed bombs crumble in wind: binders may be too weak; try a sturdier coating or reduce seed load per ball.
- Premature blooming with small flowers but short-lived displays: adjust species mix for longer bloom windows.
- Non-target species creeping in: reinforce native selections and monitor seed dispersal tendencies.
- Garden pests . . . consult local extension for best organic controls that won’t harm pollinators.
Future-Proofing with Seed Bombs: Climate Resilience and Urban Greening
As cities expand and climates shift, wildflower seed bombs can become a flexible tool for urban resilience. The key is selecting climate-resilient species and designing seed bombs that tolerate heat, drought, and heavy rainfall while still supporting pollinators. Start by identifying regional climate projections and aligning species choices with expected stressors. Reserve a portion of your seed bombs for experimentation with adaptive mixes that respond to changing conditions. This proactive stance helps your garden stay productive across seasons and decades.
Urban greening also benefits from modular deployment. Treat seed bombs as building blocks you can place and move as space becomes available. Combine seed bombs with rain gardens, permeable pavements, and pollinator corridors to create a holistic network that traps urban heat and fosters biodiversity. Document outcomes and publish results so others can adopt proven approaches quickly.
Selecting Climate-Resilient Species
Look for natives that tolerate heat and drought, yet provide nectar and pollen across multiple seasons. Include species with different root architectures to improve soil structure and water retention. Favor perennials that return year after year, reducing replacement costs and maintaining continuity for pollinators. Balance these choices with annuals to fill seasonal gaps and deliver quick visual impact after planting.
Water Capture and Soil Health
Integrate seed bombs with soil enhancement practices. Use compost, mulch, and cover crops to boost moisture retention and soil biology. Healthy soil supports seed germination and reduces irrigation needs. In urban settings, capture roof runoff and direct it toward planting sites when available, giving your seed bombs a reliable moisture source without overwatering surrounding spaces.
Policy and Urban Planning Alignment
Align seed bombing efforts with local urban greening strategies and green infrastructure plans. Seek partnerships with city departments, land trusts, and neighborhood associations to scale impact. Policy-aligned projects attract funding and public interest, helping to justify larger, multi-site deployments that maximize pollinator resources and community pride.
Economic and Sustainability Considerations
Smart budgeting ensures that wildflower seed bombs remain accessible and scalable. Track material costs, labor time, and maintenance once deployed. Compare the long-term value of perennials against annuals to understand true lifecycle costs. Even when working on a shoestring, you can achieve meaningful outcomes by prioritizing seed mixes with lower ongoing input needs and higher ecological returns.
- Source locally produced seed and natural binders to cut transport emissions.
- Reuse containers and coating materials where possible to reduce waste.
- Offer volunteer-driven seed production days to spread labor costs and build community ties.
Economics aside, the ecological benefits are tangible: boosted pollinator populations, enhanced habitat connectivity, and more resilient urban landscapes. In every project, document costs and benefits so you can advocate for continued support and expansion.
In summary, advanced strategies for wildflower seed bombs combine climate-aware planning, refined seed coatings, precise deployment, and community-led monitoring to maximize garden impact. Ultimately, success rests on adapting proven tactics to your local context and sharing learnings to accelerate collective progress.
Conclusion
Wildflower seed bombs offer a practical, scalable path to richer pollinator habitats, more vibrant borders, and resilient landscapes. By integrating microclimate-aware blends, thoughtful coatings, careful deployment, and community partnerships, you can achieve consistent blooms and measurable biodiversity gains. The Focus Keyword appears throughout this final section to emphasize the core idea behind this article: wildflower seed bombs. Begin with small pilot projects, track outcomes, and scale up as confidence grows. Ready to transform your garden into a pollinator-friendly landscape? Start today with a hands-on seed bomb project, invite neighbors to participate, and share your results with BloomHaven readers. Your wildflower seed bombs journey begins now, and the potential for beauty and biodiversity is limitless.