Flower Drying Silica: Quick Guide to Preserving Blooms
Flower Drying Silica Fundamentals for Gorgeous Dried Blooms
flower drying silica is a trusted method for preserving the shape, color, and delicate edges of blooms. If you’re new to flower drying silica, you can start with peonies or statice and build to more complex subjects. In this guide, we’ll cover fundamentals that guarantee stunning, museum-worthy dried arrangements. From choosing the right gel to managing color retention, you’ll learn practical steps you can apply today. In addition, this section lays a solid foundation for the techniques covered in Part 2 and beyond, helping you set up a successful drying routine that fits your space and climate.
What is flower drying silica: fundamentals and benefits
Silica gel is a desiccant that traps moisture without crushing petals. When used for drying flowers, the gel surrounds the bloom and slowly draws water out. Therefore, understanding the basics of how silica works is essential for predictable results. In addition, silica drying reduces the risk of mold in humid environments and supports even drying across delicate structures. Crucially, the gel’s porous matrix provides gentle support, allowing petals to retain their natural curves and textures while colors stay more vibrant than with air-drying alone.
In practice, you’ll usually place a bloom face-up or face-down in a container filled with silica gel crystals or beads. As moisture migrates into the gel, the bloom becomes firm and recognizable. The key advantage is control: you can schedule when to check the bloom and how long to leave it in the gel, leading to consistent outcomes across different species.
Types of silica for drying: crystals, beads, and color indicators
There are several forms of silica media, and they each have nuances for flower drying silica projects. Crystalline silica gel is the traditional choice, offering rapid moisture absorption and good resilience. Silica beads provide a looser structure that can accommodate larger blooms or those with extended petals. Some products include color-changing indicators that reveal when the gel is saturated, which helps you time your drying window more precisely. Therefore, selecting the right form depends on bloom size, porosity, and how delicate the petals are. In addition, consider how easily you can recondition the gel for multiple uses.
For growers focusing on color retention, a gel with a gentle, uniform pore distribution tends to yield more even tones across the petals. Crucially, you’ll want to avoid overcrowding the container; space around each bloom ensures efficient moisture exchange and reduces the risk of paste-like spots forming in dense packs.
To support your learning journey, you can consult practical guides like The Old Farmer’s Almanac: How to Dry Flowers for complementary methods and tips.
Choosing the right silica gel for flower drying silica projects
When you pick silica media, prioritize particle size, absorption rate, and reusability. For most garden blooms, medium-sized crystals or beads offer an optimal balance between speed and support. If you’re drying thin, fragile petals such as poppies or ranunculus, a softer, more open gel structure reduces the risk of petal crumpling. In addition, consider whether you want a color indicator; it is a helpful cue for beginners and saves guesswork. Crucially, reusability matters for value and sustainability—look for products you can reuse after a gentle recondition cycle in the oven or microwave as directed by the manufacturer. Furthermore, store the gel in a dry, cool place to maintain its performance between sessions.
Always follow the manufacturer’s safety guidelines when handling silica media, including avoiding inhalation of dust and using protective equipment as needed. For a reliable, easy-to-reference starting point, many hobbyists turn to ready-made silica kits designed for floral drying, which streamline setup and cleanup.
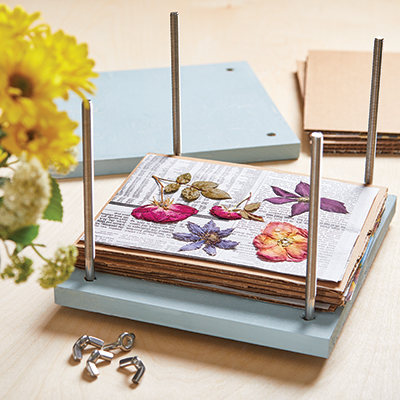
Step-by-step guide to the classic silica drying method
Crucially, a methodical approach yields consistently beautiful results. In this section, we outline a reliable workflow you can adapt to many bloom types and sizes. The steps below assume medium-sized silica crystals or beads and a standard round or square container.
- Prepare your workspace: clean the area, have gloves and a scoop handy, and choose a container tall enough to accommodate the bloom without bending the stem.
- Prep the blooms: trim stems to a workable length and remove excess foliage. If a bloom is very wide, you may want to position it diagonally to prevent crush along the petals.
- Fill the base: lay a shallow layer of silica gel at the bottom of the container. This base cushions the bloom and supports its orientation.
- Position the bloom: place the bloom face-up or face-down as required by your subject. For layered blooms, you might set petals to follow their natural contours.
- Cover with gel: gently pour or spoon silica gel around and over the bloom. Leave enough space to avoid crushing.
- Seal and wait: seal the container to minimize moisture exchange with the room. Depending on the bloom, drying times range from 24 to 72 hours. Therefore, check gently for stiffness rather than relying on a fixed timeframe.
- Evaluate and cure: once the petals feel firm to the touch, carefully remove the bloom and brush away any gel dust. Some blooms benefit from a second round for deeper color retention or restored curl.
In addition to the standard method, you can experiment with film or parchment overlays for especially delicate pieces to prevent contact with the gel, which helps maintain brightness and shape. For safety and best practices, always cool the gel after heating and dispose of spent material according to local regulations.
Preparation and handling tips for best results
Preparation is half the battle. In the weeks before drying, harvest blooms at their peak to maximize color and shape. In addition, avoid blooms that are already wilted or damaged, as these imperfections can become more pronounced after drying. Place stems in water briefly to hydrate before drying, but ensure blooms are not waterlogged, which can cause mold or spotting during the silica phase. Crucially, the room temperature and humidity of your workspace influence drying speed and outcome, so create a stable environment to minimize surprises.
During the process, keep a close eye on temperature and moisture. If the gel begins to clump with damp spots, reassess the bloom’s position and consider a longer gel exposure if necessary. If your goal is to maximize color retention, consider adding a light glaze or a finishing spray after curing to lock in tones, but test on a small sample first to avoid altering texture.
Common pitfalls and how to avoid them
Even with the best technique, you can encounter challenges. Common issues include petal curling, loss of shape, and color bleeding. In many cases, these problems arise from overcrowding, uneven gel distribution, or excessive heat exposure. Therefore, space each bloom adequately and use a medium with consistent absorption. In addition, begin with a few trial blooms before scaling up to larger batches, which helps you refine your timing and positioning.
Crucially, some pigments fade faster than others. For instance, blues and purples may shift slightly, while pinks often hold their hue well. If color shift is a concern, dry in small batches and monitor daily. Likewise, keep humidity in check by sealing containers and storing them away from direct sunlight until you’re ready to display the finished pieces.
Color, texture, and aroma: what to expect with silica drying
When done correctly, silica-dried blooms retain a convincing color and soft texture that closely resemble their fresh state. In many cases, the petals keep gentle curvature, the edges stay crisp without becoming brittle, and the leaves maintain their shape longer than with air-dried methods. However, don’t expect a perfect replica; silica can slightly alter translucence and weight. Therefore, treat each bloom as a unique case and adapt your approach accordingly. Additionally, fragrance may soften during drying; you can mitigate this by drying aromatic varieties with a simple finishing spray after curing if desired.
To maximize your results, catalog each batch with notes on bloom type, gel form, and timing. This log will help you refine your technique over time and reproduce successful outcomes consistently.
With these fundamentals, you’re prepared to explore more advanced techniques and species in Part 2, where we’ll tailor silica usage to the specific needs of popular garden blooms and craft projects.
For more ideas on how to structure your drying setup and to see real-world examples, explore additional resources at The Old Farmer’s Almanac: How to Dry Flowers.
Crucially, the next section delves into species-specific considerations, scenario planning, and practical workflows that extend the silica method to a wider range of blooms. In Part 2, we’ll match bloom types to the right silica approach, optimize timing, and share project-ready layouts for dried arrangements.
Mastering the Flower Drying Silica Method with Actionable Steps
The flower drying silica method offers a reliable route to preserve petals, colors, and forms with impressive fidelity. In this section we lay out actionable steps you can follow today, from selecting blooms to safely finishing dried arrangements. By using silica gel, you lock moisture within the petals, preventing the distortion that often comes with air drying. With careful layering and timing, you can capture the delicate shapes of daisies, peonies, and wildflowers alike, while maintaining fragrance and vivid hues that inspire next-season bouquets. This guide keeps the focus on the keyword flower drying silica and integrates practical tips that work for hobbyists and professionals alike.
Understanding the silica method basics
The flower drying silica method uses a desiccant to wick moisture from petals. Silica gel crystals surround each bloom and gradually replace water in the tissue. This process preserves shape better than many other methods. The result is a bloom that holds its form with surprising accuracy, and colors that stay lively even after weeks of drying.
Remember, the goal is to control moisture removal evenly. When used correctly, silica drying silica can guard against curling and sunken centers. For many flowers, the silica drying silica yields a balanced silhouette that shows off the bloom’s natural architecture. As you practice, you will learn which blooms tolerate deeper embedding and which respond best to shallower layers.
Preparing materials and workspace
Set up a clean, dry workspace with good airflow. Gather high-quality silica gel rated for flower drying, a sealable container, a tray or shallow pan for catching drips, and a small scoop or spatula. Choose a container size that matches your blooms; large blooms may need a deeper pit, while small blooms fit into compact boxes. Keep a timer nearby and label each project to avoid mix-ups. Store silica gel in an airtight bag when not in use to preserve its effectiveness. This preparation saves time later and reduces frustration as you work through the process.
Ventilation matters because silica dust can irritate the eyes and lungs. Wear a mask if you are sensitive, and minimize dust by handling the gel gently. Avoid aggressive movements that kick up dust. The workspace should be cool and dry; humidity can compromise the gel’s performance. With your area ready, you can focus on the flowers themselves and the precision of the embedding steps.
Choosing flowers for silica gel drying
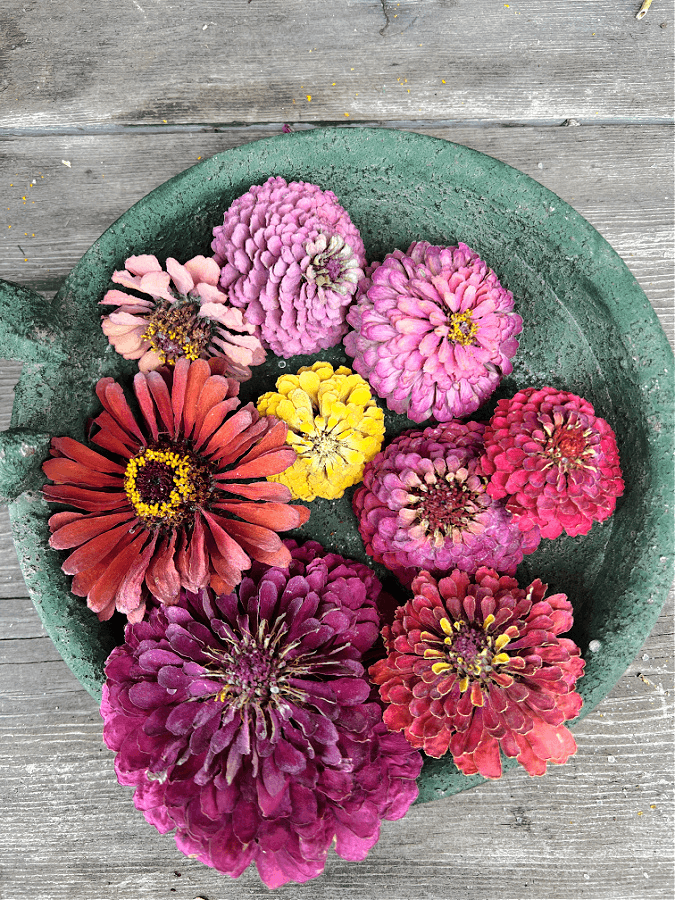
Not all flowers react the same to silica gel, so choose blooms with sturdy petals and strong structure for best results. Roses, daisies, and celosia often respond well, while delicate morning glories or arching stems may require extra support or a gentler approach. The key is to think about petal thickness, bloom size, and two-dimensional form. For example, a peony may require more gel depth to support its round head, while a small lavender bloom may dry beautifully with minimal embedding. The choice of flower directly influence drying time and final appearance, so plan your bouquet with intention and patience. For color-rich, preserved-hue results, you will want blooms that hold pigment under desiccation.
For a practical reference, review materials from reputable sources; for a trusted overview, see the University of Minnesota Extension’s guide on drying flowers: University of Minnesota Extension: Drying Flowers. This step helps you align expectations with the specific behavior of each species and avoids over-embedding or under-drying. As you select candidates, consider whether you want to preserve shape, color, or scent, and choose your blooms accordingly.
Step-by-step: layering, embedding, and timing
The core of the flower drying silica method is deliberate layering and careful embedding. Begin with a thin base layer of gel in the container; this anchors the bloom while preventing it from sinking. Gently place the bloom on this layer with the petals facing upward to reduce crush risk. Next, slowly pour or sprinkle silica gel around and over the bloom until it is fully surrounded. Use just enough gel to immobilize without applying excessive pressure on petals. This helps prevent distortion during dehydration and keeps the bloom’s natural contour visible as it dries.
When embedding multiple flowers, maintain consistent depth for each bloom. Uneven embedding can cause one bloom to dry flat while another remains puffy. After embedding, lightly tap the container to settle gel around the blooms and remove any visible air pockets. Finally, seal the container and place it in a cool, dry area away from direct sunlight. The timing depends on many variables but most blooms fall in a 24 to 72 hour window. Patience matters, and checking gently once in a while prevents surprises.
Embedding technique and air removal
Air pockets are the enemy of a clean silhouette. If you see pockets, adjust by adding more silica gel around the edges and near the petals. The goal is a snug fit that immobilizes each bloom without crushing. When feasible, use a small tool to nudge the gel so it fills gaps without bending petals. In this stage, the silica gel acts as a mold, preserving the bloom’s geometry. Specifically, the gel’s crystalline structure supports curved stems and three-dimensional shapes that might otherwise sag as moisture leaves the tissue.
Work calmly and deliberately. Quick shuffles create micro-cracks in the petals and degrade color. Take time to check alignment after the first few hours, then re-shape if needed. As you gain experience, you will notice which blooms tolerate compact embedding and which require a bit more space for the petals to breathe during the drying process. Remember that consistent depth across blooms yields the most uniform results in the final display.
Timing, moisture control, and color dynamics
Timing is a moving target. Some petals release moisture fast, others slowly. For sturdy blooms like roses or peonies, plan for 24 to 48 hours. Lighter flowers may finish in under 24 hours, while larger heads can extend to 72 hours. Inspecting the gel is a clue: when the gel around the bloom appears evenly dry and the petals feel stiff and cool to the touch, the drying is near complete. Do not rush the process; over-drying can cause brittleness and color loss. If color shifts occur, reduce exposure time next batch or adjust the gel-to-bloom ratio for more gentle moisture removal.
Color retention is a major advantage of the silica method. Silica gel is inert and preserves pigments well, ensuring reds stay vibrant and blues stay punchy. In practice, you may still see subtle color shifts, especially with highly pigmented species. If scent matters to you, know that some blooms retain fragrance while others lose it during drying. For aromatic blooms, consider a shorter drying window or a sealed display to trap the fragrance without compromising the silhouette.
Testing dryness and curing
Test dryness without pulling on the petals. A gentle wiggle can reveal stiffness; the bloom should resist deformation but not crumble. If any petal yields, the bloom needs more time. After the initial drying phase, transfer the blooms to a fresh, dry environment for curing. This step stabilizes shape and color and reduces risk of warping once you move the pieces into their final display. The curing period can last a few days, during which you should revisit the blooms briefly to ensure no stray moisture pockets form. If a bloom feels soft or shows signs of dampness, return it to the gel for a few more hours.
Color retention, finish, and edge care
After drying, inspect each bloom for uneven edges or crinkling and decide whether you want to trim tattered edges for a cleaner look. You may also want to brush off residual silica dust with a soft brush or your gloved finger. Always handle fragile petals with care; the gel can leave delicate scratches if you grip too firmly. Some blooms benefit from a light sealing spray to lock colors in place; if you choose this route, test on a small sample first and apply in a well-ventilated area. The result should be a display piece that looks fresh while preserving its natural texture. If you aim for a matte or satin finish, you can adjust your post-drying care to emphasize that look without diminishing the bloom’s form.
Troubleshooting common issues
Common issues include color fading, curling petals, and uneven drying. If colors bleed, re-check your silica gel freshness and ensure the gel is not overly damp at the start of the process. For curling petals, ensure the embedding depth is uniform and avoid placing blooms too close to the container’s rim where heat may accumulate. If flowers dry unevenly, try increasing the depth of the gel at the edges so outer petals receive similar support as inner parts.
Another frequent problem is silica gel clumping, which can trap moisture and distort shapes. If you notice clumping, sift the gel lightly once a day to prevent large crystals from forming around delicate petals. Throughout the process, keep notes about bloom type, depth of embedding, and drying times; this simple log will save time in future projects and help you tailor techniques for specific flowers. If you encounter persistent issues, consider trying a slightly different gel ratio or container size to maintain consistent pressure and depth. This iterative approach yields reliable, repeatable results over time.
Safety, cleanup, and storage
Silica gel is generally inert but can irritate the skin or eyes if mishandled. Wear gloves if you handle large amounts, and keep gel away from children and pets. After you finish a batch, seal the used gel bag tightly for disposal according to local guidelines; you can reuse gel that has not absorbed much moisture but discard crystals that have changed color or clumped, as they indicate reduced effectiveness. Clean the working surface with a damp cloth to remove any silica dust and let the container air out before storing. For long-term storage, keep dried blooms in a cool, dry place away from direct sunlight to avoid fading and brittleness. This careful handling helps maintain the quality of your dried specimens for months or even years.
Looking ahead, the next part will cover troubleshooting and variations, helping you adapt the silica method to particular blooms, sizes, and color goals. In Part 3: Troubleshooting the Silica Method and Variations, we dive into common challenges and adjustments that yield consistent results across a broader range of flowers.
Alternative layering techniques for delicate blooms
For fragile petals, such as poppies or peonies in certain forms, you can experiment with lighter embedding and focusing on central areas. A small, shallow pit allows petals to lift naturally as the gel sets. Try partial embedding where only the base is covered, allowing tips to protrude slightly for a more dynamic silhouette. This approach reduces pressure points and preserves asymmetry that can be visually striking in arrangements. In all cases, test a sample first before committing to a full batch to ensure color and shape align with your goals.
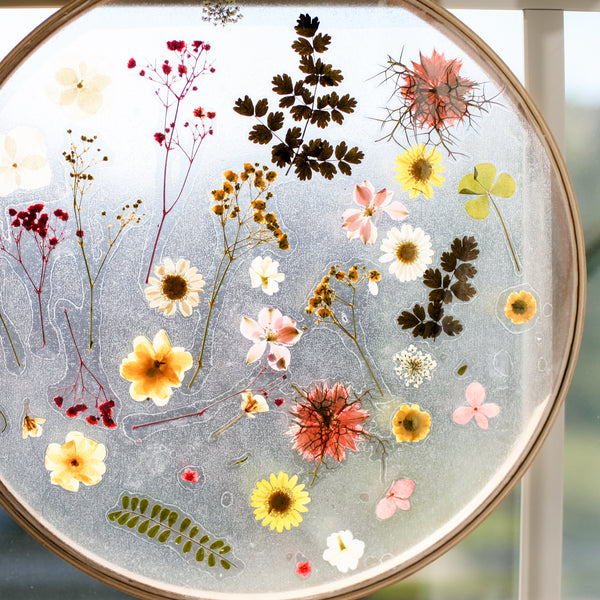
Storage and display options after drying
Dry petals can be stored in airtight boxes with tissue to cushion edges and avoid movement. A small amount of desiccant in the storage container can help control humidity. When ready to display, consider framing, shadow boxes, or pressed-curtain displays to maximize the preserved form. If you plan to dust or spray, do so with non-yellowing products inside a ventilated space. The aim is to present the dried blooms as living pieces of art that capture memory and color without becoming brittle prematurely.
In practice, you will build a small library of blooms dried with the silica method and learn how each variety behaves in storage and display. The key is to keep records about bloom type, container size, gel quantity, and drying times; this data helps you replicate successes and refine techniques over time. As you gain confidence, you may begin to mix bloom families in a single project, creating layered compositions that showcase texture, contrast, and color harmony.
Finally, remember that practice compounds precision. Each batch teaches you more about embedding depth, gel hydration, and the subtleties of color retention under varying light conditions. With dedication, your dried florals will become reliable, beautiful accents for wreaths, arrangements, and artful displays.
Advanced Tips and Final Guidance on Flower Drying Silica
In this final section, we consolidate the best practices for using flower drying silica, focusing on precision, safety, and sustainability. The aim is to empower gardeners and florists to achieve consistent, museum‑grade results with minimal waste. Whether you’re drying roses, peonies, dahlias, or wildflowers, the tips here center on reliability and repeatability. Ultimately, adopting a structured workflow will save time, reduce failures, and elevate your dried arrangements for months to come.
To begin, understand that success hinges on a deliberate combination of material choice, method, and post‑treatment care. In the following subsections, you’ll find actionable guidance that translates into repeatable outcomes, even if you are working with a mixed bouquet. In addition, we address common pitfalls so you can troubleshoot before you waste precious blooms.
Mastering Silica Gel Selection for Flower Drying Silica
Choosing the right silica gel for flower drying silica starts with recognizing how bead size, absorption capacity, and moisture indicators influence outcomes. Silica gel sachets range from fine, color‑indicating beads to coarser granules. The bead size matters because smaller beads cushion delicate petals while preserving shape, whereas larger beads allow faster moisture exchange for tougher flowers. Therefore, aligning bead size with bloom type is a practical first step toward consistent results.
Additionally, color‑changing silica gel can help you gauge saturation without lifting the lid repeatedly. When the beads shift from orange to green or pink to blue, you have a visual cue about the remaining drying capacity. However, color indicators are aids—not guarantees—so use them in conjunction with timing estimates and bloom type knowledge. In short, pick a silica gel brand that offers a reliable indicator, and keep a small, labeled stash to match the bouquet you’re drying.
When selecting silica gel, consider two main grades: fine beads for thin petals and standard beads for mid‑weight blooms. For robust botanicals like peonies or dahlias, medium to coarse beads can speed up drying while maintaining structure. If you are new to flower drying silica, test a few blooms with both bead sizes to observe which yields the most faithful shape and color retention. Ultimately, the right gel choice reduces trial and error and accelerates your learning curve.
For a quick primer on silica gel basics, see silica gel overview. This non‑competitive resource helps you understand the material at a glance without distracting from your practical workflow.
Understanding Silica Gel Grades and Absorbency for Flower Drying Silica
Silica gel comes in absorbency ratings and pore structures that influence how quickly it draws moisture from blooms. High‑porosity beads absorb water more rapidly but can also strip color and tume flowers if left too long. Conversely, lower porosity beads offer a gentler, longer drying period that helps preserve petal integrity and hue. When planning a drying session, choose a medium absorption level for most garden varieties and adjust based on bloom density and stem thickness. In practice, you’ll often start with medium beads and shift to finer beads for sensitive florals as you refine your technique.
Another critical factor is the ambient environment. If your workspace is humid, even high‑quality beads may saturate slowly. Therefore, consider your room’s humidity alongside bead selection. As a rule of thumb, drier rooms shorten drying times and lessen the risk of limp petals. In contrast, humid conditions demand a slightly longer run or a two‑stage approach, where you allow initial moisture loss before final stabilization with silica. Consequently, grading your beads by absorbency and pairing them with the room environment yields robust, repeatable results.
To reduce confusion, catalog your bead types and outcomes. Create a quick note card for each bloom type, recording bead size, expected drying time, and visual cues you observed. Over time, this catalog becomes your go‑to guidance when you prepare mixed bouquets. Ultimately, consistent labeling and tracking expedite decisions and improve your overall drying success.
Reusable vs One‑Time‑Use: Is Reuse Practical for Flower Drying Silica?
Reusability is a practical consideration when you plan long‑term drying projects or want to minimize waste. Dried silica can be regenerated by baking, which releases trapped moisture and restores absorption capacity. The basic principle is simple: apply heat to the beads, and they release absorbed water as steam. However, you must follow safe, proven steps to avoid damaging beads or releasing dust into your workspace.
When contemplating reuse, weigh the cost of new silica gel against the energy and time required for baking. For small hobby projects, it may be more convenient to refresh your beads with a fresh batch rather than bake multiple times. For larger studios or ongoing seasonal work, regeneration becomes a cost‑saving technique that pays off over time. In practice, you can bake silica gel beads at a moderate temperature for a set period, then cool them completely before storing. If you notice a persistent odor or color remnants after regeneration, replace the beads to maintain drying accuracy. In summary, reuse is feasible and beneficial for steady workloads, provided you follow validated regeneration steps and monitor performance after each batch.
As you implement reuse, keep a log of baking times and temperatures. A simple, repeatable protocol reduces variation and keeps your results predictable. If you encounter reduced effectiveness after several cycles, it is time to retire that batch and start fresh. Ultimately, adopting a disciplined reuse routine helps you balance efficiency with quality in the long run.
Process Precision: Timing, Temperature, and Layering
Timing, temperature, and layering are the trio that determines whether your flower drying silica yields pristine, preserved blooms. Start by defining a standard timeline based on bloom type, thickness, and desired finish. Then, adjust temperature and exposure to align with that timeline. Finally, optimize the layer arrangement to ensure even contact and consistent drying across all petals and stems.
Timing: How Long to Leave Blooms in Flower Drying Silica
Time is the most forgiving ally when you understand bloom density and moisture content. Delicate flowers like anemones or cornflowers may require shorter intervals, while denser blooms like ranunculus or roses may benefit from longer exposure. A practical approach is to plan a baseline drying window—such as 2 to 5 days for many yard blooms—and check daily. Instead of a single long session, many florists employ staged checks: mid‑way verification, final assessment, and a light reshuffle to equalize contact. By integrating these checkpoints, you minimize the risk of collapsing petals and uneven dryness. In addition, use a wooden or plastic spatula to gently lift petals for a quick inspection rather than removing the entire bloom. Ultimately, disciplined timing reduces guesswork and yields uniform results across varieties.
Layering and Contact: Achieving Even Drying
Layering is more than aesthetics; it governs contact between petals and silica beads. A shallow, evenly spread layer allows beads to touch every surface of the bloom. When drying a bouquet with mixed shapes, consider removing heavy stems or reorienting petals to maximize surface contact. If beads settle unevenly, gently tap the container to re‑establish contact rather than shaking the container, which can crush delicate petals. For tall stems, use a second container or a divider inside the same vessel to keep blooms upright and in contact with silica. In short, even layering prevents air pockets that slow drying and cause distortions. Ultimately, consistent layering is a straightforward but powerful way to improve results across multiple bloom types.
Temperature and Humidity Targets for Best Results with Flower Drying Silica
Ideal drying temperatures typically fall between 70–90°F (21–32°C), with relative humidity kept low in the surrounding room. If your space is cooler, drying takes longer; if it’s too warm, you risk color loss or brittleness. Humidity control matters because high ambient moisture competes with silica’s ability to draw water from petals. A fan or dehumidifier can help maintain a stable microclimate around the container. When you notice condensation or damp beads on the surface, pause, shift the blooms to dryer conditions, and allow the beads to regain capacity before continuing. To conclude, create a predictable climate for drying by balancing temperature and humidity, and you’ll consistently preserve form and color across a wider range of species.
Maintenance, Safety, and Sustainability
Maintenance and safety are essential for reliable results and a responsible workflow. Incorporate routine checks, protective practices, and thoughtful disposal methods to protect your workspace and environment. Additionally, consider sustainability practices that extend beyond a single drying session. Ultimately, a well‑maintained process saves time and reduces waste, letting you focus on artistry rather than troubleshooting.
Maintaining Silica Gel: Bake, Refresh, or Reuse for Flower Drying Silica
Regular maintenance keeps silica gel performing at its best. If you are using color‑changing beads, monitor saturation and plan regeneration when indicators shift toward saturated tones. Baking is a reliable regeneration method; however, you must follow recommended temperatures and durations to avoid scorching or damaging beads. A practical approach is to bake evenly distributed beads at a moderate temperature for 4–6 hours, then cool completely before reusing. For smaller batches, you can rejuvenate beads in a dedicated oven tray and inspect them for cracks or clumping before reusing. When beads form hard clumps or emit a strong odor, replace them—this is a sign that absorption capacity has degraded. In short, regular maintenance ensures the silica gel remains an effective workhorse for flower drying silica and sustains your workflow over the long term.
Safety Considerations When Handling Silica Gel
Silica gel is generally safe when used as directed, but it requires basic precautions. Avoid inhaling fine dust when pouring beads during setup or regeneration. Work in a well‑ventilated area and wear a mask if you handle large volumes. Keep beads away from curious children and pets who might mistake them for candy. Use gloves if you frequently handle the gel to prevent skin irritation, especially when the beads are very dry and dusty. Do not heat or bake mixtures that contain damaged or contaminated beads, as they may release dust or compromise the product’s integrity. In addition, always follow the manufacturer’s guidelines for temperature limits and regeneration cycles. Ultimately, maintaining safety standards ensures that your flower drying silica practice remains pleasant and risk‑free for you and your household.
Eco-friendly Disposal and Upcycling Silica for Sustainability
After a long drying season, consider sustainable disposal options. If disposal rules permit, you can reuse silica beads in soil drying or as moisture absorbers in closets, instrument cases, or toolboxes. Visualize a simple upcycling cycle: harvest blooms, dry with silica gel, store dried materials, then reuse beads for future projects or donate surplus beads to craft groups. When beads are near end‑of‑life, replace them with a new batch and retire the old beads in an appropriate waste channel. This approach reduces landfill impact and supports a circular workflow for your flower drying silica projects. In addition, you can explore upcycling ideas like creating decorative sachets by sealing dried petals within breathable fabric. Ultimately, sustainable practices transform drying into a mindful, low‑waste craft that aligns with eco‑friendly gardening and floral design.
For further guidance on safe handling and disposal, consider consulting reputable sources and following local waste guidelines to keep your studio green and compliant.
Troubleshooting Common Challenges
Even with a meticulous workflow, you may encounter challenges. The key is to diagnose quickly and adapt your approach. The following troubleshooting tips address several frequent issues you might see when using flower drying silica.
Flowers Not Flattening Correctly or Deteriorating
When petals curl, crinkle, or lose shape, the likely culprits are excessive heat, uneven contact, or overly aggressive handling. Start by verifying the ambient temperature and humidity; adjust as needed to reduce stress on the petals. Next, check the bead distribution—are there air pockets or gaps under the blooms? If so, re‑layer and press gently to reestablish contact. Finally, inspect the bloom for intrinsic moisture content. Very moist flowers often require a longer drying window or a lighter initial press to preserve form. In practice, patience and careful observation yield the best reshaping outcomes, especially for delicate species. To conclude, re‑evaluate temperature, layering, and handling to restore flattened, true‑to‑life petals in subsequent attempts.
Color Changes and Odor in Silica Packs
Color shifts can occur due to pigment leaching or extended exposure. If colors dull or shift unexpectedly, reduce drying time or switch to finer beads to minimize pigment loss. Odor indicates moisture retention or contamination; regenerate beads or replace them to reestablish a neutral odor profile. Additionally, ensure your workspace is well ventilated during regeneration and storage. In summary, monitor color stability and odor to preserve bloom brightness and fidelity in your dried arrangements.
Uneven Drying: Troubleshooting Fill and Contact
Uneven drying often stems from inconsistent bead contact or overcrowded containers. Rebalance by redistributing beads to ensure plants touch beads on all surfaces. If necessary, remove some blooms to create space and encourage more uniform moisture removal. For tall stems, consider anchoring the bouquet with a support inside the container to keep blooms upright and evenly exposed. By addressing contact and spacing, you’ll minimize warping and achieve consistent results across the full bouquet. Ultimately, precise layering and mindful placement are your best antidotes to uneven drying.
To conclude this troubleshooting guide, maintain a calm, methodical approach. Small adjustments in contact, timing, and environment yield large improvements over time. With practice, you’ll be able to diagnose most issues in minutes and keep your drying schedule on track.
Conclusion: Bringing It All Together and Your Next Steps
Throughout Advanced Tips and Final Guidance on Flower Drying Silica, you have learned how to select the right silica gel, optimize absorption, and fine‑tune timing, temperature, and layering for dependable outcomes. You now understand the balance between bead size and bloom type, how to reuse silica gel responsibly, and how to maintain a safe, sustainable workflow. Importantly, you’ve gained practical strategies for maintenance, safety, and troubleshooting that protect your blooms and your workspace. In summary, the focused practice of using flower drying silica with a deliberate, repeatable system yields consistently beautiful dried flowers, regardless of the season. For a quick summary, remember: choose the right silica gel, layer evenly, monitor timing, and maintain your equipment with care. This final guidance is designed to empower you to craft enduring floral art from even the most fragile blooms. To take the next step, implement these tips in your drying routine this weekend, document your results, and share your success with your community. And as you refine your technique, return to this guidance to refresh your approach and keep your skills sharp. In conclusion, applying these proven steps for flower drying silica will help you preserve blooms with confidence and consistency, turning fresh blossoms into lasting keepsakes that celebrate the spring and summer garden all year long. For more inspiration and practical tips, explore BloomHaven’s ongoing coverage of cabbage crush, wildflowers, peonies, and pollinator plants to align your drying projects with current 2026 Pinterest trends and sustainable gardening practices.