Dried Flower Ornaments: DIY Floral Crafts Guide
Whether you’re a hobbyist florist or a DIY crafter, dried flower ornaments offer a way to keep garden color alive year-round. This BloomHaven guide introduces the foundations—essential techniques, practical tools, and smart practices—that turn simple stems into lasting, decorative pieces. By mastering a few time-tested methods, you can create delicate keepsakes that echo cottage gardens and modern interiors alike.
In this Part 1, we focus on the core techniques and the toolbox you’ll rely on from project to project. You’ll learn how to choose blooms for longevity, the best drying and pressing methods, and how to preserve color and form so your ornaments remain vibrant for seasons. The goal is clarity, efficiency, and beauty—so your first projects build confidence rather than frustration.
Whether you plan wall hangings, tabletop charms, or seasonal wreaths, these foundations set you up for success. As you practice, you’ll also discover how micro-choices—like stem length, layout, and sealing—affect the final look. Let’s begin with the building blocks of quality dried flower ornaments.
Dried Flower Ornaments Foundations: Essential Techniques and Tools
Foundations for Dried Flower Ornaments
Foundations are about balance, color harmony, and longevity. When you design with dried flower ornaments, you’re repurposing dead blooms into lasting accents. The essential principle is rhythm: alternate textures and tones so the piece reads from a distance and rewards close inspection. Start by visualizing the ornament as a small composition with a clear focal point, a supporting cast, and a quiet background. Practice with three simple color stories: soft pastels, bold contrast, and earthy neutrals. Each palette guides bloom selection and placement, ensuring your finished piece feels cohesive rather than cluttered.
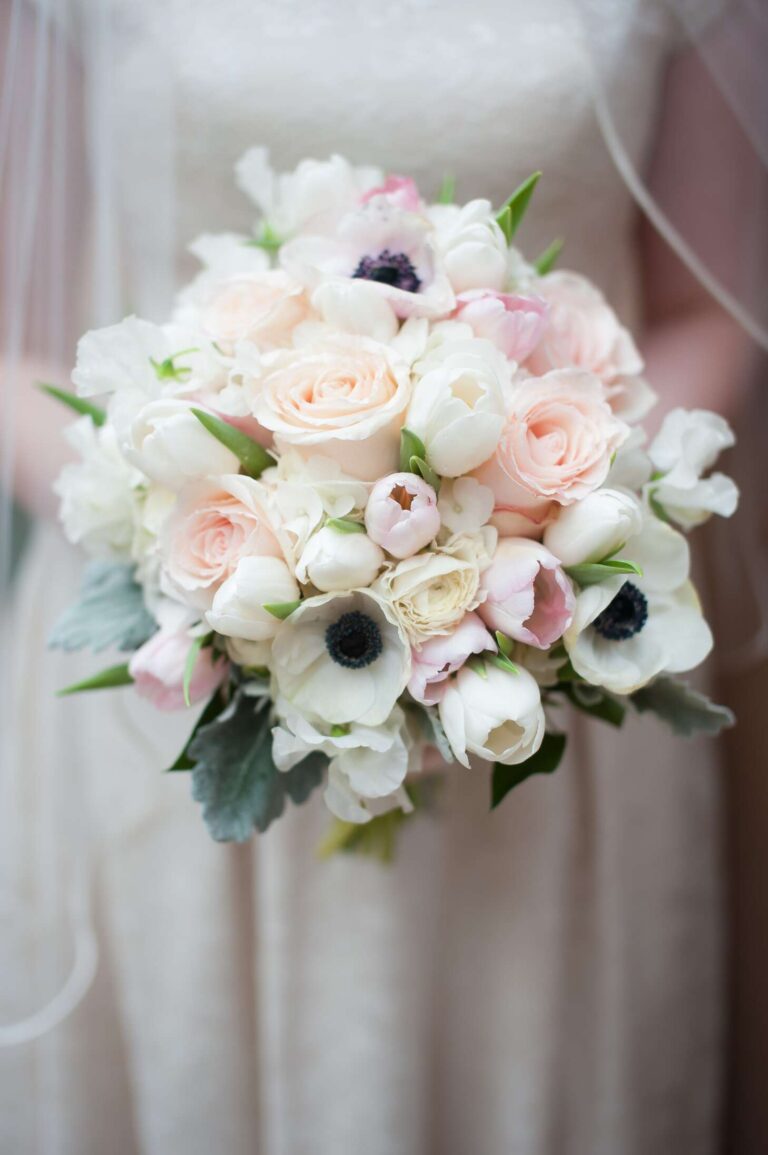
Choosing the right blooms is as important as arranging them. In 2026, Pinterest trends favor airy textures, wildflower silhouettes, and peony-inspired softness—elements that translate beautifully into dried forms. For longevity, prioritize blooms that dry with shape retention and color stability. Avoid blooms that crumble or fade quickly unless you enjoy frequent reassembly. The result should be ornaments that look good on day one and still feel fresh after months on display.
Practical design tips: keep a limited color range per piece to avoid visual noise; mix light, mid, and dark tones to create depth; and leave a little negative space so individual stems can breathe. In addition, plan for mounting or hanging hardware so weight is evenly distributed. With these foundations, you’ll approach each project with confidence and clarity.
To deepen your understanding of drying science and color preservation, check a trusted guide on flower drying methods such as How to Dry Flowers from The Old Farmer’s Almanac. It complements these techniques with practical tips and safety notes.
Selecting Flowers for Dried Flower Ornaments
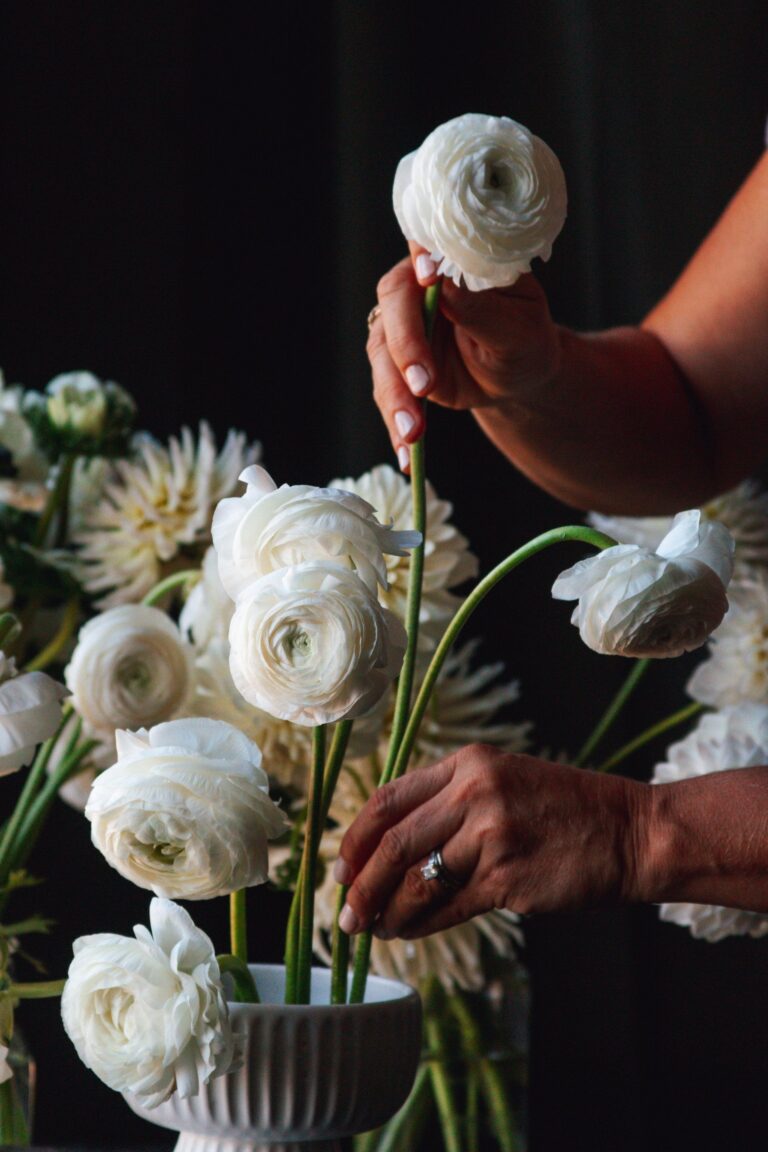
Not all blooms dry well. Favor sturdy petals, buoyant shapes, and blooms that resist limpness during drying. Good candidates include statice, lavender, baby’s breath (Gypsophila), eucalyptus foliage, and poppy seeds. Roses, ranunculus, and peonies can also translate beautifully when dried but require gentler handling. Consider the final silhouette—long stems for hanging arrangements, compact sprays for wreaths, and flat-topped inflorescences for pressed-forward looks.
- Statice: maintains color well and holds its shape.
- Lavender: preserves fragrance and a delicate silhouette.
- Baby’s breath: adds airy texture and lightness.
- Eucalyptus: adds foliage form and a subtle blue-green hue.
- Roses and ranunculus: rich color and petal texture when dried carefully.
When possible, harvest blooms at their peak, ideally in the morning after dew has dried. Remove leaves low on the stem to prevent rot during drying. Trim stems to consistent lengths if you plan to bundle several sprigs together for a cohesive look.
Drying and Pressing Methods for Dried Flower Ornaments
There are several reliable paths to dry flowers, each with its own time frame and best-use scenario. Air-drying in bundles is simple and economical; it preserves natural color and texture but takes longer and requires controlled humidity. Pressing creates a flat, matte finish ideal for embedded or framed pieces. Silica gel speeds up drying while helping petals retain form, though it’s a bit more equipment-intensive. A quick summary follows:
Air-drying: Gather stems into small bundles, hang them upside down in a dark, dry space. Expect 1–3 weeks depending on humidity. Keep bundles off the floor and away from direct sunlight to prevent color fade.
Pressing: Place blooms between parchment sheets inside a heavy book or a dedicated flower press. Change parchment every few days if the flowers are thick. Pressing works well for flat ornaments you’ll mount on a background or embed in a clear layer.
Silica gel drying: Submerge blooms in silica gel, which absorbs moisture quickly and preserves three-dimensional shape. This method typically takes 24–48 hours for small blooms and longer for larger petals. Use silica with care to avoid crushing delicate petals.
Crucially, after drying, handle blooms with clean, dry hands or tweezers to prevent oils from dulling surfaces. For color retention, minimize light exposure during storage and display. For more on structured drying methods and timing, consult practical guides on floral preservation and experiment with small tests before committing a full piece.
Preserving color and texture is as much about post-drying handling as the drying method itself. A light spray of a matte sealant can reduce color shift and keep petals from becoming brittle with age. Avoid overcoating; a subtle finish is typically more faithful to the original bloom. Rely on tested products designed for floristry and craft use, and always test on a single bloom before treating your entire ornament.
Preserving Color and Texture in Dried Flower Ornaments
Color fade happens when blooms are exposed to bright light or high heat. Display dried flower ornaments away from direct sun, radiators, and humid environments. Choose substrates and seals that complement the bloom’s hue rather than masking it with overly glossy finishes. A soft, satin or matte sealant preserves color depth while maintaining natural texture. Texture preservation is easiest when you avoid over-handling and give each bloom room to shine within the composition.
Tools and Materials for Dried Flower Ornaments
Having the right toolkit makes every step smoother. The goal is efficiency, not excess. Assemble a compact set that covers cutting, shaping, binding, mounting, and finishing. A well-chosen toolkit reduces fatigue and increases accuracy, especially for beginners.
Essential Tools for Dried Flower Ornaments
Stock your toolbox with reliable, precise instruments. Key items include sharp scissors or floral shears, fine-tipped tweezers for delicate placement, and small pliers for bending wires. A good hot glue gun with low-temperature setting prevents scorching delicate petals. You’ll also want a clean cutting mat, a ceramic palette for glues, and parchment paper for drying and mounting. For damping and smoothing edges, keep a small emery board or nail file handy. A steady, bright work light helps you see subtle color variations and vein details in the petals.
Materials, Finishes, and Substrates for Dried Flower Ornaments
Materials span from adhesives to protective finishes. Choose acid-free glues and archival-grade sealants to maximize longevity. Substrates range from wooden frames and embroidery hoops to glass domes and shadow boxes. Finishes can be matte, satin, or hand-rubbed waxes that enhance texture without obscuring color. For structures and display, stock lightweight wires, rings, and hooks. A practical kit minimizes guesswork and keeps you focused on composition rather than tool selection.
Work Area Safety for Dried Flower Ornaments
Drying powders, glues, and sealants require good ventilation. Work in a well-ventilated area and use a mask when sanding or lightly abrading petals. Keep pets and small children away from hot tools and solvents. Maintain a tidy workspace to reduce the risk of crushed petals and lost pieces. When you finish, seal the area and store your tools in a dry, cool space to preserve their efficiency for future projects.
Starter Projects for Dried Flower Ornaments
Starting small helps you translate theory into tangible results. The projects below are designed for beginners and emphasize clean technique, clear steps, and a sense of accomplishment that fuels motivation for more complex pieces.
Mini Dried Flower Ornaments Tutorial
Overview: Create a tiny hanging charm using a pré-cut wooden disk or a small circular frame. Step-by-step: 1) Gather a few dried blooms that retain their shape. 2) Arrange a simple cluster on the ring with tweezers. 3) Secure with a dab of clear glue at contact points. 4) Add a small ribbon or twine for hanging. 5) Seal lightly with a matte spray. 6) Label with the bloom names and the date to record your first success.
Tip: Start with one dominant bloom and a handful of supporting accents to keep the design readable at small sizes. This project sets a confident baseline for larger work.
Classic Wall-Hanging Dried Flower Ornaments Tutorial
Overview: A slightly larger composition that you can hang on a wall or a door. Step-by-step: 1) Prepare a wooden hoop or a thin frame as your base. 2) Dry-fit blooms to map composition; place focal blooms near the center. 3) Secure with hot glue or archival adhesive, ensuring stems are tucked behind the hoop to avoid protruding glue. 4) Build a layered effect by adding sprays behind the focal bloom. 5) Finish with a subtle sealant and a hanging cord. 6) Display away from direct sunlight and heat sources.
As you gain comfort, you can increase complexity by layering textures, varying stem lengths, and integrating preserved seed heads for a natural, garden-inspired look.
Care, Storage, and Longevity of Dried Flower Ornaments
Proper care extends the life of dried flower ornaments and helps them stay vibrant longer. The key is consistent environmental control and thoughtful handling. Store finished pieces in a cool, dry place with stable humidity. Avoid areas with high moisture or dramatic temperature swings, which can cause brittleness or mold. When displaying, keep them out of direct sunlight to prevent color shift and fading.
Environmental Considerations: Humidity and Light
Humidity is the nemesis of dried blooms. If you live in a humid climate, consider using a dehumidifier or silica packets in the storage area to regulate moisture. Light exposure gradually bleaches colors, especially purples and pinks. Opt for shaded display spots or use UV-protective glass if you’re mounting behind a window. Rotate pieces seasonally to maintain interest and reduce prolonged light exposure on a single item.
Storage becomes a careful ritual: place pieces in acid-free tissue or tissue-lined boxes to cushion them from impact. Stack gently and avoid heavy weights that could crush delicate petals. Regularly inspect for signs of scorching, moisture buildup, or pests, and address issues promptly to prevent damage from spreading.
Cleaning and Maintenance for Dried Flower Ornaments
Cleaning should be minimal but deliberate. Use a soft brush or a gentle blast from a hairdryer on a cool setting to remove surface dust. Avoid water and solvents that can soften adhesives or alter the bloom’s color. If a piece looks dull, a light dusting and a careful re-sealing with a matte spray can restore luster without compromising texture. Refrain from aggressive cleaning—preserve the integrity of the stems and petals to maintain the piece’s natural beauty.
In summary, mastering the foundations of dried flower ornaments sets the stage for more ambitious, artful projects. With the right blooms, careful drying, and thoughtful finishing, your ornaments can echo the best of 2026’s floral trends while standing up to the test of time. Stay tuned for Part 2: Finishing Touches and Display Ideas for Dried Flower Ornaments, where we explore sealing, mounting, and creative presentation concepts that bring your pieces to life.
Dried Flower Ornaments Step-by-Step Projects and Design Variations
In this section, we translate Part 1 ideas into hands-on projects. Each project centers on dried flower ornaments that preserve color and texture. You will learn to choose blooms for longevity, build a sturdy frame, and finish with a protective coating or fabric for lasting beauty. Work in a clean, dry space with good light, and lay out colors before you begin for smoother assembly.
Dried Flower Ornaments: Step-by-Step Wire-Wrapped Bell Orbs
To start, gather materials: dried blooms such as statice, lavender, and baby’s breath; a small bell-shaped frame; thin jewelry wire; round-nose pliers; wire cutters; clear-drying glue; and a hanging ribbon. This project creates a floating lattice that cradles petals while letting light pass through. First, cut a length of wire and form a tiny hanging loop at the top. Next, place a bloom against the frame and secure it with a touch of glue. Then weave more wire over and around the blooms, keeping the mesh even and balanced. Turn the orb slowly, adding blooms one by one so the arrangement stays airy rather than crowded. Finally, trim excess wire and secure loose ends. Tie a ribbon loop for hanging, and adjust the blooms to ensure even spacing. When finished, the ornament shines on a window sill or tree branch, catching daylight from multiple angles.
Dried Flower Ornaments with Ribbon Accents
Ribbon adds movement and color. Choose a palette that matches your decor. Begin with the wire frame or ball. Arrange 3 to 5 blooms and secure them with a dab of glue. Then wrap a satin or grosgrain ribbon around the blooms and frame. Tie a neat knot and leave a tail for hanging. The ribbon should not overpower the flowers; it should complement them. This variation is ideal for wedding decor, nurseries, or living spaces where soft color is welcome.
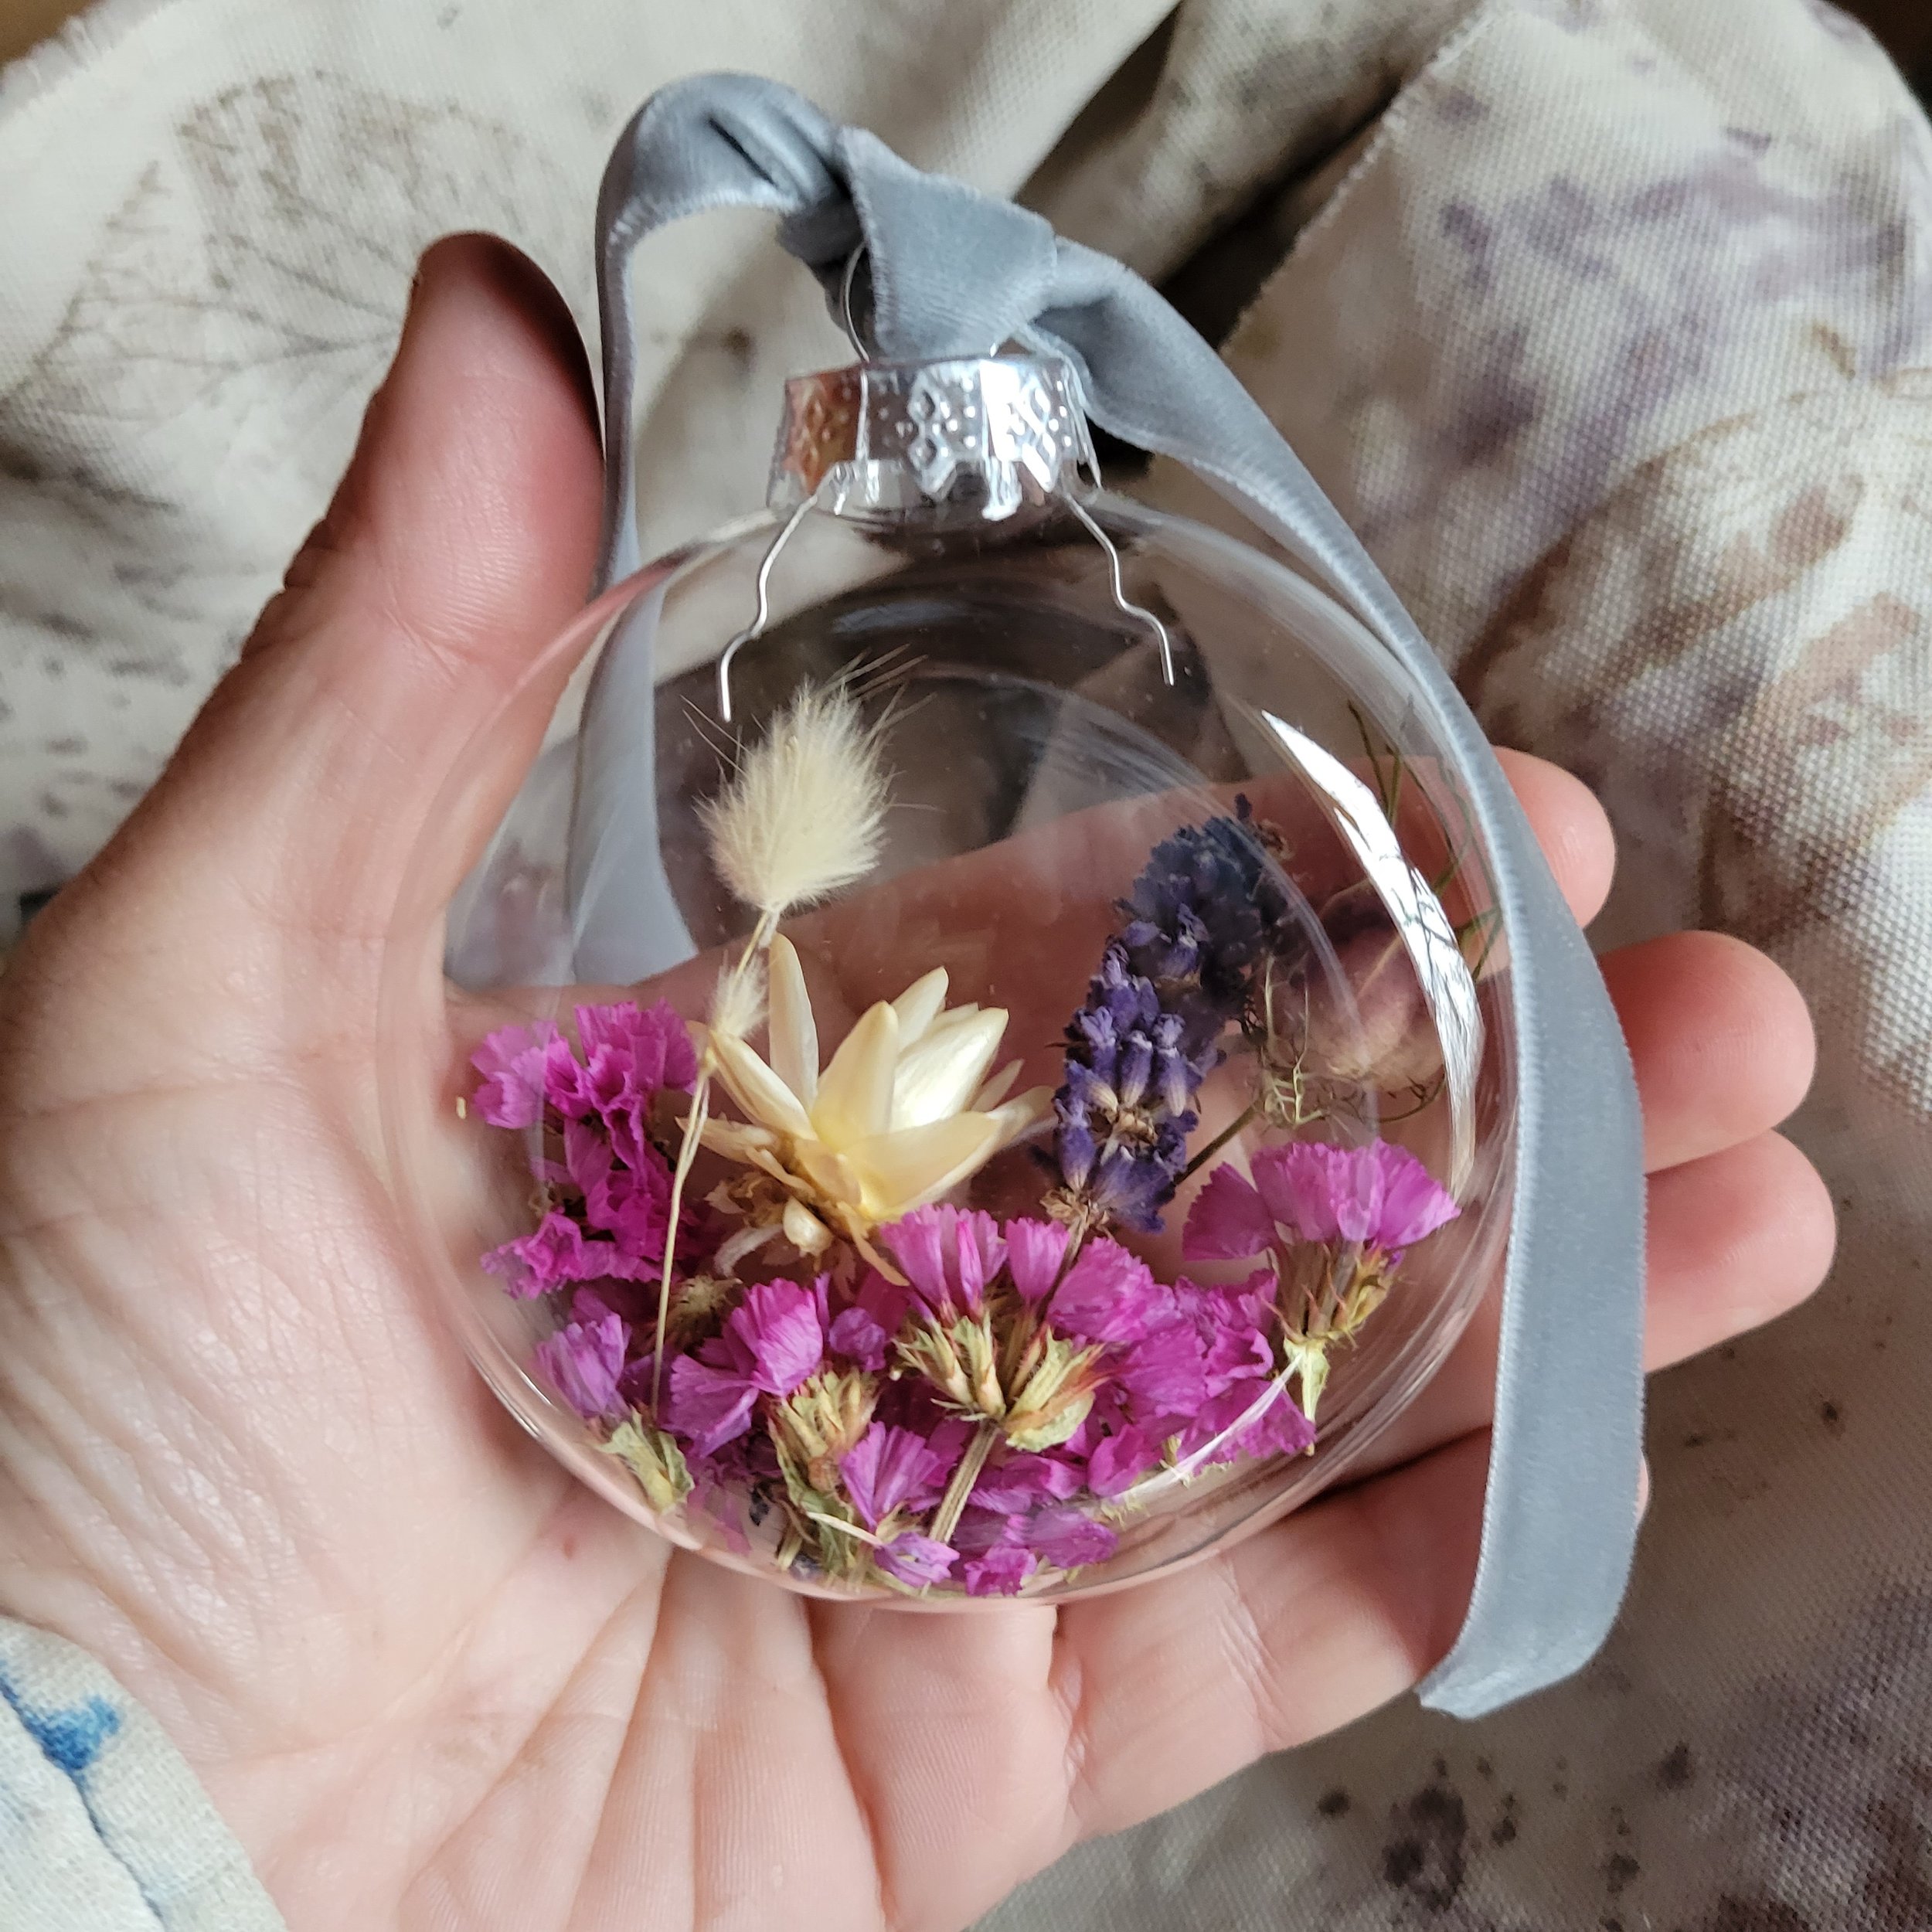
Dried Flower Ornaments: Minimalist Clear Ball Variation
Use a transparent glass or acrylic ball. Gently place 2 to 4 small blooms inside. The aim is simplicity and transparency. Position each bloom to show its color as it catches light. Add a tiny amount of fine preserved greenery for texture. Seal with a clear cap or a fine glue bond so the blooms stay in place. This minimalist approach works well in modern homes, on a shelf, or as a winter centerpiece.
Dried Flower Ornaments: Natural Basket-Weave Variation
For a rustic touch, weave petals and seed pods into a shallow basket shape. Start with a soft base and secure it with thin twine or wire. Layer dried elements to create a basket-weave texture. The result resembles a tiny harvest ornament ready for mantel display. Use earthy tones such as creams, russets, and sage for a cozy, nature-inspired effect.
Dried Flower Ornaments: Hanging Mobiles and Wall Garlands
Expand beyond single spheres by composing a mobile or a slim wall garland. Create a central anchor with a thread or fishing line, then suspend multiple blooms at different heights. This project emphasizes balance, rhythm, and negative space. Use long fibers or twine for an organic look, and consider adding seed pods for texture. When completed, hang the mobile in a bright corner or the entryway for a welcoming statement. A wall garland offers an ongoing design feature that shifts with the lighting of the day.
Dried Flower Ornaments: Color-Block Garland
Arrange blooms by color family along a length of twine. Space the blooms evenly and secure with glue or delicate wire. Allow sections of the garland to reflect different hues as the light passes through. This variation is ideal for seasonal decor or to highlight a focal wall. Keep the palette cohesive to maintain a refined look.
Dried Flower Ornaments: Monochrome Woodland Weave
Choose a single color family, like blues or creams, and build a woven extension along a string. The effect is calm and coordinated. Use seed heads or dried grasses to add texture without introducing multiple shades. This variation pairs well with minimalist interiors or homes that favor quiet symmetry.
For a trusted guide on drying methods, visit The Old Farmer’s Almanac: How to Dry Flowers.
Dried Flower Ornaments: Care and Longevity Tips
Dried flowers are delicate and require careful handling. Keep ornaments away from humidity and direct sunlight to prevent color fade. Dust gently with a soft brush rather than wiping with a cloth. Store completed pieces in a cool, dry place inside a box or tissue paper to minimize movement. If a bloom loosens, reattach with a small dab of archival glue and allow it to dry fully before hanging again.
Dried Flower Ornaments: Protective Coatings and Finishes
Consider a light, satin sealant or a clear spray to protect petals from dust and cracking. Test any finish on a small area before applying to the whole piece. A thin coat often preserves color without creating a plastic look. Reapply sparingly as needed, especially in dry indoor environments where brittle edges can occur.
Dried Flower Ornaments: Display and Storage Solutions
Display options include hanging from a mantel, clustering in a glass dome, or lining a gallery wall. When not on display, store ornaments in acid-free tissue in a breathable box. Avoid tightly packed storage that can crush delicate petals. Label pieces with care notes to help you rotate displays seasonally.
In 2026, these projects align with Pinterest trends such as wildflowers and peonies. Specifically, keep the color balance in mind to adapt the pieces across different seasons. In Part 3, we will cover finishing touches and display ideas for dried flower ornaments to extend their charm and practicality.
Dried Flower Ornaments Mastery: Troubleshooting, Scaling, and Creative Expansion
Troubleshooting Common Issues with Dried Flower Ornaments
When you work with dried flowers, setbacks happen. Ultimately, most problems stem from moisture, improper drying, or careless handling after preservation. The good news is that most issues are reversible or preventable with a clear plan. Start with a diagnostic checklist: moisture levels, bouquet composition, drying method, storage conditions, and finishing steps. By addressing root causes, you protect your ornament’s integrity and extend its display life.
Common Problems: Cracking, Fading, Mold, and Shedding
Cracking often appears in thin petals or brittle seed heads after improper drying or over-pressing. Fading happens when intense colors are exposed to direct sun or heat. Mold indicates trapped moisture during curing or storage. Shedding can occur if the finish is too thin or the flower is not fully dried. Each issue has a practical fix; knowing them saves waste and time.
To prevent cracking, adjust your drying protocol. Use a slower, gentler pressing method or a lightweight air-drying setup that reduces pressure. For fading, choose flowers with natural color stability and shield finished pieces from harsh light. If mold shows up, cut losses early and re-dry the material in a low-humidity environment with better airflow. Shedding is minimized by ensuring flowers are completely dry before sealing and by testing finishes on a small sample first.
Begin with small experiments. Create a tiny batch that mirrors your typical ornament. Compare outcomes with and without changes. This living quick-test saves material and time later. Remember, preservation is as much craft as science, and small adjustments yield big results.
Practical tips in brief: dry thoroughly, monitor humidity, avoid direct sun, and seal only when ready. Keep a simple log of drying times, temperatures, and results. Over time, your log becomes a personal playbook that speeds troubleshooting and accelerates creativity.
For reference, reliable drying techniques are described by botanical guides and university extension resources. For example, see a practical guide to drying flowers from The Old Farmer’s Almanac: The Old Farmer’s Almanac guide to drying flowers.
Preventive Measures: Drying Protocols, Finishing, and Storage
Prevention beats repair. Develop a standardized drying protocol that suits your botanical mix. Create a two-step finish plan: a light seal for flexibility, followed by a UV-protective topcoat for color retention. Store finished pieces in acid-free tissue and in climate-controlled spaces. Use desiccants in storage boxes to maintain low humidity. Label each batch with date, plant type, and finish used. This practice helps you reproduce consistent results and scale confidently.
When you work with a mix of botanicals, tailor the approach to each specimen. Heavier blooms like peonies may require longer drying times or alternative pressing methods. Lighter blossoms might be more prone to curling if pressed too heavily. By acknowledging these nuances, you prevent fragile varieties from becoming riskier bets. In practice, a modular workflow helps you scale while keeping quality high.
In production terms, design your studio with zones: drying, pressing, sealing, and display. Clear separation reduces cross-contamination of moisture and ensures better air flow. Invest in a small dehumidifier for the drying zone and a gentle, adjustable heat source for controlled curing when needed. The goal is predictable, repeatable outcomes that you can teach others to execute consistently.
Scaling Your Production: From DIY to Small-Batch
Scaling is not merely about making more; it’s about making smarter. Start by mapping a repeatable process that your team or collaborators can follow. Break the workflow into discrete, trackable stages: selection, harvesting window, drying, pressing, finishing, and packaging. When you document each stage, you minimize surprises and maximize throughput without sacrificing artistry.
First, determine your target batch size. A practical starting point is a weekly small-batch run of 20–40 ornaments. This amount fits most home studios and helps you refine production timing. Use a calendar to allocate drying days, pressing days, and finishing days. Align each step with a realistic lead time so you never overpromise to customers or collaborators.
Next, standardize material sourcing. Create a preferred supplier list for stems, petals, and embellishments. Keep a reserve of commonly used botanicals to avoid gaps in production. Maintain a simple inventory system: item, quantity, location, and restock threshold. This clarity saves time during peak season and reduces waste from over-purchasing.
Space planning matters. Allocate dedicated zones for washing, drying, pressing, sealing, and packaging. A clear layout speeds handoffs and minimizes cross-contamination. If space is tight, consider a rotating system where some ornaments stay in curing while others are in display or packing. The objective is a smooth, predictable flow that scales without chaos.
Quality control is non-negotiable at scale. Implement a quick-pass checklist for each batch: no moisture pockets, uniform color, intact petals, and consistent coating thickness. Train staff or collaborators to spot deviations and correct them immediately. Short, focused feedback loops keep the entire line moving toward a shared standard of excellence.
Pricing strategy should reflect cost and value. Factor in materials, labor, packaging, and shipping. Use tiered pricing to reward repeat customers, gift orders, and wholesale channels. Transparent pricing builds trust and reduces friction at checkout. In practice, offer bundles, seasonal collections, and limited-edition palettes to keep your catalog fresh and compelling.
Responsible scaling also means sustainability. Source responsibly, minimize waste, and consider recyclable packaging. If you use synthetic components, choose eco-friendly options that align with your brand’s values. Communicate your sustainability commitments in product pages and social posts. Consumers increasingly reward green practices with loyalty and trust.
Creative Expansion: Alternative Materials, Finishes, and Display Ideas
Creative expansion fuels engagement and opens new revenue channels. It also invites experimentation with finishes, materials, and display concepts that elevate your dried flower ornaments from craft to collectible art. Start by expanding your botanical palette. Include a broader range of botanicals, such as wildflowers, herbs, seeds, and even small dried fruits. Each addition brings texture, scent, and color that can inspire fresh designs. Remember to test compatibility with your finishing systems before committing to a full line.
Experimentation should be intentional. Keep a design notebook with pages for thumbnail sketches, color swatches, and notes on how each botanical behaves when dried. Track which specimens hold color best, which resist crumbling, and how they respond to different sealants. This record helps you refine your offerings and reduces waste from trial-and-error shoots.
Finishes and coatings open a spectrum of possibilities. A light acrylic sealant can preserve flexibility and protect against handling. UV-resistant varnishes help retain color when displayed in sunlit areas. Resin coatings create a glassy, durable surface that magnifies intricate details. Wax seals add a tactile, vintage feel. Always test finishes first on a sample piece to observe how it interacts with different textures and colors. Document results for future reference.
Colors can be tuned with selective tinting. For example, a tiny drop of colorant mixed into a clear sealant may deepen the hue without dulling the natural beauty of the petals. Use color sparingly to maintain a balanced, timeless look. When you combine botanical variety with restrained color storytelling, your ornaments feel cohesive and premium rather than kitschy or chaotic.
Display concepts matter as much as the ornament itself. Consider a storytelling approach: grouped arrangements with seasonal narratives or individual keepsakes for gifting. Packaging can mirror the craft’s narrative—natural fibers, kraft paper, and dried botanicals pressed into tags. Gift-ready presentation elevates perceived value and increases shareability on social platforms. A thoughtful display design makes your ornaments more than decor; they become experiences.
In terms of material storytelling, highlight the origin of each piece. Share brief notes about where the botanicals came from, the drying method used, and the finish applied. This transparency deepens customer connection and strengthens your brand voice. People buy stories as much as they buy products. And stories anchored in care, craft, and sustainability resonate deeply in 2026.
Tools, Resources, and Templates for Dried Flower Ornaments
Equipping yourself with the right tools accelerates growth and reduces confusion. A core toolkit includes quality micro-shears, a soft-bristled brush for dusting, a reliable drying rack, a light-weight press, a precise sealant brush, and a small heat gun for controlled curing when needed. A simple digital notebook keeps your notes organized, while a colorimeter or swatch book helps you track color changes across batches. These tools support consistent outcomes and scalable creativity.
Templates and checklists keep teams aligned. Create a standard operating procedure (SOP) for drying, pressing, sealing, and packaging. Include step-by-step visuals or annotated photos to reduce misinterpretations. Use a batch-tracking template to capture batch name, botanicals used, drying time, finishing method, and packaging details. A packing checklist ensures each ornament ships safely and looks polished on arrival.
Templates protect quality during growth. They also save you time when onboarding new collaborators or seasonal help. Keep a folder of reusable templates you can adapt for new collections or seasonal launches. In time, your templates become an operating system for your dried flower ornaments business.
Trend watch: 2026 brings a fresh pulse to the craft world. Cabbage crush, wildflowers, peonies, and pollinator plants are trending not just in gardens but in home decor. These themes invite you to experiment with color theories inspired by nature and to pair botanicals with sustainable packaging for a cohesive brand story. To stay inspired, follow seasonal palettes, and test combinations that align with your audience’s evolving tastes. For ongoing guidance, explore reputable sources on flower preservation and design inspiration.
Inspiration can also come from experience. Visit craft studios or attend local workshops to observe different drying environments, pressing styles, and finishing approaches. You’ll pick up practical tips that you can adapt to your own workflow. Networking with other makers reduces downtime and expands your creative horizon. Collaboration can spark new ideas and help you reach new audiences.
Conclusion and Next Steps
To conclude, mastery of dried flower ornaments rests on a balanced blend of troubleshooting, scalable systems, and creative exploration. Troubleshooting teaches you to identify moisture, color, and finish issues early. Scaling turns a craft hobby into a sustainable small business with predictable outcomes. Creative expansion invites you to push boundaries while maintaining quality and authenticity. When you combine disciplined processes with bold experimentation, you unlock a spectrum of possibilities for dried flower ornaments that delight, inspire, and endure.
Ultimately, your success depends on a clear plan. Start with a compact trial run to validate your drying and finishing methods. Then build a scalable workflow with defined zones, checklists, and a minimal but efficient toolkit. Finally, let creativity lead the way. Try new botanicals, finishes, and display ideas that tell a story and honor the beauty of the flowers you preserve. By embracing this approach, you position BloomHaven as a trusted source for high-impact, sustainable floral crafts that resonate with modern decorators and gift-givers alike.
Ready to take the next step? Download the included templates, refine your seasonal collection, and begin your own batch-run in the coming weeks. Subscribe to BloomHaven for ongoing tips, seasonal palettes, and exclusive tutorials that deepen your mastery of dried flower ornaments. And if you’re seeking practical guidelines, remember the focus keyword you’re building around: dried flower ornaments. It’s the essential thread that ties your projects together and helps you rank for the topics readers search most often. Your audience awaits. Start today, share your progress, and let your artistry flourish with every ornament you create.