Pollinator Pathway Design Ideas: Nectar-Rich Gardens
pollinator pathway design is more than a garden feature—it’s a deliberate, living corridor that links nectar sources, nesting sites, and safe havens across your BloomHaven landscape. When done well, it yields resilient, vibrant beds that bloom in sequence from early spring to late fall and invite buzzing visitors to linger. In BloomHaven’s approach, the path connects meadows to cottage borders, supports native bees, butterflies, and other pollinators, and reduces maintenance by emphasizing perennial structure and groundcover. In 2026, Pinterest trends lean into wildflowers, peonies, and nectar-rich plantings, which align perfectly with a thoughtful pollinator pathway. This article will guide you through the essentials—how to assess your site, pick a plant palette that lasts, and lay out a corridor that is both beautiful and ecologically robust.
Pollinator Pathway Design Essentials for BloomHaven Gardens
pollinator pathway design Essentials: Core Principles for Nectar-Rich BloomHaven Gardens
pollinator pathway design in Practice: Site Assessment and Connectivity
Begin with a site assessment that identifies sun, shade, wind, drainage, and soil. Note existing nectar sources and known pollinator hotspots. Draw a simple map that marks border edges, trees, and any structures that influence microclimates. Then, design a backbone: a continuous bloom corridor that links to different garden rooms. Therefore, you should think in terms of paths that are walkable, not just planted strips. In practice, a well-connected pathway weaves through beds with mid-layer shrubs, tall flowering perennials, and groundcovers that keep soil alive and accessible for ground-nesting bees. Connectivity matters because pollinators follow scent and nectar trails. If gaps appear, fill them with quick-blooming annuals that bridge seasons, or select perennials with overlapping bloom windows. The goal is not a single spectacular plant, but a dependable rhythm of food throughout the season.
pollinator pathway design in Practice: Plant Palette and Bloom Sequencing for Year-Round Attractors
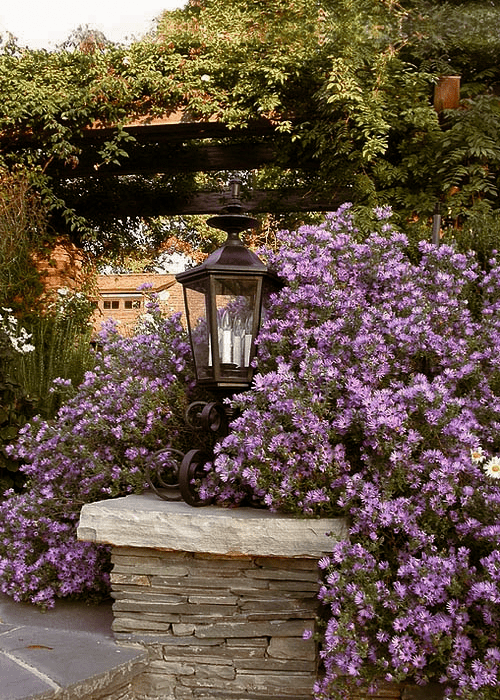
Choose a palette with diverse flower shapes and colors to accommodate multiple pollinators. Prioritize nectar-rich perennials with overlapping bloom times. Include early-spring crocuses, daffodils, wildflowers, mid-season lisianthus, echinacea, and late-season asters. Plant structure: high towers, mid-height stems, and groundcovers create a multi-layered food web. Include natives where possible, but also well-suited cultivars for your climate. Soil tests guide liming and amendment; avoid dense fertilizer regimes that encourage foliage over flowers. Plant in clusters rather than singletons to create bigger nectar sources and stronger scent cues. Freshly watered beds will hold nectar longer, boosting pollinator visits. In addition, design with bloom sequencing so a nectar source is always available for foraging pollinators—ideally 6-8 weeks of continuous blooms. For an accessible palette, consider combinations like native Salvia, Echinacea, Gaillardia, and late-season Aster blends.
For authoritative guidance on native plant lists, see the Xerces Society resources on pollinators.
pollinator pathway design in Practice: Habitat Layers, Nesting, and Shelter
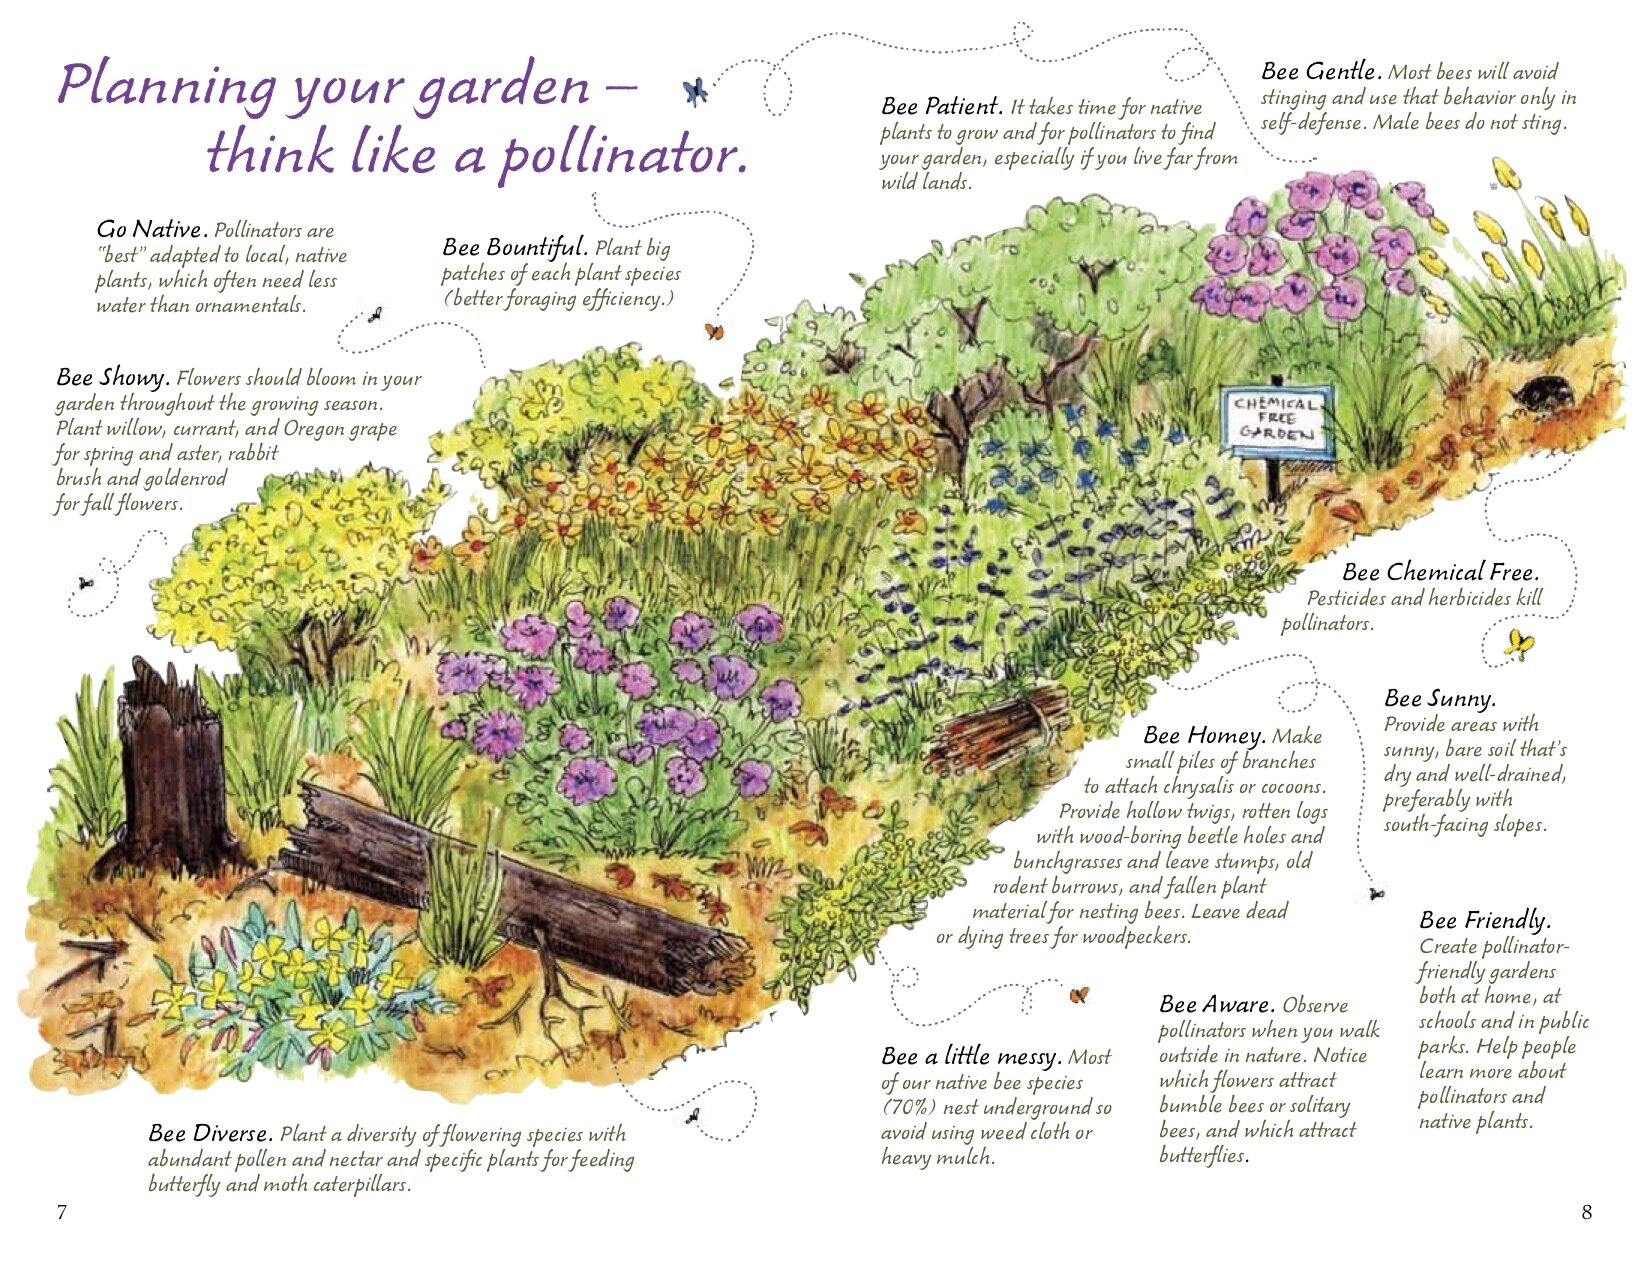
Habitat layers matter. Create a layered structure with groundcovers, mid-height shrubs, and tall flowering stems. This arrangement provides continuous food, shelter from wind, and safer landing zones. Include nesting sites: bare patches of soil for ground-nesting bees, hollow stems for mason bees, and protected roosting spots for butterflies. Leave a few dead stems or a small brush pile as overwintering shelter. Mulch should be organic and shallow near nesting zones to avoid suffocating organisms. These layers support a diverse cast of visitors, from tiny mining bees to large swallowtails, all while keeping maintenance manageable.
pollinator pathway design in Practice: Water, Soil, and Microhabitats
Pollinators need accessible water. Provide shallow dishes with rough edges or stones for landing. Add damp soil patches for mud-puddling butterflies. Improve soil texture with compost and organic matter; avoid soil deflection or compaction. Use mulch to conserve moisture and suppress weeds without smothering roots. Install drip irrigation or rain barrels to keep beds evenly hydrated without overspray. A well-hydrated garden sustains bloom quality and nectar volume through heat waves. Crucially, water features should be safe, shaded, and easy for pollinators to approach.
pollinator pathway design in Practice: Maintenance, Monitoring, and Seasonal Transitions
Set up a simple routine: deadhead regularly to encourage continuous bloom, weed thoughtfully, and mulch to reduce evaporation. Monitor pollinator activity to gauge success and adjust plantings as needed. In addition, allow some spontaneous growth to maintain habitat value; avoid heavy pruning during peak nectar times. Track what’s working by noting bloom windows and visitor counts; use this data to refine your palette over time. Choose organic pest controls and avoid broad-spectrum sprays that harm bees and butterflies. This steady approach ensures your pathway remains productive through seasonal transitions and climate shifts.
pollinator pathway design in Practice: Community and Outreach for BloomHaven Gardens
Engage your neighborhood. Share plant lists, seeds, and tips; invite schools for garden visits to spark curiosity about pollinators. Community planting days strengthen the pathway and spread ecological benefits. Document progress with photos and maps so others can replicate your approach. Connect with local pollinator groups or extension programs to stay current on best practices and climate considerations. By making your BloomHaven a model, you amplify impact beyond your borders.
In Part 2: Plant Palette and Bloom Sequencing for Pollinator Pathway Design, we will dive deeper into selecting species, bloom timing, and practical layouts that keep nectar flowing across the season.
Implementing Pollinator Pathway Design: Step-by-Step Pathways for All Seasons
In this part, we translate the theory of pollinator pathway design into a practical, repeatable workflow. The goal is to create a living network of nectar sources, shelter, and nesting sites that stay productive through all four seasons. Each step builds on the previous, ensuring continuous pollen and nectar availability while supporting pollinator health and biodiversity. You will learn how to map your space, select seasonally aware plantings, plan the physical pathways, and implement maintenance routines that keep the pathway vibrant year after year.
Step 1: Map Your Space for Pollinator Pathway Design
Begin with a honest assessment of light, soil, moisture, and microclimates. Pollinators respond best to habitats that accommodate fluctuating weather. A map helps you place plants so that blooming windows overlap and space allows movement. Start by sketching the garden on paper or a digital plan. Mark sun exposure: full sun, partial shade, and cool shade. Note soils: sandy, clay, loam, drainage. Identify existing features like fences, walls, and pathways where pollinators can move along a corridor.
Next, identify nectar and pollen gaps across the calendar. Look at your current plantings. Which months feel sparse for bees and butterflies? Which seasons would benefit from early blooms and late-season sustenance? Align those insights with the actual path the pollinators fly. The aim is not to overwhelm any single bed with too many flowers at once, but to layer blooms so there is nectar from early spring to late autumn. Remember that even a small corner of 6 by 6 feet can host multiple microhabitats if you combine shrubs, perennials, and groundcovers.
Assess Sun, Shade, and Soil for Pollinator Pathway Design
Sun exposure drives plant choices. A sunny bed invites sun-loving species such as cosmos, salvias, and coreopsis. Shady pockets thrive with native ferns, heuchera, and pulmonaria. Soil structure matters as well. Improve poor soil with compost and gentle mulch to support resident soil life. Good soil structure creates moisture retention and root resilience, both critical for long-lasting nectar producers.
Identify Seasonal Nectar Gaps
Chart the months when your garden offers little nectar. When spring arrives, do you have enough early pollen sources for emerging bees? In midsummer, is there a lull before late-blooming asters and coneflowers arrive? Filling these gaps strengthens pollinator pathway design by reducing periods of scarcity. Pair early bloomers with mid and late season feeders to create overlapping bloom calendars. You can also stack plants with different bloom times in the same bed so that as one plant fades, another takes its place.
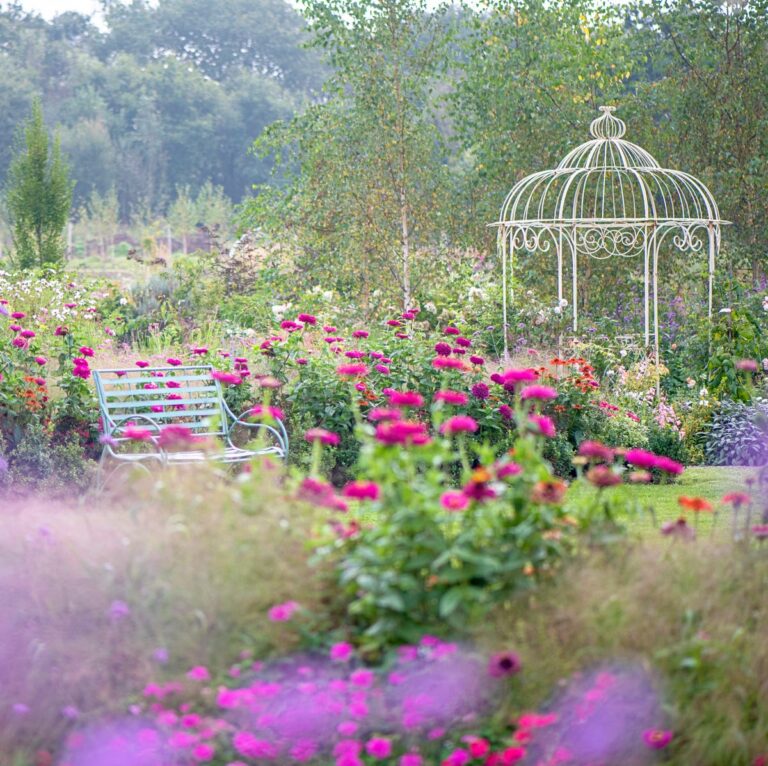
Step 2: Build Continuous Bloom Across Seasons
Continuous bloom is the heart of pollinator pathway design. The garden should read as a corridor of color and fragrance from spring through fall, with winter-friendly shelter and resource availability. Start by staggering plant heights and textures along your pathways so that pollinators can navigate without being crowded. Plant clusters, not single specimens, to create scent neighborhoods that are easy to locate.
Spring Nectar and Pollen
Spring brings early pollinators like mason bees and honeybees. Choose shrubs and perennials that pop early, such as lilacs, flowering currant, and grape hyacinth. For nectar-rich annuals, plant poppies, common evening primrose, and buckwheat. These establish a strong kick-off to the season and set the tone for ongoing activity along the pollinator corridor.
Summer Sustainers
Summer requires heat- and drought-tolerant options. Lavenders, salvias, milkweed, and sunflowers provide reliable nectar when other plants fatigue. Include flowering grasses and sturdy perennials to create resting spots along the pathway where pollinators can pause between foraging bouts.
Autumn and Winter Shelter
In late summer and autumn, rotate in late-blooming asters, goldenrods, and asters that extend nectar into fall. For winter, include evergreen structural plants and shelter options like dense conifers or evergreen grasses that protect pollinators from cold winds. Provide dry shelter such as leaf litter piles or sheltered crevices near the path edges. Even during cold months, some pollinators search for shelter or resources, so consider microhabitats that offer roosting sites and water sources that don’t freeze quickly.
Step 3: Design Pathway Connectivity and Pollinator Corridor Concepts
The geometry of your beds matters. Pathways should be wide enough for foraging insects and humans to move without stepping on roots or disturbing roots. The layout should encourage movement along the corridor rather than in isolated pockets. Think of the garden as a network of linked patches. Each patch provides nectar, shelter, and nesting opportunities. Connecting this network increases pollinator resilience when weather or pests threaten one area.
Width, Material, and Safety
Pathway width determines how many pollinators use the corridor at once. A 2- to 3-foot wide bed between plantings can function as a living sidewalk for small bees, butterflies, and hoverflies. Material choices matter, too. Mulch, gravel, stepping stones, and low pervious pavers all work well when edges are kept accessible. Avoid impervious linings that trap heat in hot weather. Use permeable materials to maintain soil moisture and permit creeping roots to reach air and water. Safety considerations include slip resistance on wet days and clear sightlines for visitors.
Pollinator Corridors and Connectivity
Corridors connect larger plantings into a network. They reduce isolation and give pollinators multiple foraging opportunities. Where possible, plant native forage along the corridor to support local species. When designing these passages, include flowering shrubs at intervals to create landmarks and reduce foraging errors for insects. The idea is to guide movement without turning pathways into tunnels. The result is a landscape that feels like a living street map, with flowers as street signs guiding pollinators from one patch to the next.
Edge Habitats and Microhabitats
Edge habitats along pathways attract a variety of pollinators. A mix of grasses, low-growing groundcovers, and flowering perennials at the edge creates microhabitats that shelter predatory insects, provide nectar, and reduce soil erosion. This approach also benefits birds and beneficial insects that help balance garden ecosystems. In practice, edges become active surfaces where pollinators locate resources while humans still enjoy a pleasant walk through the garden.
Step 4: Planting Strategy and Soil Preparation
Planting strategy blends aesthetics with function. You want bloom-rich plantings that survive climate swings and require manageable maintenance. Start with a soil assessment and a gentle improvement plan. Improve drainage if necessary, add compost to build soil biology, and top-dress with mulch to retain moisture and suppress weeds. A careful layout ensures roots won’t compete for resources, and pollinators won’t encounter bare soil or bare stems for long stretches of bare ground.
Soil Improvement and Mulching
Healthy soil supports robust root systems that anchor large flowering perennials. Mulch retains soil moisture, moderates temperature, and reduces weed pressure. Use organic mulch around plant crowns, avoiding piles against stems that can cause rot. A slow-release approach to soil amendment keeps nutrients available through the growing season. This translates into more consistent nectar production and better support for bees and butterflies as they move along the pathway.
Planting Schedule and Grouping
Group plants by bloom time and by pollinator preference. When you plant for continuous bloom, think in layers: canopy shrubs, mid-height perennials, and groundcovers that fill gaps. Plant in groups that create visual blocks and scent neighborhoods to help pollinators locate resources quickly. For example, a spring module could pair a blooming shrub with a cluster of early bloomers and a contrasting leaf texture to attract different pollinator species. A thoughtful grouping also helps you manage water use and maintenance more efficiently.
Step 5: Maintenance, Monitoring, and Adaptation
Maintenance is not a one-off task but a seasonal practice. A pollinator pathway design thrives with regular checks and small adjustments. Approach maintenance as stewardship rather than routine chore. With simple monitoring, you’ll learn what works and what needs changing. Recording observations makes it easier to adapt your design over time, especially as climate patterns shift in 2026 and beyond.
Seasonal Maintenance Calendar
Create a lightweight schedule that aligns with your garden’s microclimates. Spring tasks include pruning dead wood, refreshing mulch, and dividing crowded clumps to maintain airflow. Summer tasks focus on watering during droughts, deadheading to encourage further blooms, and removing invasive species. Fall routines emphasize seed heads and late-season structure, while winter care centers on protecting pollinator shelters and planning for the next season. The key is consistency, not intensity, so that pollinators rely on steady food sources year-round.
Monitoring Pollinator Activity and Plant Performance
Observation is your best measurement tool. Note which flowers see the most visits, which times of day yield the most activity, and how pollinators respond to temperature and rainfall. Use simple notes or a photo log. Over time you’ll spot patterns that reveal the strengths and weaknesses of your pathway design. If a bed is underperforming, consider adding a bloom variety that fills a gap or adjusting irrigation to prevent water stress that delays nectar production.
Adaptive Management for Growth and Climate Variability
Adaptation is crucial. Plantings that survive dry spells or heavy rains may require shifting watering regimes. You may need to replace certain species with more drought-tolerant or frost-tighter options as weather patterns change. Maintain flexibility in your plan and allow your pollinator pathway design to evolve. The goal is a resilient corridor that remains productive and inviting through all types of weather and seasonal shifts.
Step 6: Integrating Water, Nesting, and Habitat Features
Pollinators need more than nectar. Water sources, shelter, and nesting sites extend the function of the pathway. A well-placed water feature can attract a wider range of species and reduce dehydration on hot days. Nesting opportunities vary by species; some bees nest in hollow stems, while others rely on soft soils or wood and leaf litter. Integrating these elements into the pathway design creates a more complete habitat network that supports diverse pollinators.
Water Elements for Hydration
Provide shallow, accessible water sources with gentle edges so pollinators can drink without drowning. A saucer of water with pebbles or a small fountain can be effective. Place water features near nectar sources but out of direct sun to reduce evaporation. In winter, avoid freezing water that would deter visits. Also consider a bird-friendly water feature that integrates well with the garden’s aesthetics.
Nesting and Shelter Options
Nesting options vary by pollinator group. Leave some bare ground patches for ground-nesting bees and install bee hotels or hollow-stem structures for cavity-nesting species. Use dead wood, brush piles, and layered plantings to provide shelter from wind and predators. Regularly assess nesting sites for safety and persistence. A healthy shelter network encourages ongoing activity along the pathway and reduces pollinator stress during periods of drought or cold snaps.
Seasonal Cleanup and Habitat Stewardship
Keep pathways clean without removing beneficial habitat. Remove only invasive competitors and prune dead stems at appropriate times to avoid destroying shelter. Allow some plant litter in sheltered areas for overwintering insects. This sustainable approach supports long-term pollinator health and ensures that the pathway remains a credible habitat network for the community of species that rely on it.
Further guidance on habitat planning is available from credible organizations such as Xerces Society for Invertebrate Conservation. Their resources cover native plant selections, habitat features, and monitoring techniques that align with pollinator pathway design best practices.
By following these steps, you create a resilient, nectar-rich corridor that supports a diverse pollinator community through every season. In Part 3: Measuring Impact and Real-World Case Studies of Pollinator Pathways, we translate theory into metrics, share actionable case studies, and outline scalable strategies for larger landscapes.
Advanced pollinator pathway design Tactics and Long-Term Garden Stewardship
This final section builds on earlier tactics to deliver durable, resilient landscapes that continuously fuel pollinators. You will learn advanced methods to align bloom periods, optimize habitat structure, and sustain these benefits for years to come. The goal is not only to attract bees, butterflies, and other pollinators but also to foster a garden that remains healthy, productive, and easy to manage across seasons. As you implement these strategies, you’ll see how deliberate design choices pay off in pollinator visits, seed set, and overall garden vitality.
Seasonal Sequencing for pollinator pathway design
Seasonal sequencing is the backbone of a reliable pollinator pathway design. By orchestrating a continuous chain of bloom, you provide food and nesting cues through spring, summer, and fall. This approach reduces gaps when pollinators must migrate or pause to forage elsewhere, and it helps you manage maintenance with predictable tasks.
Key concepts to apply:
- Staggered bloom windows: select plants with overlapping but distinct flowering times to cover early, mid, and late season forage.
- Successional plantings: plan for successive plantings so that once one flush finishes, another slips into bloom with minimal downtime.
- Migration-aware timing: align major nectar surges with local pollinator life cycles, such as butterfly emergence or bee brood cycles.
Implementation tips:
- Develop a bloom calendar that maps months to plant groups. Review it each season and adjust for weather patterns.
- Place high-nectar, high-pollen species at entrances and along pathways to maximize encounter rates for foragers in transit.
- Keep maintenance light during peak nectar flights. Plan pruning and weeding around emergent blooms to avoid accidental removal of nectar resources.
Pro tip: For a practical blueprint, combine early-blooming native shrubs with mid- and late-season perennials. This creates a resilient nectar corridor that supports overwintering queens and spring brood alike. The concept of pollinator pathway design becomes tangible when you view your garden as a living calendar of food sources.
Bloom windows and plant pairings
In this subsection, you balance floral architectures to support diverse pollinators without overloading any single resource. Pairing plants with complementary nectar and pollen profiles extends forage beyond a short peak. For example, pair crocus and grape hyacinth with early-blooming native perennials, then layer in late-summer sunflowers and asters to extend the season.
How this contributes to pollinator pathway design: continuous forage, less competition for limited resources, and healthier pollinator populations. It also reduces the risk of nectar drought during critical brood-rearing periods.
Maintenance calendar aligned with bloom cycles
Link maintenance tasks to bloom cycles rather than a rigid calendar. Herbaceous patches may require weeding and deadheading to sustain nectar production. Woody components may need pruning to maintain light infiltration and pest control. Keeping a maintenance calendar linked to bloom status reduces disturbance to active flowering plants and supports consistent nectar availability.
In practice, you’ll plan for spring cleanups after peak bloom, summer weeding during mid-season nectar flushes, and fall cleanup only after late-season blooms recede. This phased approach preserves feeding opportunities while preserving garden structure for the following year.
Note: Documentation of bloom timing improves future planning. A simple log noting when peak blooms occur helps refine the pollinator pathway design over multiple years.
Year-Round forage: Multi-layer plant palettes for pollinator pathway design
A robust pollinator pathway design depends on a layered plant community that provides forage at different heights and in varying microhabitats. A well-planned palette offers nectar, pollen, and habitat resources across seasons, supporting a broad range of pollinators, including bees, butterflies, moths, and hoverflies.
Design principles to apply:
- Vertical layering: create canopy, understory, and groundcover layers to shelter pollinators from weather and predators while maximizing forage density.
- Native-first philosophy: prioritize native species that are naturally adapted to your site’s climate and soil. They typically require less water and maintenance while offering reliable nectar.
- Diversity and density: mix a broad spectrum of species with staggered bloom times. Diversity supports pollinator resilience and reduces disease transmission risks.
Seed mix strategies:
- Use a baseline of 60–70% native perennials and 20–30% annuals or biennials to seed continuous nectar.
- Introduce nectar-rich shrubs and small trees for structural habitat and late-season forage.
- Include seed-producing plants to support specialist pollinators that require both nectar and seeds.
Plant palettes should be tailored to your climate zone and microclimates within the garden. For example, drought-tolerant options are essential in hot, sunny stretches, while shade-tolerant species ensure forage under tree canopies or within dense borders.
To further enrich your pollinator pathway design, ensure that seed mixes include flowers with varied flower forms, such as flat-taced daisies for short-tongued bees and tubular flowers for long-tongued butterflies. The result is a garden that welcomes a wider range of pollinators at different times of day and across weather conditions.
Resource note: a curated, pollinator-friendly plant list can be a helpful planning tool. For expert guidance on selecting and combining plants for pollinator health, see Xerces Society’s pollinator resources.
Water features and microhabitats within pollinator pathway design
Water is a critical, often overlooked component of a thriving pollinator habitat. A thoughtful water strategy supports hydration for small insects, larval development, and the creation of microhabitats that shelter beneficial organisms. Water features don’t need to be large to be effective; even tiny, well-designed pockets can make a big difference.
Principles to guide water integration:
- Micro-waters and damp patches: install shallow basins, shallow saucers, or mineral-rich damp soil pockets that stay moist in hot weather.
- Rain gardens and high-efficiency irrigation: capture runoff and direct it toward plant beds while avoiding waterlogging sensitive species.
- Seasonal moisture balance: adjust irrigation to mimic natural rainfall patterns, reducing stress during nectar-rich periods.
Water features should be designed to minimize mosquito breeding risks. Use sloped basins with drainage that prevents standing water, ensuring that water serves as a resource rather than a liability. A well-placed corner pool or shallow dish can attract bees to drink without creating a safety hazard for others.
Embrace drought-resilient infrastructure: mulch to conserve moisture, select water-wise plant species, and position features to take advantage of microclimates. The goal is to provide reliable hydration while maintaining garden aesthetics and ease of care.
Water budgeting and micro-watering
Plan your water budget by zone. Identify high-nectar, low-water demand zones and ensure they stay adequately hydrated during peak heat. For zones with higher moisture needs, tailor watering frequency to plant stress indicators rather than a fixed schedule.
Smart irrigation can support pollinator pathway design by delivering water only where it’s needed, reducing waste and promoting consistent nectar sources. Consider drip irrigation for efficiency and targeted soil moisture management.
Dry-season microhabitats
During dry spells, microhabitats such as shaded understory pockets and mulched paths provide refuge for pollinators seeking cooler microclimates. Mulch reduces soil temperature, improves moisture retention, and supports ground-nesting species by maintaining a more stable substrate.
Incorporate features like stone basins, bee pastures with moisture-retentive plants, and shallow puddling sites for butterflies in hotter climates. Each element contributes to pollinator pathway design by sustaining life during demanding periods.
Soil health mastery for pollinator pathway design
Healthy soil underpins vigorous plant growth, robust nectar and pollen production, and strong root systems for long-lived habitat plants. A soil-first mindset translates into healthier blooms and more resilient pollinator habitat. Focus on soil biology, structure, and nutrient availability to sustain year-round forage.
Core actions to implement:
- Soil testing and amendments: perform soil tests to identify pH, nutrient imbalances, and organic matter levels. Apply amendments that improve structure and fertility with minimal environmental impact.
- Organic matter and compost: regularly add compost to beds to feed soil biology and improve moisture retention.
- Biological inoculants: consider mycorrhizal fungi and beneficial soil microbes to enhance nutrient uptake and plant resilience.
Healthy soil supports a robust root system, which translates into vigorous flowering plants that sustain pollinators. A dynamic soil ecosystem also helps plants withstand drought, pests, and disease, reducing maintenance demands over time.
Soil testing and amendments
Begin with a baseline soil test to determine pH and nutrient levels. Based on results, adjust with organic amendments such as compost, aged manure, or biochar as appropriate for your climate. Avoid over-fertilizing; excess nutrients can lead to lush foliage with fewer flowers, reducing nectar availability for pollinators.
Maintain a regular schedule of soil health checks, especially after major planting changes or drought events. This practice supports steady growth and ongoing bloom production for pollinator pathway design progress.
Mycorrhizae and microbial diversity
Inoculation with mycorrhizal fungi can improve water uptake and resilience, particularly in poor or compacted soils. A diverse microbial community supports nutrient cycling and plant disease resistance. Use organic, slow-release inputs to nurture beneficial microbes and sustain long-term plant vigor.
Remember that diverse soil biology translates into robust plant communities. The more flourishing your plants are, the more abundant your nectar and pollen sources become for pollinators.
Monitoring, data, and adaptive management in pollinator pathway design
Monitoring is the engine that drives continual improvement in pollinator pathway design. Systematic observation, data logging, and flexible management enable you to respond to changing conditions, refine plant selections, and optimize habitat with precision. This is especially important in a climate where weather patterns shift and pollinator populations respond to multiple stressors.
Key components of an effective monitoring program:
- Baseline surveys: document plant species, bloom times, and pollinator activity at the outset.
- Regular check-ins: record bloom performance, nectar resource levels, and signs of plant stress across seasons.
- Adaptive logs: maintain a change log that documents what was revised, why, and the observed outcomes.
Citizen science can amplify your monitoring effort. Invite garden visitors to note pollinator sightings and bloom timing on a simple app or notebook. This data enriches your understanding of local pollinator dynamics and strengthens your garden’s contribution to regional biodiversity.
Data-driven adjustments are at the heart of adaptive management. If a bloom window underperforms or a habitat feature fails to attract pollinators, tweak plant selections, adjust irrigation, or reconfigure microhabitats. The objective is not perfection but continual improvement that leads to a more reliable, resilient pollinator pathway design.
Citizen science and data collection
Encourage participation by providing easy data sheets or QR-coded forms that link to a simple online log. Regularly publish update notes and seasonal progress to foster community involvement and accountability. Even small contributions can reveal patterns that shape long-term improvements.
Documentation matters: track plant performance, pollinator counts, and weather influences. Over multiple years, this archive becomes a valuable resource for understanding pollinator pathways and refining your strategy.
Adaptive change log
Maintain an ongoing log of changes, including plant substitutions, irrigation adjustments, and new habitat features. Review the log annually to identify trends and outcomes. Use insights to inform next year’s plantings and maintenance tasks, ensuring your pollinator pathway design remains dynamic and productive.
Long-term stewardship: maintenance, budgeting, and community engagement for pollinator pathway design
A long-term stewardship plan ensures your pollinator pathway design remains vibrant, functional, and financially sustainable. This section focuses on governance, resource planning, and community involvement that amplify impact while keeping maintenance manageable.
Key practices include:
- Budgeting and resource planning: allocate funds for plant replacements, soil improvements, and water features over a multi-year horizon.
- Maintenance minimization strategies: select durable species, use mulching, and implement efficient irrigation to reduce ongoing labor and costs.
- Community engagement and education: invite neighbors and local schools to participate in planting days, walks, and citizen science projects.
Celebrating and documenting progress builds momentum. A public-facing garden story reinforces the importance of pollinator health and encourages others to adopt pollinator pathway design principles in their own spaces.
Budgeting, grants, and resource planning
Plan for capital investments (hardscape, water features, irrigation infrastructure) and recurring expenses (soil amendments, seed and plant replacements). Seek grants or local sponsorships to offset costs. Establish a clear, transparent budget timeline and track actual expenses against projections. This discipline supports long-term viability and expands the reach of your pollinator pathway design.
Community involvement and education
Hosting seasonal workshops, guided walks, or school visits fosters community stewardship. Provide take-home materials that explain the pollinator pathway design concept and guide participants through basic maintenance tasks. When the community understands the value of pollinators, ongoing support and volunteer energy naturally grow, reinforcing the garden’s sustainability and impact.
Ultimately, a well-executed long-term stewardship plan ensures your pollinator pathway design remains a living, evolving system. It becomes a community asset that educates, inspires, and continuously contributes to biodiversity and pollination success.
Conclusion
In summary, advanced pollinator pathway design tactics fuse seasonal sequencing, layered plant palettes, water and soil stewardship, precise monitoring, and a forward-looking framework for long-term care. By integrating these elements, you create a durable habitat that reliably supports pollinators while remaining manageable and beautiful for years to come. The focus on pollinator pathway design guides every decision—from bloom calendars and plant pairings to soil health and community engagement. If you’re ready to begin, start with a seasonal audit of your beds, map a year-round forage strategy, and build a stewardship plan that fits your climate and lifestyle. Your garden can become a thriving pollinator pathway design that sustains biodiversity and joy in equal measure. Embrace the challenge, implement the tactics, and watch your pollinators return season after season. To take the next step, download our starter checklist or join BloomHaven’s community to share progress and learn from other pollinator pathway design enthusiasts.