Dahlia Bloom Extension Tricks for Garden Vibes
In 2026, gardening readers crave projects that blend color, structure, and sustainability. A dahlia bloom extension is a proven way to turn scattered dahlias into a cohesive late-summer and autumn display. This approach helps you map flowering windows, manage beds, and guide pruning for consistent impact. Whether you’re a seasoned designer or a weekend picker, a clearly defined dahlia bloom extension plan keeps goals realistic and measurable. By anchoring the project to concrete outcomes, you set up your garden for uninterrupted color, pollinator visits, and easier maintenance. In this first section, we define the foundations that support every successful extension: goals, scope, and baseline setup. With these pillars in place, you can measure progress, communicate with partners, and adjust tactics as seasons shift.
Dahlia Bloom Extension Foundations: Define Goals, Scope, and Baseline Setup
Why a dahlia bloom extension matters for garden vibes
Gardening is about story and flow. A dahlia bloom extension ties bloom timing, color transitions, and bed structure into a narrative. Therefore you can plan companions such as salvias, asters, and grasses that complement each phase. In practice, a cohesive extension reduces dead space and increases pollinator activity. It also improves maintenance, since tasks align with bloom cycles. Crucially, a clear extension plan helps you communicate with partners, sponsors, and family helpers. It supports budgeting by predicting tuber needs, soil amendments, and fertilizer windows. By defining a story for your bed, you’ve got a framework that coordinates plant choices, spacing, and timing. This foundation pays off in front-of-house displays and in the cutting garden, where steady supply matters. With the right groundwork, your dahlia bloom extension becomes easier to sustain, season after season.
Setting SMART goals for dahlia bloom extension
To start, set Specific, Measurable, Achievable, Relevant, and Time-bound targets. Specific goals for the extension could be: achieve three color-blocked zones, extend bloom coverage from July through October, and reduce maintenance time by 20%. Therefore, write down these targets and attach a date. In addition to color goals, define care goals—soil health, moisture consistency, and pest management. Measurable metrics will include bloom start dates, peak dates, and vase life. Achievable goals require local climate realism. Relevant goals align with your garden’s sun exposure and soil type. Time-bound goals create quarterly reviews. Additionally, assign owners for each target and establish simple success criteria. This disciplined approach ensures you can monitor progress with confidence and adjust tactics without guesswork. Therefore, use a simple scorecard to track each target and celebrate small wins along the way.
Defining scope for a garden project
In this phase, define what is in scope and what is out of scope. In scope: selecting a resilient dahlia cultivar mix, adjusting bed structure, drip irrigation checks, mulch strategies, and seasonal maintenance. Out of scope: major structural changes or plantings outside the defined bed lines, expensive renovations, or specialty fertilizers beyond the baseline plan. Therefore, list inclusions and exclusions clearly. In addition, create a simple RACI-style roles map to clarify who does what. The scope foundation helps prevent scope creep and ensures stakeholders agree on expectations. By setting boundaries now, you can keep the project on track and within budget. For clarity, attach a one-page scope doc to your project notebook as a living guide that updates with seasonal realities.
Baseline metrics for dahlia bloom extension
Baseline data establish where you begin. Key metrics for the dahlia bloom extension include bed area, tuber counts, spacing, soil pH and texture, water usage, and average maintenance time per week. In addition, record bloom onset windows, daily bloom intensity, and pollinator activity. You can capture data with a simple garden journal, a spreadsheet, or a photo log. For soil health, measure organic matter and microbial activity where possible. Therefore, establish a 4- to 6-week baseline period before any major changes. This baseline enables you to compare changes after you implement design tweaks or irrigation improvements. As you gather data, visualize trends with charts to keep motivation high. For more guidance on soil and planting benchmarks, see this extension resource: extension resources.
Stakeholders and roles in a garden extension
In many gardens, roles balance between owner, designer, gardener, and seasonal volunteers. First, the garden owner defines priorities and budget. Second, a designer translates goals into a plan for beds, colors, and spacing. Third, a gardener executes planting, watering, and pruning tasks. Fourth, volunteers support seasonal tasks and documentation. Therefore, clarify responsibilities using simple statements and checklists. In addition, set up quick decision points so that the group can respond to weather or pest pressure. When everyone knows their role, communication stays clear and actions stay aligned with the project goals. The outcome is a cohesive effort that sustains color and health across the season.
Timeline and milestones for a dahlia bloom extension
Crucially, map a practical timeline. Start with a 12-month calendar that aligns tasks to bloom windows and weather. For example: Month 1–2: finalize cultivar list and evaluate bed layout; Month 3–4: prepare soil, install or refresh irrigation; Month 5: plant or plant-tube placement; Month 6–7: monitor growth; Month 8–9: optimize fertilization; Month 10–11: extend color with companions; Month 12: review results and plan adjustments. In addition, set quarterly milestones for data review and visual checks. Each milestone should have a clear owner and a simple success criterion. A well-planned timeline keeps momentum and prevents last-minute scrambling. If needed, adjust the schedule due to weather, but maintain the overall trajectory of the project.
Risk assessment for a dahlia bloom extension
Therefore, anticipate common risks and craft mitigations. Potential risks include unpredictable weather, drought stress, pests, and disease pressure. Mitigation steps: diversify cultivars, install proper irrigation, apply mulches, and monitor soil moisture. Another risk is resource constraints; mitigate with a lean budget and phased tasks. Additionally, ensure pest scouting and proactive pruning to maintain plant vigor. Document risks and responses in a living risk register. Crucially, review the register at each milestone and adjust plans as needed. By being proactive, you protect the project’s goals and maintain garden health across seasons.
With goals, scope, and baseline firmly defined, you’re ready for Part 2: Dahlia Bloom Extension Planning and Execution, where design, plant selection, and resource allocation translate this foundation into practice.
Dahlia Bloom Extension in Practice: Step-by-Step Techniques for Extending Blooms
In practice, extending the life of a dahlia bloom requires a deliberate rhythm, a micro-management of light, water, nutrients, and pruning, all aligned with the plant’s growth cycle. The goal of the dahlia bloom extension is not simply to keep flowers on the stem, but to sustain a sequence of flushes that deliver color and structure from late spring through late autumn. In 2026, as gardeners chase visual trends like cabbage crush, wildflowers, and pollinator-friendly borders, the skill of extending your dahlia display becomes a practical, lucrative technique. Here, we translate theory into step-by-step practice that can be applied in beds, containers, and cut-flower plots. The following techniques emphasize timing, balance, and simplicity so you can achieve continuous blooms without exhausting the plant.
Choosing the Right Varieties for dahlia bloom extension
To maximize dahlia bloom extension, variety selection matters as much as care routines. Some cultivars naturally deliver more frequent flushes, while others boast exceptional vase life. In general, late-blooming or remontant types still follow a predictable rhythm if you provide steady moisture and balanced nutrition. Look for varieties known for consistent performance across climates, with sturdy stems and compact growth habit that tolerate regular pinching and staking. In a mixed border or container, pair early-blooming types with mid- to late-season forms to create a staggered display that extends the flowering window. Additionally, consider color and form; a spectrum across purples, pinks, whites, and yellows will keep arrangements vibrant while reducing the risk of color fatigue in your garden beds. By aligning variety selection with your climate, you set the stage for a robust dahlia bloom extension that works in 2026 gardens.
Core Techniques Driving dahlia bloom extension
There are several core techniques that influence the duration and quality of bloom. Pinching, disbudding, proper watering, and regular feeding all contribute to a steady sequence of flowers rather than a single spectacular flush. Specifically, pinching during the first growth phase encourages a bushier plant with multiple new meristems that can produce additional blooms later in the season. It also helps to create a denser stem structure that supports heavier inflorescences as the season progresses. In contrast, neglecting pinching can lead to leggy growth and a finish that comes early. To maintain a reliable dahlia bloom extension, schedule pinching when new shoots reach about 12 inches tall. Then, remove any side buds on the main terminal shoot to direct energy toward the main stems and eventual secondary flushes. This practice, when done with care, yields a more continuous display rather than a single line of flowers.
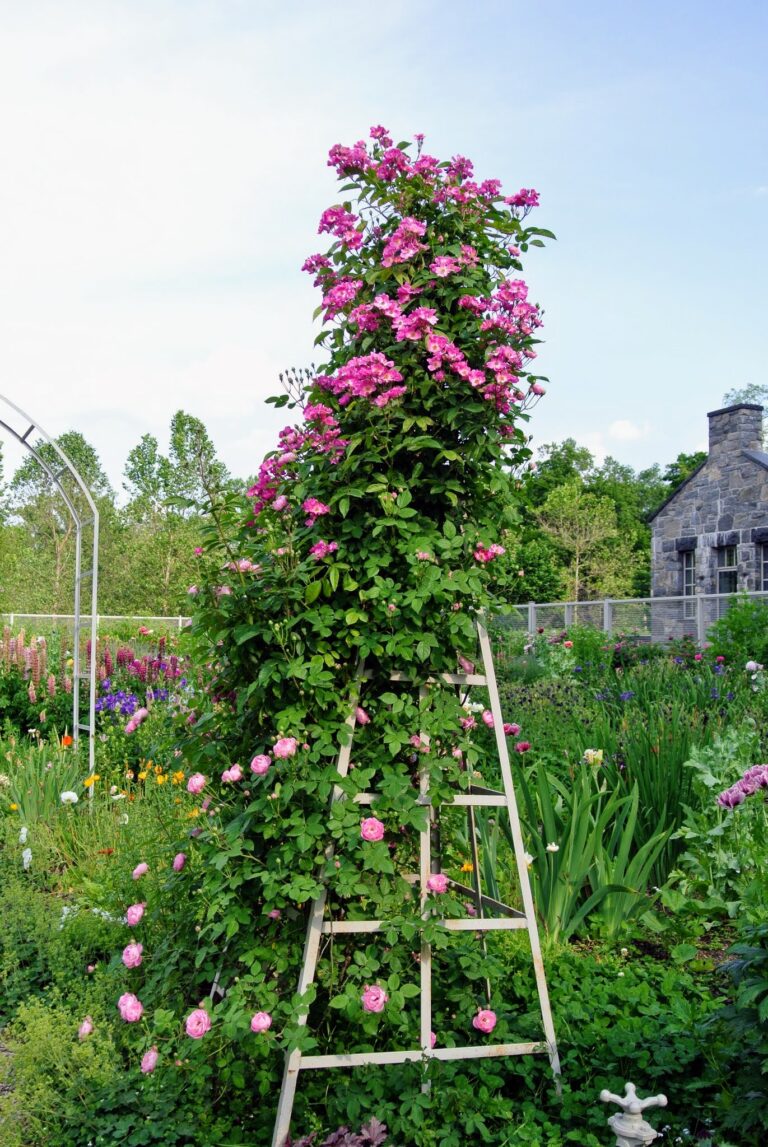
Staking and support for the dahlia bloom extension
Staking is not just about keeping flowers upright; it is a critical support for an ongoing display. As shoots thicken and flowering clusters develop, wind and heavy blooms can cause broken stems, which interrupts the bloom extension. Install sturdy supports early in the season, choosing tall stakes or obelisks that align with the plant’s natural growth. Tie stems loosely with soft, breathable ties to avoid girdling as the plant expands. Specifically, position supports at a slight angle to reduce wind stress and increase airflow. In addition, checking ties every week prevents damage as the plant grows. By protecting stems, you maintain ongoing bloom potential and improve vase life in cut arrangements.
Watering and soil moisture management for consistent extension
Water is the engine of growth, and moisture stability is the backbone of a reliable dahlia bloom extension. Dahlias prefer deep, even moisture, with less emphasis on frequent shallow watering. In practice, aim for a deep soak about once or twice a week in dry spells, increasing slightly during hot spells and reducing or pausing in late fall as plants slow. However, never allow the soil to stay waterlogged, which invites rot and root stress that can shorten bloom longevity. A layer of mulch helps conserve soil moisture, suppresses weed competition, and maintains a more uniform root zone. Specifically, check soil moisture a few inches below the surface and adjust irrigation to keep the bed consistently moist but not soggy. In 2026, climate variability makes consistent watering even more critical to ensure that the dahlia bloom extension remains steady through heat waves and occasional droughts.
Nutrition timing: feeding for a longer display in the dahlia bloom extension
Feeding should support, not overwhelm, the plants’ natural growth cycle. Use a balanced, slow-release fertilizer at planting and supplement with a liquid feed during active blooming windows. Too much nitrogen early in the season may spur leafy growth at the expense of flowers, while a well-balanced mix with modest phosphorus and potassium helps promote flower initiation and longevity. The aim is to sustain a steady supply of energy for recurring bloom cycles, not to push the plants into rapid, sparse flushes. Specifically, apply a starter fertilizer at planting; switch to a bloom-focused fertilizer once stems begin to branch and buds form. Adjust according to foliage color, growth rate, and rainfall. Furthermore, avoid over-fertilization in mid-to-late season, which can lead to lush foliage with fewer inflorescences. This careful nutritional plan supports a robust dahlia bloom extension across the season.
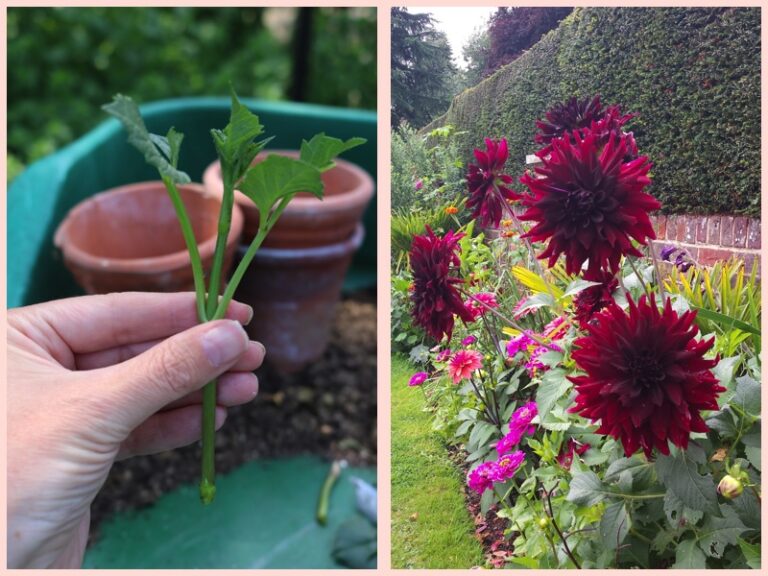
Harvesting, handling, and vase life to extend the display
Extending bloom life begins with timely harvest and careful post-harvest handling. Cut stems in the cool of early morning or late afternoon when plants are well hydrated. Use sharp, clean snips at a slight angle just above a leaf node to encourage future growth, while minimizing tissue damage that can invite wilting or infection. Immediately place stems in clean water and recut after a few hours to remove any damaged tissue. In the vase, use fresh water and change it regularly to slow bacterial growth that shortens vase life. Proper hydration sustains a longer display both in the garden and in arrangements, and the right vase conditions help the blooms maintain their signature shape and color. In practice, this approach to dahlia bloom extension ensures that you can enjoy a longer window of fresh flowers without sacrificing stem integrity. For gardeners seeking deeper guidance, see the RHS dahlias guide at the RHS dahlias guide.
Post-harvest care to maximize vase life
After cutting, maintain a cool environment and moderate humidity to slow senescence. Remove lower leaves that would sit in water and debulk heavy blooms when necessary to reduce etiolated stems. Light, clean cuts allow water uptake to continue smoothly, supporting the dahlia bloom extension in vases for several days longer than average. If possible, place arrangements in a bright, indirect light location with good air movement to prevent heat buildup. Specifically, avoid placing vases near heat sources or direct sun, which accelerates wilting. In addition, some growers test the benefit of adding floral preservatives or a splash of sugar water to improve longevity. While not a miracle cure, consistently applied vase care creates a longer display that complements the garden’s ongoing bloom extension.
Seasonal timing and climate considerations for 2026
Seasonality remains a decisive factor in how long you can rely on a dahlia bloom extension. In many climates, early heat waves can trigger a late flush, while early frosts can end the display prematurely. In 2026, the typical pattern remains: plant in late spring after the soil has warmed, set up protection if you anticipate late cold snaps, and be prepared for occasional droughts that require mindful irrigation. Observing local frost dates and adjusting pinching, staking, and fertilization schedules accordingly helps maintain a reliable extension window across the season. Specifically, monitor day length and night temperatures, as longer days usually coincide with more flower production, while cooler nights may delay or prolong blooming. By aligning timing with your climate, you maximize the dahlia bloom extension and ensure a steady supply of blooms through late summer into fall.
Seasonal calendar and bloom extension window
Create a practical calendar that marks key stages: planting, pinching, staking, first flush, subsequent flushes, and the final cut-off before fall frosts. A well-planned calendar reduces guesswork and supports consistent growth through the peak months. Use this schedule to pace fertilizer applications, water adjustments, and pruning, ensuring that each phase contributes to the dahlia bloom extension rather than causing a stop-start pattern. The aim is to smooth the rhythm of flowering so you experience multiple peaks rather than a single dramatic show. For gardeners in 2026, this planning is especially important as weather patterns shift and growers adapt to new seasonal norms. We should also consider how row covers or cloches can protect later flushes from unexpected cold snaps, extending the display where possible.
Integrating dahlia bloom extension into garden design and floristry
Finally, dahlia bloom extension should be wired into your garden design and your floral practice. A well-timed sequence of blooms allows for dynamic garden beds and long-lasting cut arrangements. In design terms, staggered planting with complementary foliage and annuals creates a continuous background of interest, while keeping the focus on the dahlias themselves. In floristry, plan vase stems so that you get a steady supply of blooms for arrangements while the garden continues to shower new stems. When you think about color, form, and texture, you create a living tapestry that remains vibrant for weeks. Moreover, this integration lowers the risk of marketing gaps for BloomHaven readers who are chasing 2026 trends like wildflowers and pollinator plants, because dahlia bloom extension complements a wide range of garden styles and display formats.
Companion planting and pollinator-friendly layout
Choose companions that enhance the dahlia bloom extension by attracting pollinators and conserving soil moisture. A pollinator-friendly border with blooms that peak at different times creates visual rhythm while supporting dahlias. In practice, mix upright perennials with compact annuals to maintain structure and buoyant color. The key is to arrange plants so that the dahlias still receive adequate sun and airflow, while the border becomes a living exhibit of successive blooms. Also, consider photographing arrangements at different stages to create mood boards for social media and Pinterest trends in 2026, such as cabbage crush and wildflower-inspired palettes. This approach not only extends the bloom display but also heightens garden value and visitor interest.
Through these practical steps, you gain a reliable framework for dahlia bloom extension that you can apply in borders, pots, and cut-flower plots. The techniques are designed to be adaptable to variable weather and garden sizing, so you can tailor the approach to your own space. As you refine your routine, you will likely notice blooms appearing in successive waves rather than a single finish. In Part 3, titled “Troubleshooting and Longevity for Dahlia Blooms,” we will tackle common issues, from pests and diseases to tips for extending vase life and protecting blooms during heat waves. Stay tuned to continue mastering the dahlia bloom extension journey.
Dahlia Bloom Extension Mastery: Scaling, Troubleshooting, and Final Optimization
In this final section, we advance from the core setup to a scalable, resilient system for the dahlia bloom extension. The aim is to translate one-off success into a repeatable workflow that yields consistent, striking blooms across seasons. You will learn how to scale your approach, diagnose and fix problems quickly, and apply finishing techniques that elevate visual impact and pollinator appeal. This is where theory meets practice, and where every decision stacks toward healthier plants, richer color, and longer-lasting interest in your garden or display.
As you scale, remember that the dahlia bloom extension is not a single trick but a cohesive pipeline. It starts with planning, then moves through cultivation, support, care, and refinement. Each stage reinforces the next, so progress in one area amplifies results in others. With a little discipline, you can multiply the reach and beauty of your dahlias without sacrificing quality or sustainability.
Scaling the Dahlia Bloom Extension: Building a Scalable Workflow
Scaling means more than planting more dahlias. It means designing every step to be repeatable, efficient, and adaptable to different layouts, soil conditions, and climates. The goal is to expand coverage—bed space, containers, or arrangements—without introducing bottlenecks or sacrificing bloom quality. Start with a scalable plan that covers selection, spacing, irrigation, fertilization, maintenance, and harvest timing. When you map these steps, you create predictable outcomes and easier management as the garden grows.
In practice, scaling the dahlia bloom extension begins with smart site planning. Choose sun exposure that maximizes bloom potential while moderating heat stress. Reserve pathways for access and airflow, which helps with disease prevention and easier maintenance. Then define a staging sequence for each bed or container group: soil preparation, planting, staking or caging, feeding, pruning, deadheading, and final inspection before harvest. This sequence becomes the backbone of your extension system, repeatable year after year.
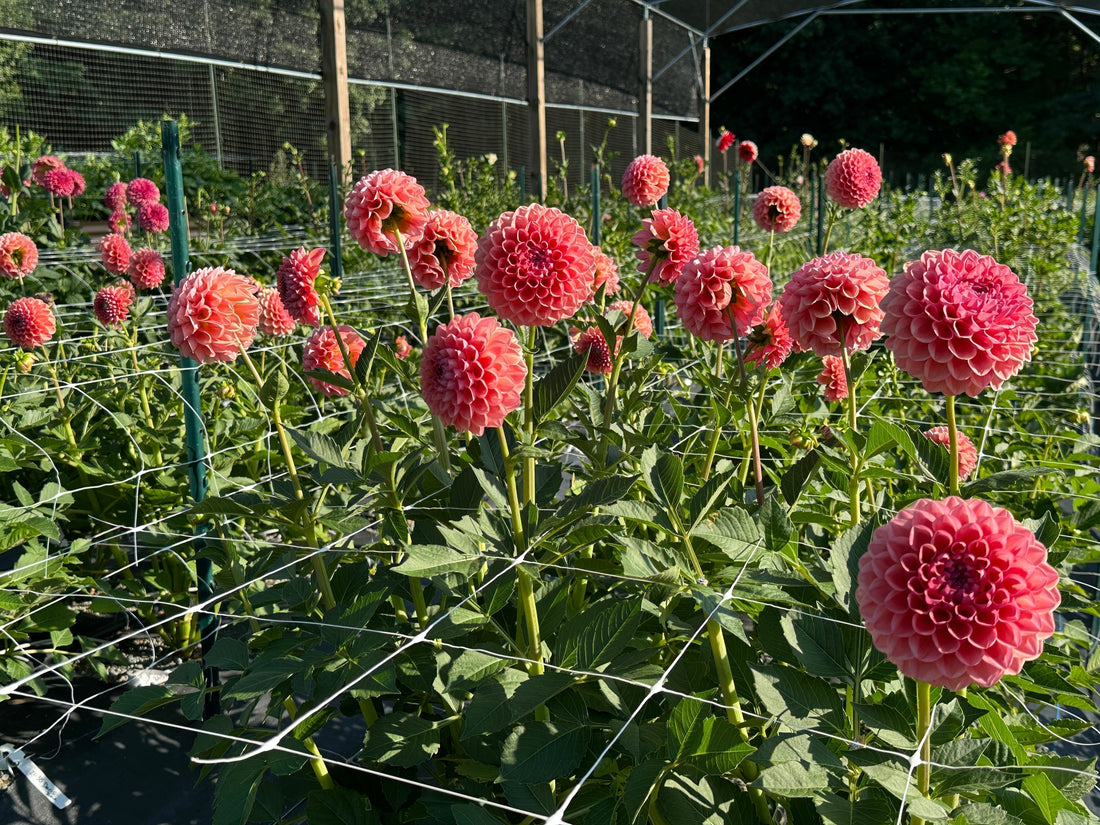
Step 1: Bed Planning and Spacing for Mass Plantings
Begin with density calculations that respect cultivar size and air circulation. Taller varieties require more horizontal room, while compact dahlias can share closer spacing if air movement remains adequate. In general, plan 18 to 24 inches between plants for medium-sized dahlias and 24 to 36 inches for giants. If you’re clustering for visual impact, maintain a staggered grid that creates depth and reduces disease risk. Ultimately, spacing should minimize foliage overlap, which speeds drying after rain and reduces fungal pressure.
Use a simple grid system to manage rotation and succession. Label beds with durable markers and map each cultivar to its bed, row, or container. This makes it easier to rotate plantings next season and troubleshoot issues without disturbing established roots. As a result, you’ll keep soil biology intact and encourage robust root systems that fuel the dahlia bloom extension even under pressure.
Step 2: Irrigation, Soil, and Fertility Syndicate
Irrigation is the silent engine of a scalable extension. Drip systems with emitters at the base of each plant deliver steady moisture that supports strong stems and large blooms. For containers, consistent watering is even more critical, as soil can heat up and dry quickly. Implement a simple irrigation schedule tied to weather data and soil moisture readings. This reduces water waste and prevents stress that dulls color and elongates vase life.
Soil health underpins every scale-up. Use a balanced mix that drains well but retains moisture, with a pH appropriate for dahlias (slightly acidic to neutral works well for most cultivars). Top-dress with a light compost layer in early spring and refresh mulch to conserve moisture and suppress weeds. Fertility should align with growth stages: a gentle nitrogen boost early for leaf development, then potassium- and phosphorus-focused feeding during stem elongation and bud formation. This staged approach sustains growth without pushing lush foliage at the expense of bloom quantity and quality.
Step 3: Support Systems, Staging, and Maintenance Cadence
Supports keep tall varieties upright and prevent breakage as blooms grow heavy. Use sturdy stakes or framed cages, and consider a surveillance plan to check supports weekly. When scaling, you’ll appreciate modular staking systems that can be extended as plants fill space. Maintain a steady cadence for pruning, deadheading, and disease scouting. Consistency beats intensity in the long run, and it reinforces the dahlia bloom extension across the full growing season.
Maintenance cadence should be lightweight but decisive. Short, focused tasks daily or every other day keep tasks from piling up. As blooms emerge, switch to a weekly round of deadheading and staking checks, then to a biweekly reproductive health check, including pests and disease signs. If you automate or delegate responsibilities, document each step so your team can reproduce results without guesswork.
Troubleshooting Common Issues in Dahlia Bloom Extension
Troubleshooting is the safety net that keeps your scaling plan from derailing. When a problem arises, a systematic approach—identify, isolate, test, and adapt—saves time and protects bloom quality. The following guide covers frequent roadblocks you may encounter as you expand your dahlia bloom extension program. Always start by reviewing the last 7 to 14 days of conditions: weather, water, fertilization, and any changes in horticultural practices. Small shifts can have outsized effects on dahlias.
Disharmony Between Foliage Growth and Bloom Density
If foliage takes off but blooms lag, you may be over-fertilizing with nitrogen or under-supplying potassium and phosphorus. Adjust the feed mix toward a balanced or bloom-focused formula, and reduce nitrogen by a third for a couple of weeks. Ensure irrigation delivers even moisture to all plants so some roots aren’t starving while others are overwatered. In addition, prune crowded growth to improve light penetration and air circulation, which supports bloom formation and quality.
Pest Pressure: Slugs, Aphids, and Beyond
Common pests can derail a dahlia bloom extension quickly. Slugs nibble foliage at night, while aphids sap vigor and can spread disease. Begin with manual removal and physical barriers, then deploy organic controls such as beneficial insects or targeted sprays. Rotate pesticides across beds to reduce resistance. Regular scouting is essential; invest in a simple notebook or app log to track which beds show pressure and when control measures were applied. This data helps you refine your approach over a season and beyond.
For all pest management, aim for a quick response window. The sooner you intervene, the less impact pests have on stem strength and bud development. Ultimately, timely action preserves bloom quantity and quality, reinforcing the dahlia bloom extension rather than undermining it.
Disease and Fungal Issues: Powdery Mildew, Botrytis, and Botany’s Hidden Dangers
Leaf spot, powdery mildew, and botrytis can creep in under humidity and poor airflow. Improve air circulation by spacing, thinning, and pruning. Water early in the day so leaves dry before night; this reduces fungal incubation. When disease is detected, isolate affected plants if possible and apply appropriate fungicidal treatments or organic alternatives as guided by your local extension guidelines. Sanitation matters too: remove infected plant material promptly and disinfect tools to prevent spread. In a well-managed scale, disease events are contained rather than widespread disasters.
Row sanitation and mulch management contribute as well. Mulch helps moderate soil temperature and reduces splash-down infection risk. However, avoid excessive mulch that can trap moisture against stems. In a dahlia bloom extension system, balanced sanitation and airflow are your best defense—an ounce of prevention beats a pound of cure.
Water Stress: Overwatering and Underwatering Signs
Discrepancies between leaf turgor, wilting, and soil moisture reveal watering misalignments. Overwatering often shows as yellowed leaves and mushy roots; underwatering presents as wilt and crisp edges. Implement a simple moisture check: every bed or container should have a consistent baseline moisture, with a small buffer for heat or drought. If you notice uneven moisture, inspect irrigation lines for clogs or leaks and adjust emitter placement. A uniform watering approach is essential for a reliable dahlia bloom extension, especially in mass plantings where microclimates can develop within a single bed.
Root Health and Tuber Integrity
Rot, poor tuber development, or stunted shoots signal root problems or overwintering issues. Ensure the soil drains well and avoids compaction. If you transplant tubers, handle gently to prevent breakage. In late winter or early spring, do a tuber check: discard any soft, mushy, or foul-smelling material and replant healthy tubers with fresh compost. Root vigor is the backbone of extension success; healthy roots support heavier blooms and better transplant resilience in subsequent seasons.
Final Optimization: Fine-Tuning for Peak Bloom and Visual Impact
With scaling and troubleshooting mastered, the final optimization phase concentrates on maximizing bloom quantity, size, color richness, and overall garden impact. This is the stage where a thoughtful dahlia bloom extension becomes not only productive but also aesthetically compelling, supporting pollinators and providing lasting beauty through the season. Focus on the integration of science and design, so your extension yields both strong performance and striking visuals.
Color Management: Color Consistency Across Beds
Color consistency is enhanced by uniform soil fertility and careful cultivar selection. Use a color map to plan garden sections so complementary tones appear in sequence, not in overlapping blocks. If certain beds show color drift, check for nutrient imbalances or microclimates that might be altering pigmentation, such as light exposure, heat pockets, or soil pH fluctuations. Adjust feeding and pruning regimes to maintain expected color saturation and bloom density. In addition, timely deadheading reduces energy wasted on aging flowers and redirects it toward new bud formation.
Bloom Timing and Staging for Continuous Display
To extend display time, stagger planting times so blooms emerge in a steady sequence rather than in a single flush. This provides a longer harvest window and reduces peak load on irrigation and support systems. Use a simple calendar to track cultivar-specific bloom windows and schedule maintenance around expected peak periods. This planning reduces downtime and keeps your dahlia bloom extension in constant, compelling motion rather than peaks and troughs.
Pruning and Deadheading as Design Tools
Pruning isn’t just removal—it’s a design tool for shaping plant architecture and encouraging new growth. Regular deadheading nudges the plant to allocate energy to late-season blooms rather than seed production. For mass plantings, maintain a consistent deadheading rhythm across beds so the garden looks polished from any viewing angle. When done correctly, pruning and deadheading preserve vigor, improve air movement, and extend the life of each container or bed.
Pollinator-Friendly Planting: Supporting Biodiversity and Visual Appeal
Pollinators love dahlias, and a garden designed for them is more resilient and vibrant. Include nectar-rich companion plants and varied bloom times to attract a broader range of pollinators. Position them to create visual rhythm while maintaining practical access for maintenance. Ultimately, a pollinator-friendly dahlia bloom extension enhances not only aesthetics but ecosystem health, which in turn supports longer bloom cycles and steadier harvests.
Quality Metrics and Seasonal Review
Develop a simple scorecard to assess performance at season end. Track metrics such as bloom count per bed, average bloom size, color saturation, stem strength, pest incidence, and disease days. Review results with your team or family garden partners and translate findings into a concrete plan for the next year. Data-driven adjustments ensure the dahlia bloom extension remains robust, scalable, and increasingly refined with each season.
Implementation Checklist and Quick Reference
Use the following compact checklist to implement the scaling, troubleshooting, and optimization approach described above. Keeping this at hand helps maintain consistency and ensures you don’t skip crucial steps during busy seasons.
- Define scalable bed groups and map cultivars for easy rotation.
- Install modular supports and confirm staking integrity before growth surges.
- Set a precise irrigation baseline and monitor soil moisture weekly.
- Apply staged feeding aligned with growth stages to maximize bloom formation.
- Schedule regular pest and disease scouting with a documented response plan.
- Practice consistent pruning and deadheading to sustain vigor and color.
- Incorporate color planning and companion plantings for visual and ecological balance.
- Review season data and translate into a concrete plan for the next cycle.
For additional practical guidance on growing and managing dahlias with professional standards, you may consult extension resources such as Oregon State Extension’s guide to growing dahlias. This aligns with best practices for scale, sustainability, and plant health without duplicating content from BloomHaven.
Conclusion: The Definitive Path to a Thriving Dahlia Bloom Extension
In summary, mastery of the dahlia bloom extension comes from a disciplined blend of scaling strategy, proactive troubleshooting, and precise final optimization. You start with thoughtful bed planning, spacing, irrigation, and fertility. Then you scale through scalable workflows, robust supports, and consistent maintenance. When issues arise, you diagnose quickly, isolate the problem, test fixes, and adapt your approach. Finally, you fine-tune color, timing, and display to create a garden that captivates every season. This is how a well-executed dahlia bloom extension becomes a reliable, repeatable source of beauty for BloomHaven and every garden it touches.
Whether you’re growing for a show, a market display, or a personal paradise, the focus remains clear: optimize each component of the extension, measure outcomes, and iterate. If you commit to the process, your dahlia bloom extension will consistently deliver impressive blooms, lush foliage, and a garden that invites pollinators and admirers alike. Embrace the scalable system, apply the troubleshooting framework, and follow the optimization steps to maintain peak performance year after year. The journey to a standout dahlia bloom extension is a deliberate one, but with method and momentum, you will see results you can be proud of.
Ready to start implementing these practices today? Begin by modeling one scalable bed, document your workflow, and watch how the extension scales beautifully across your garden. Your best dahlias are within reach when you treat the dahlia bloom extension as a repeatable, holistic system. Take action now and elevate your garden’s bloom potential.